🍰 Easy Chimney Cake Recipe Anyone Can Make at Home
👩🍳 The Busy Home Cook's Arsenal
Consistently cooking incredible meals for your family doesn't mean spending three hours in the kitchen every night. These are the 5 absolute life-saving appliances and culinary tools that dramatically cut down prep time while guaranteeing restaurant-quality results.
🌪️ Ninja 4-Quart Air Fryer
The machine that completely changed weeknight dinners. It preheats in seconds and cooks frozen vegetables, chicken wings, and battered fish to an incredibly crispy, deep-fried texture using 75% less oil and taking half the time of a traditional oven.
⏱️ Instant Pot Duo 7-in-1 Pressure Cooker
Forget slow cookers that take 8 hours. This legendary appliance aggressively pressure cooks tough cuts of meat into melt-in-your-mouth tender roasts, stews, and perfectly fluffy rice in under 45 minutes, saving you when you forget to defrost dinner.
🔪 Victorinox Fibrox Pro 8" Chef's Knife
A dull knife is dangerous and makes chopping vegetables a miserable chore. This exact blade reigns supreme in professional kitchens because it holds a terrifyingly sharp edge, features a non-slip grip, and costs significantly less than heavy German steel.
🌡️ ThermoPro Instant Read Thermometer
The secret difference between dry, rubbery chicken and juicy perfection. Stop nervously slicing your proteins open to check if they're done—this waterproof digital pen gives you a highly accurate temperature reading in less than three seconds.
🥤 Vitamix 5200 Professional-Grade Blender
Whether you are making silky-smooth breakfast smoothies, pureed soups from scratch, or blending absolutely lump-free sauces, this famously indestructible motor pulverizes anything you throw at it. It literally heats soup from the friction of the blades alone.
So you’re craving something warm, sweet, and dangerously addictive… but also shockingly easy to make at home, huh? Same. That’s exactly why I’m about to put you onto the magical, twirly, cinnamon-sugary masterpiece known as chimney cake — a.k.a. the snack that makes people think you’re a pro baker when you’re actually just improvising in the kitchen with a rolling pin and a dream.
If you’ve ever walked past one of those street stalls selling chimney cakes (official name: kürtőskalács… but don’t worry, I can’t pronounce it either), you already know the smell alone feels like a warm hug. The good news? You can make it at home without needing a medieval-looking rotating spit or a fire pit.
Yes — you’re about to bake something that looks fancy, tastes incredible, and is still idiot-proof. Honestly, even I didn’t mess it up.
Grab your apron. Or don’t. We’re not judging here.
Why This Recipe Is Awesome
Okay, look. Some recipes are stressful. They demand perfection. They want you to “fold gently,” “knead vigorously,” and “summon the spirit of your ancestors.”
Not this one.
Chimney cake is awesome because:
- It’s beautifully simple. The dough is easy, the assembly is fun, and the results are chef’s kiss.
- It smells like heaven. Seriously — if cinnamon rolls and sugar toast had a baby, this is it.
- You can customize it like crazy. Want chocolate outside? Coconut flakes? Crushed Oreos? Yes, yes, and absolutely yes.
- It looks fancy AF. People will assume you spent 300 years training in a Hungarian monastery.
- It’s surprisingly forgiving. Messy spirals? Uneven dough? Doesn’t matter. It still bakes into a crispy, caramelized cinnamon dream.
Basically: It’s the perfect show-off recipe for people who pretend they can bake.
(Welcome to the club.)
Ingredients You’ll Need
Here’s everything required to make your chimney cake a sweet, spiraled success:
For the Dough
- 3 cups all-purpose flour — nothing fancy, just the regular stuff.
- 1 packet (2¼ tsp) active dry yeast — the magical dust that makes things fluffy.
- ½ cup warm milk — warm enough to activate the yeast, not warm enough to traumatize it.
- ¼ cup granulated sugar — because we like things sweet.
- 2 tbsp butter (melted) — the flavor booster we all love.
- 1 tsp vanilla extract — optional, but let’s be real… you want it.
- 1 egg — helps give the dough structure.
- ¼ tsp salt — the tiny ingredient that makes big flavor moves.
For the Coating
- ½ cup melted butter — for brushing and flavor.
- ½ cup granulated sugar — the crust builder.
- 1–2 tsp cinnamon — the smell that’ll make your neighbors jealous.
Optional (but highly recommended) Toppings
- Shredded coconut
- Crushed walnuts
- Mini chocolate chips
- Oreo crumbs
- Caramel drizzle
- Nutella (no explanation needed)
Step-by-Step Instructions
Time to make chimney cake magic — and yes, it’s actually fun.
1. Prep your yeast like a boss
Mix the warm milk, sugar, and yeast in a bowl. Let it sit for 5–10 minutes until it becomes foamy. If it doesn’t foam, your yeast is dead… RIP. Try again.
2. Make the dough
In a large bowl, mix the flour, salt, melted butter, egg, vanilla, and your foamy yeast mixture. Use your hands or a mixer. Just commit. The dough should be soft and slightly sticky.
3. Knead it like you mean it
Knead for about 5–7 minutes until smooth. You’ll know it’s ready when it looks like shiny dough instead of a confused blob.
4. Let it rise
Cover the dough and let it rise for about 1 hour or until doubled in size. This is your chance to scroll TikTok guilt-free.
5. Prep your baking molds
Traditional chimney cakes use wooden rollers… but unless you’re living in a castle, you probably don’t have those lying around.
So do this instead:
- Grab empty cans or rolling pins.
- Wrap them tightly in aluminum foil.
- Lightly grease them with butter.
Boom. DIY chimney cake mold.
6. Roll out the dough
Once your dough has risen, punch it (gently… or aggressively, depending on your mood). Roll it into a big rectangle about ¼ inch thick.
7. Cut into strips
Cut the dough into long strips, around ½–1 inch wide. No need for perfect lines. We’re baking, not doing geometry.
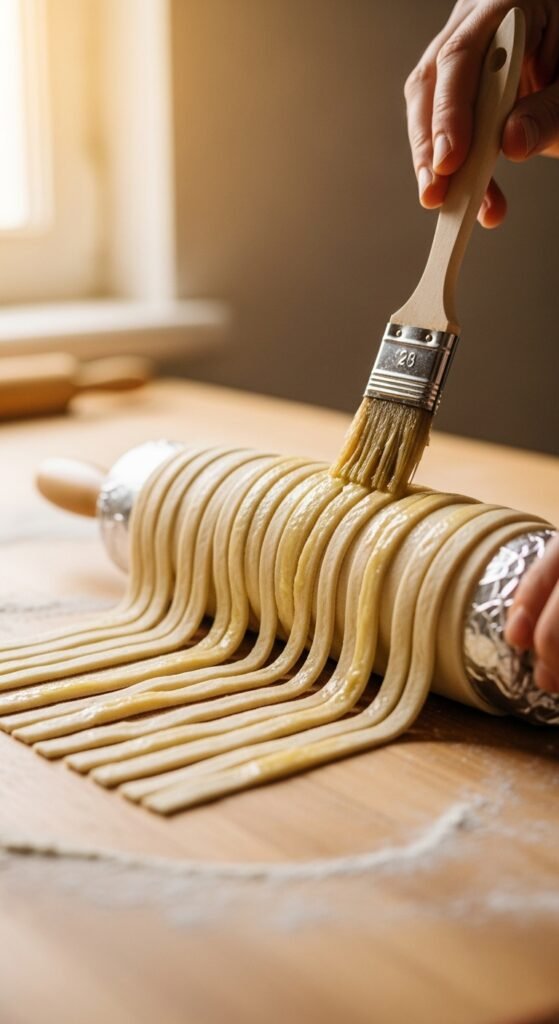
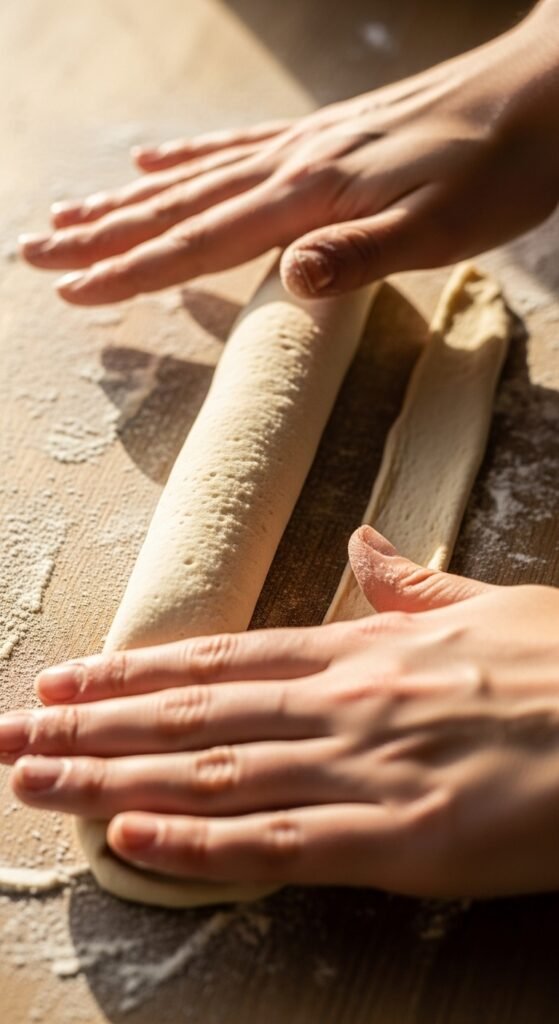
8. Wrap the strips around your mold
Spiral the dough around your foil-wrapped can or rolling pin. Slightly overlap each strip so it bakes into a seamless cylinder. Roll it gently on the counter to smooth it out.
9. Brush with melted butter
Be generous. Butter is love, butter is life.
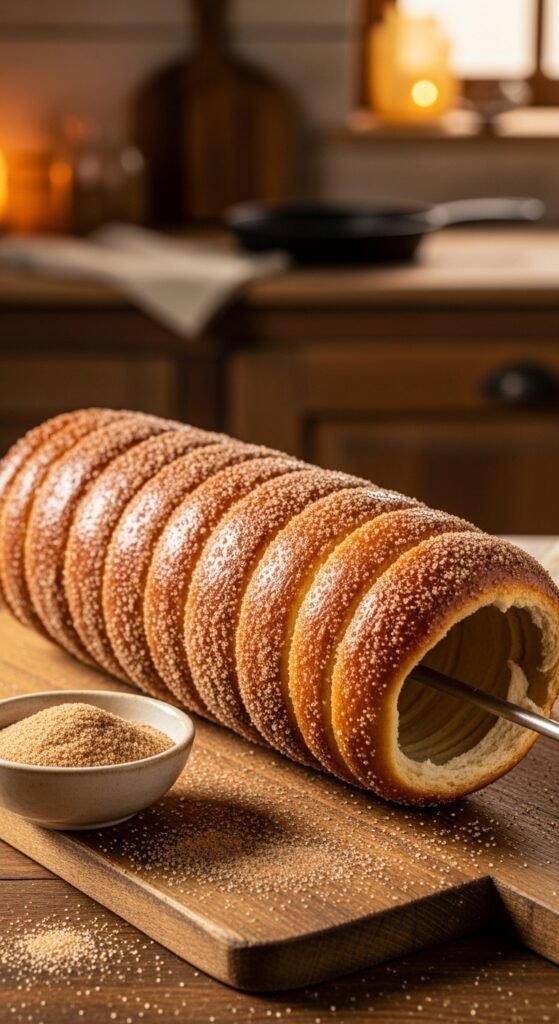
10. Coat in cinnamon sugar
Roll the buttered dough in the cinnamon-sugar mixture until fully coated.
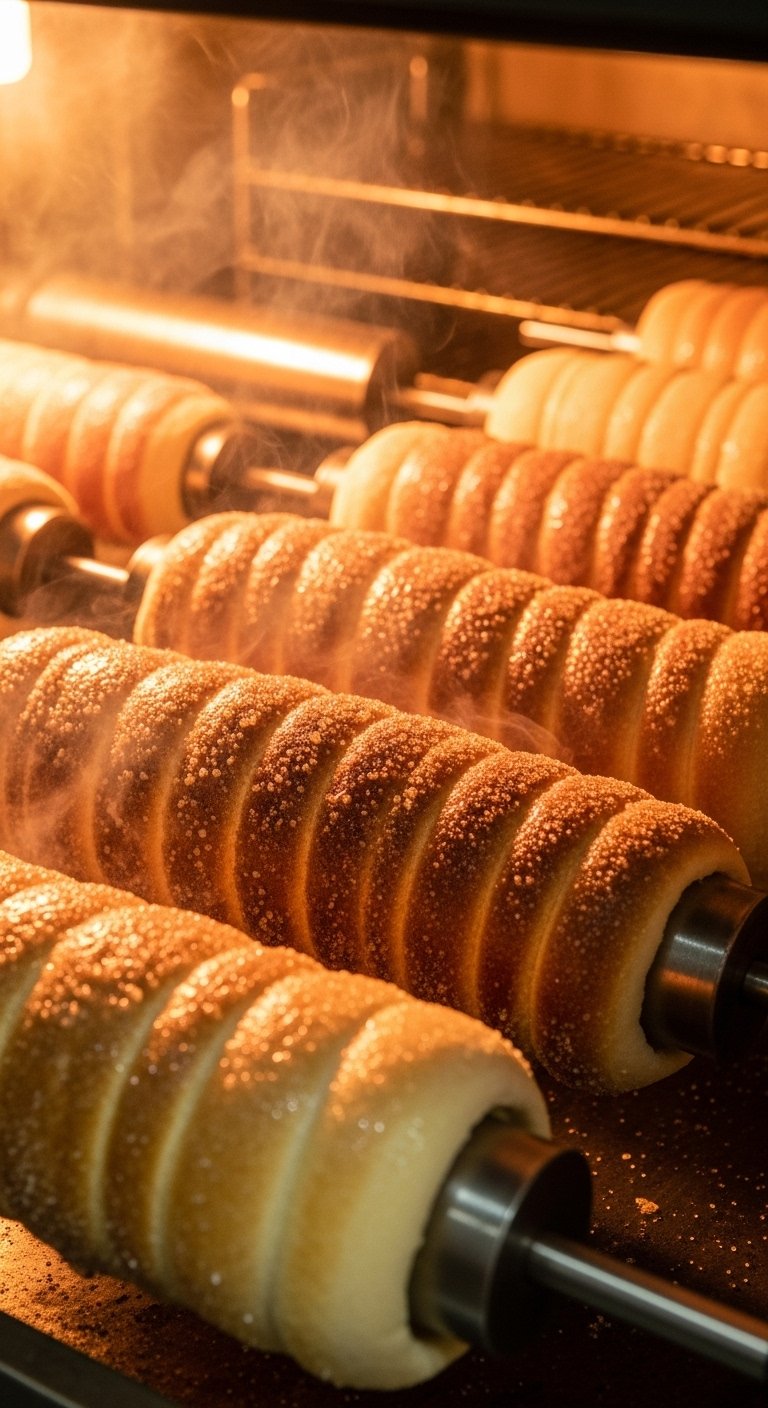
11. Bake
Place your molds horizontally on a baking sheet.
Bake at 375°F (190°C) for 15–18 minutes, rotating halfway so it browns evenly.
12. Add toppings
While it’s still hot, roll the chimney cake in your favorite toppings. Coconut, chocolate, nuts — go wild.
13. Slide it off the mold
Once cool enough to handle, gently slide your chimney cake off the mold. It should come off like a cute, sugary, hollow pastry slide.
That’s it. You just made chimney cake like an absolute legend.

Common Mistakes to Avoid
Learn from the mishaps of those who came before you:
- Skipping the yeast proofing. Don’t do it. If your yeast is dead, your chimney cake will bake into a sad, dense spiral of disappointment.
- Not greasing your mold enough. Rookie mistake. If you don’t grease properly, your cake will cling to the mold like it never wants to let go.
- Forgetting to rotate during baking. Unless you like uneven, patchy pastries, rotate that thing.
- Rolling the dough too thick. Thick dough = underbaked interior + sadness.
- Under-sugaring the coating. The sugar caramelizes and creates that signature shiny crust. Don’t hold back.
Alternatives & Substitutions
Want to tweak the recipe? I got you:
- No rolling pin? Use a wine bottle. Very on-brand, IMO.
- No milk? Use water. The dough still lives.
- No cinnamon? Skip it — use cocoa powder or just sugar.
- Want a healthier version? I mean… good luck, but go ahead and use coconut sugar.
- Want gluten-free? Use a 1:1 gluten-free flour mix. The texture changes slightly but still works.
- Want viral TikTok-level extra? Fill the inside with ice cream. Yes. Really.
FAQ (Frequently Asked Questions)
1. Do I REALLY need a mold?
Technically yes — unless you want flat chimney cakes, which defeats the whole “chimney” thing. But you can DIY a mold with cans, jars, or rolling pins.
2. Can I use the air fryer?
Honestly? Yes. 350°F for 10–12 minutes. Still crispy, still delicious, still magical.
3. Can I make the dough ahead of time?
Totally. Refrigerate overnight. Just bring it to room temp before shaping.
4. Can I use margarine instead of butter?
Well, technically yes… but why hurt your soul like that?
5. Why is my dough tough?
Either you over-kneaded it, used too much flour, or annoyed the dough gods. Try again with a gentler hand.
6. Is this recipe kid-friendly?
Absolutely. Kids love helping wrap the dough and rolling it in sugar. (Just don’t let them touch the hot molds.)
7. Can I freeze chimney cake?
Yes — bake it fully, cool it, freeze it, then reheat for 3–5 minutes. It’ll taste like fresh magic.
Final Thoughts
You did it — you just learned how to make chimney cake like someone who casually bakes Hungarian street treats on a Tuesday afternoon. Whether you plan to impress guests, spoil yourself, or pretend you’re filming your own cooking show… this recipe is your new best friend.
Now go enjoy that warm, sweet, spiraled masterpiece.
You’ve earned it.