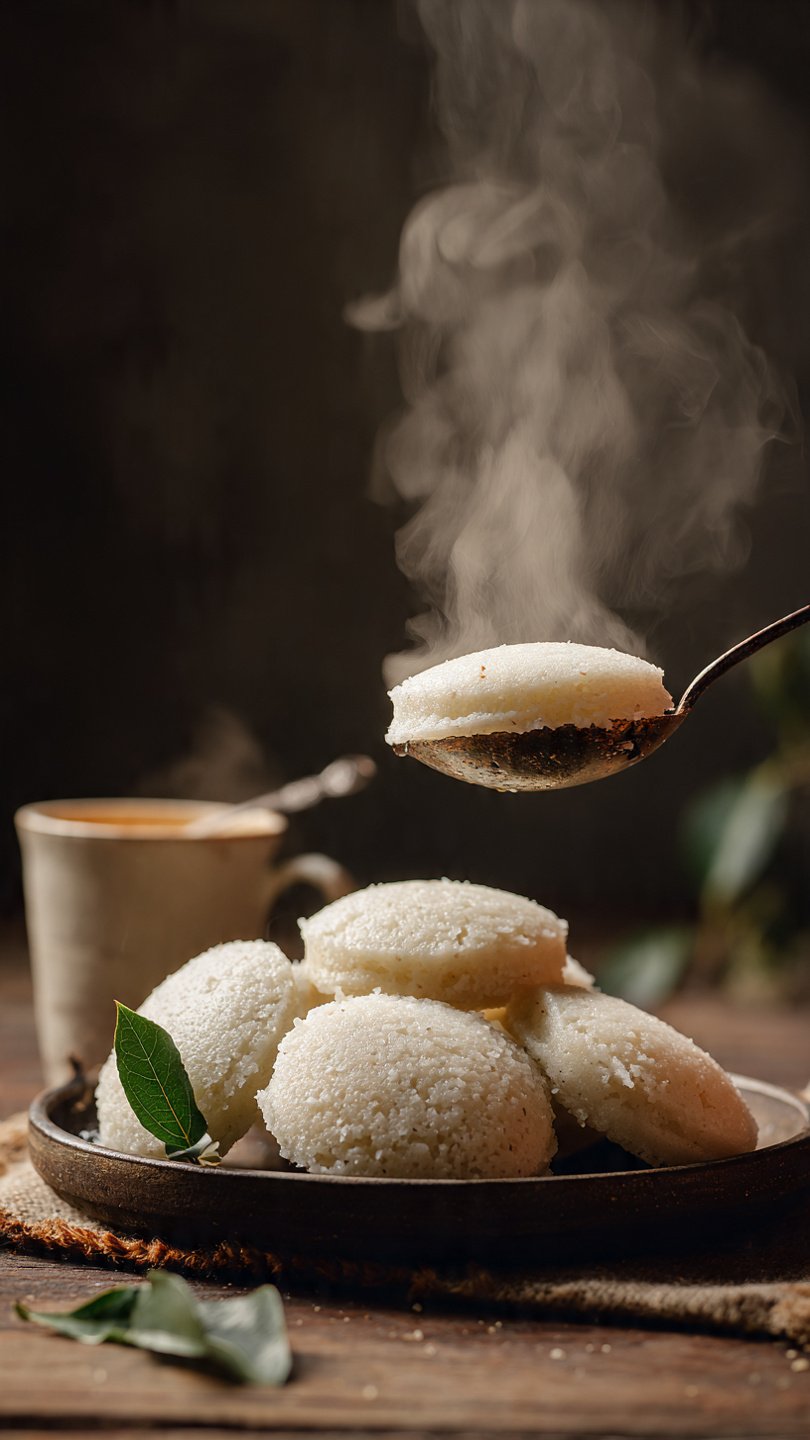
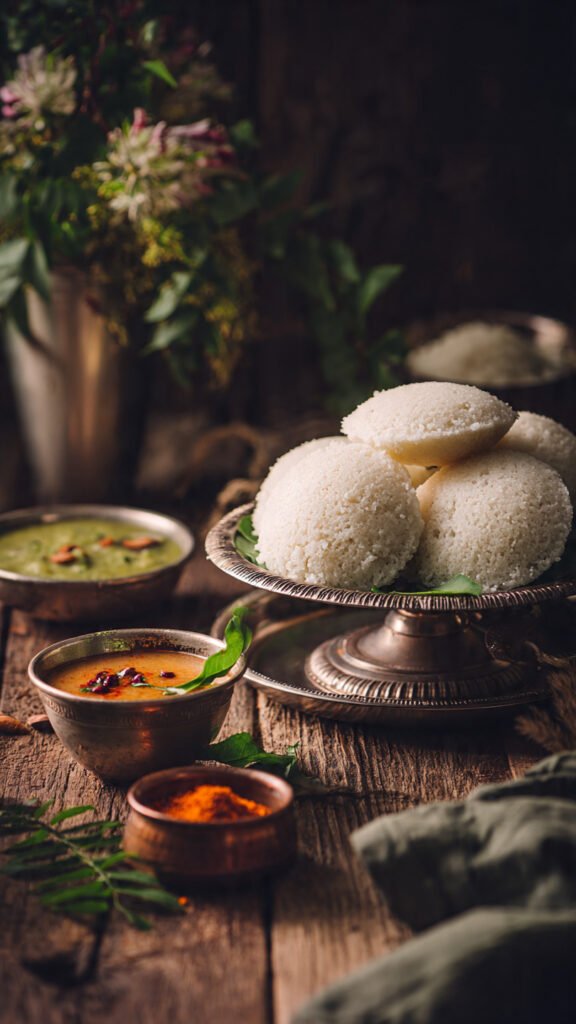
✨ Fluffy Rice Idli Recipe — Soft & Perfect South Indian Breakfast
👩🍳 The Busy Home Cook's Arsenal
Consistently cooking incredible meals for your family doesn't mean spending three hours in the kitchen every night. These are the 5 absolute life-saving appliances and culinary tools that dramatically cut down prep time while guaranteeing restaurant-quality results.
🌪️ Ninja 4-Quart Air Fryer
The machine that completely changed weeknight dinners. It preheats in seconds and cooks frozen vegetables, chicken wings, and battered fish to an incredibly crispy, deep-fried texture using 75% less oil and taking half the time of a traditional oven.
⏱️ Instant Pot Duo 7-in-1 Pressure Cooker
Forget slow cookers that take 8 hours. This legendary appliance aggressively pressure cooks tough cuts of meat into melt-in-your-mouth tender roasts, stews, and perfectly fluffy rice in under 45 minutes, saving you when you forget to defrost dinner.
🔪 Victorinox Fibrox Pro 8" Chef's Knife
A dull knife is dangerous and makes chopping vegetables a miserable chore. This exact blade reigns supreme in professional kitchens because it holds a terrifyingly sharp edge, features a non-slip grip, and costs significantly less than heavy German steel.
🌡️ ThermoPro Instant Read Thermometer
The secret difference between dry, rubbery chicken and juicy perfection. Stop nervously slicing your proteins open to check if they're done—this waterproof digital pen gives you a highly accurate temperature reading in less than three seconds.
🥤 Vitamix 5200 Professional-Grade Blender
Whether you are making silky-smooth breakfast smoothies, pureed soups from scratch, or blending absolutely lump-free sauces, this famously indestructible motor pulverizes anything you throw at it. It literally heats soup from the friction of the blades alone.
So you’re craving something soft, fluffy, and comforting… but you’d rather not destroy your kitchen, your sanity, or your cooking confidence today? Same. Lucky for both of us, rice idli exists — the ultimate “I want something delicious but please don’t make me think too hard” breakfast. It’s steamed, it’s light, it’s adorable (yes, food can be cute), and it pretty much cooks itself while you pretend you’re a culinary genius. Ready to make cloud-like idlis without stressing out? Let’s go.
Why This Recipe is Awesome
Let me hit you with the truth: rice idli is the friend who never lets you down. It’s reliable, comforting, and won’t judge you even if your kitchen looks like a reality TV disaster zone.
Here’s why this recipe totally slaps (yes, I said it):
- It’s idiot-proof — even I didn’t mess it up. And trust me, I’ve burned water before.
- It’s steamed, not fried, so you can still pretend you’re eating healthy while dunking each idli into a pool of coconut chutney.
- Perfect for meal prep — make once, enjoy for days. Like magic.
- Free kitchen aromatherapy — the smell of fermenting batter is basically a warm hug.
- Everyone loves idli — kids, adults, grandparents, your dog (okay, maybe don’t feed the dog).
Whether you want breakfast, a snack, or a midnight “I deserve this” moment, rice idlis have your back.
Ingredients You’ll Need
Yes, the list is short. Yes, the recipe is simple. Yes, this is your sign to stop overthinking it.
- Idli Rice (or parboiled rice) – 2 cups
This is the backbone — don’t replace it with sushi rice unless you enjoy chaos. - Urad Dal (split, skinless) – 1 cup
Gives you that signature fluff. Cloud-level fluffiness. - Fenugreek Seeds (methi) – ½ teaspoon
Helps fermentation, also makes you feel like a pro. - Water – As needed
Hydrate your batter like you hydrate yourself — generously but responsibly. - Salt – 1 to 1.5 teaspoons
Add after fermentation unless you enjoy slowing down science. - Oil or ghee – For greasing idli plates
Optional but makes demolding easier, unless you love drama.
That’s it.
Minimal ingredients, maximum comfort.
Step-by-Step Instructions
Let’s do this — short steps, no stress, no culinary overthinking.
1. Rinse your rice and dal
Wash the rice 2–3 times until the water stops looking like a cloudy mystery. Rinse the urad dal too.
This removes excess starch and any emotional baggage.
2. Soak everything
Add rice, urad dal, and fenugreek seeds to separate bowls.
Add enough water to cover them. Soak 4–6 hours.
Long soak = soft idlis = happy you.
3. Grind the urad dal
Drain the dal and grind it with a little fresh water until fluffy.
Think “whipped cream but savory.”
4. Grind the rice
Grind the soaked rice into a slightly coarse batter.
We want a gentle texture, not rice milk.
5. Mix the batters
Combine urad dal batter + rice batter in a large container.
Mix with your hand — yes, your literal hand — because warmth = faster fermentation.
Don’t argue with science.
6. Let it ferment overnight
Cover and leave in a warm place for 8–14 hours.
You want it doubled and bubbly like it’s living its best life.
7. Add salt & mix gently
In the morning (or whenever), stir in salt gently.
Do not stir too aggressively — the batter is delicate like your 2 AM feelings.
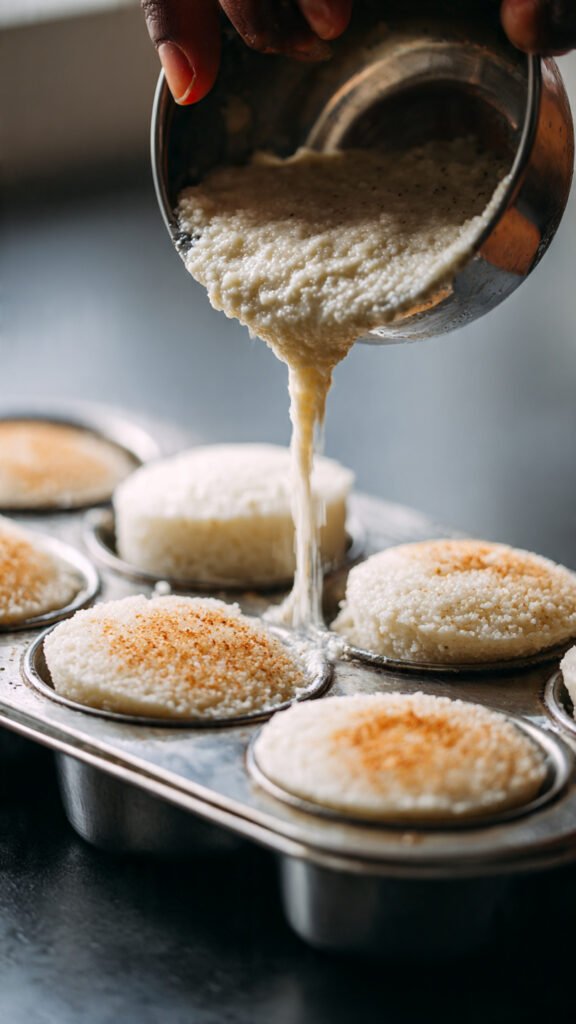
8. Grease idli molds
Lightly oil or ghee the idli plates.
You’ll thank yourself later when they glide out like smooth divas.
9. Pour batter
Fill each mold about ¾ full.
Leave space for the batter to puff up like it’s showing off.
10. Steam the idlis
Place in a steamer and steam for 10–12 minutes.
Don’t peek — steam is shy.
11. Check for doneness
Insert a toothpick or wet finger (yes, classic Indian test).
If it comes out clean, your idlis are ready for their grand debut.
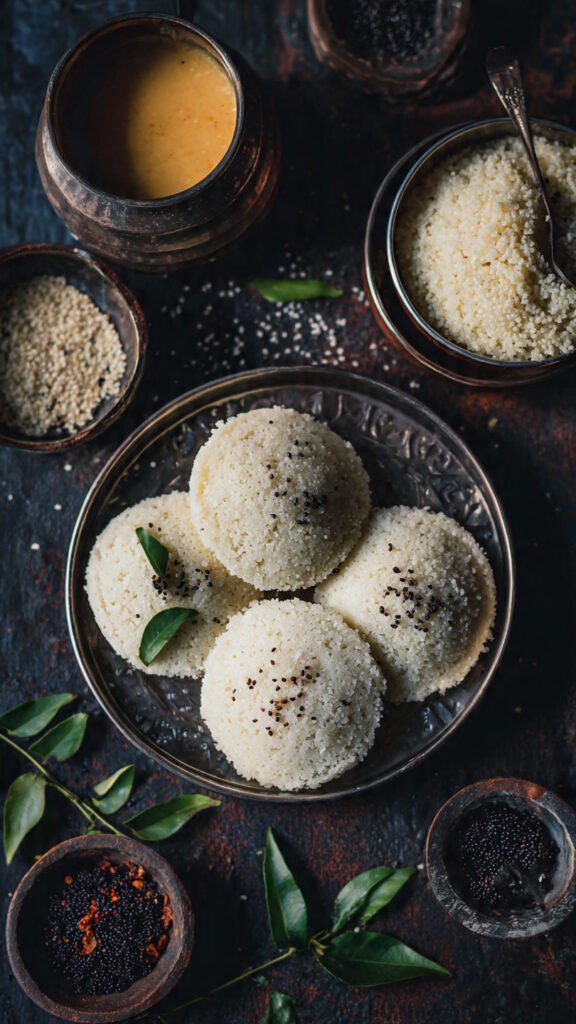
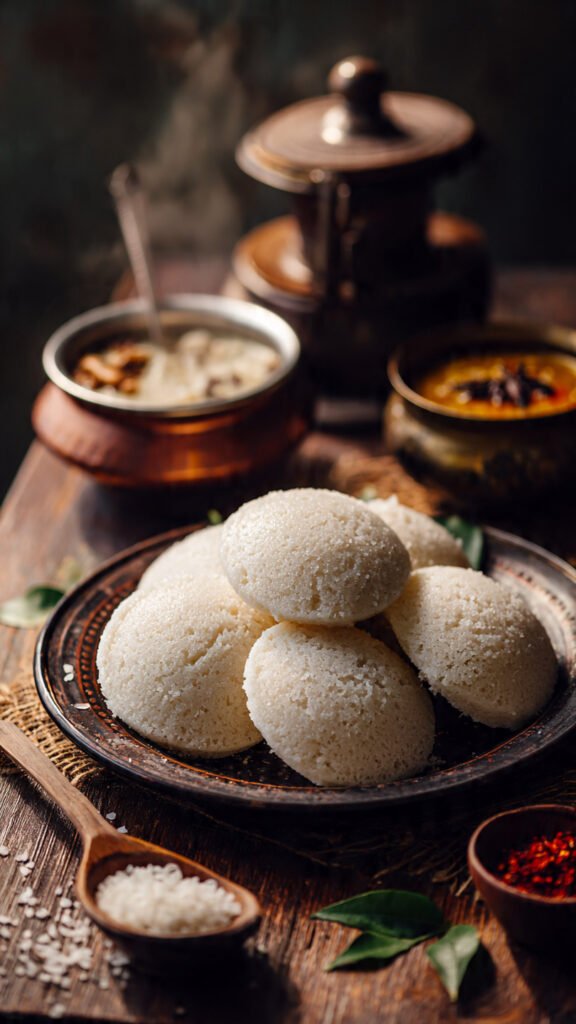
12. Demold & devour
Scoop them out with a spoon, and boom — fluffy rice idlis without drama.
Serve with sambar, coconut chutney, tomato chutney, or eat them plain like a true idli purist.
Common Mistakes to Avoid
Let’s save you from some classic rookie moves:
- Skipping soaking time
Not soaking enough = rock-like idlis no one wants. - Grinding with too much water
If your batter pours like soup, your idlis will be flat… and sad. - Fermenting in a cold room
Batter won’t rise. Warm = good. Cold = depression (for the batter). - Overmixing after fermentation
Don’t destroy the airy bubbles — they’re your idli lifeline. - Peeking during steaming
Every peek steals steam. Every lost steam steals fluff. - Using the wrong rice
Basmati won’t work here. You want short-grain or idli rice.
Just avoid these and you’re basically an idli master already.
Alternatives & Substitutions
Sometimes life doesn’t give you all the ingredients you want, so here’s how to improvise like a chill chef:
- Can I use regular rice instead of idli rice?
Yep, use short-grain rice. Not perfect, but still tasty. - No urad dal? Use whole urad.
Same flavor, same fluff — just rinse well. - Want instant idlis?
Use idli rava instead of grinding rice.
Shortcut alert. - Trying for extra-soft idlis?
Add 2 tablespoons of poha (flattened rice) while grinding. - Want protein-packed idlis?
Add quinoa or millets for hybrid idlis that taste amazing. - Feeling fancy?
Add grated carrot, spinach puree, or beetroot for colorful idlis.
Instagram will approve.
FAQ (Frequently Asked Questions)
1. Why didn’t my batter rise?
Cold weather, over-washing, or using chlorinated water can slow fermentation. Warm the batter slightly or store it in your oven (light on).
2. Can I make idli batter without a wet grinder?
Totally. A blender works fine — just grind in small batches so you don’t overheat it.
3. How long does idli batter last?
Up to 5 days in the fridge. Flavor gets slightly sour each day, which IMO (yes, this is one of your slang moments) tastes even better.
4. Are idlis healthy?
Yes! Low-cal, low-fat, steamed, rich in probiotics — basically the Beyoncé of Indian breakfasts.
5. Can I freeze idlis?
Yep. Steam, cool fully, freeze, then microwave with a sprinkle of water to revive.
6. My idlis came out sticky. Why?
Too much water or under-steaming. Let them cook fully, boo.
7. Can I use the same batter for dosa?
Absolutely — just thin the batter with water for smooth dosa magic.
Final Thoughts
There you go — fluffy, soft, cloud-like rice idlis made right in your kitchen without a single meltdown. This recipe is classic, comforting, and so easy you’ll wonder why you ever bought ready-made batter. So go ahead: steam a fresh batch, grab your chutney, and instantly feel like a South Indian breakfast hero.
Now go impress someone — or just yourself — with your new idli superpowers. You’ve totally earned it.