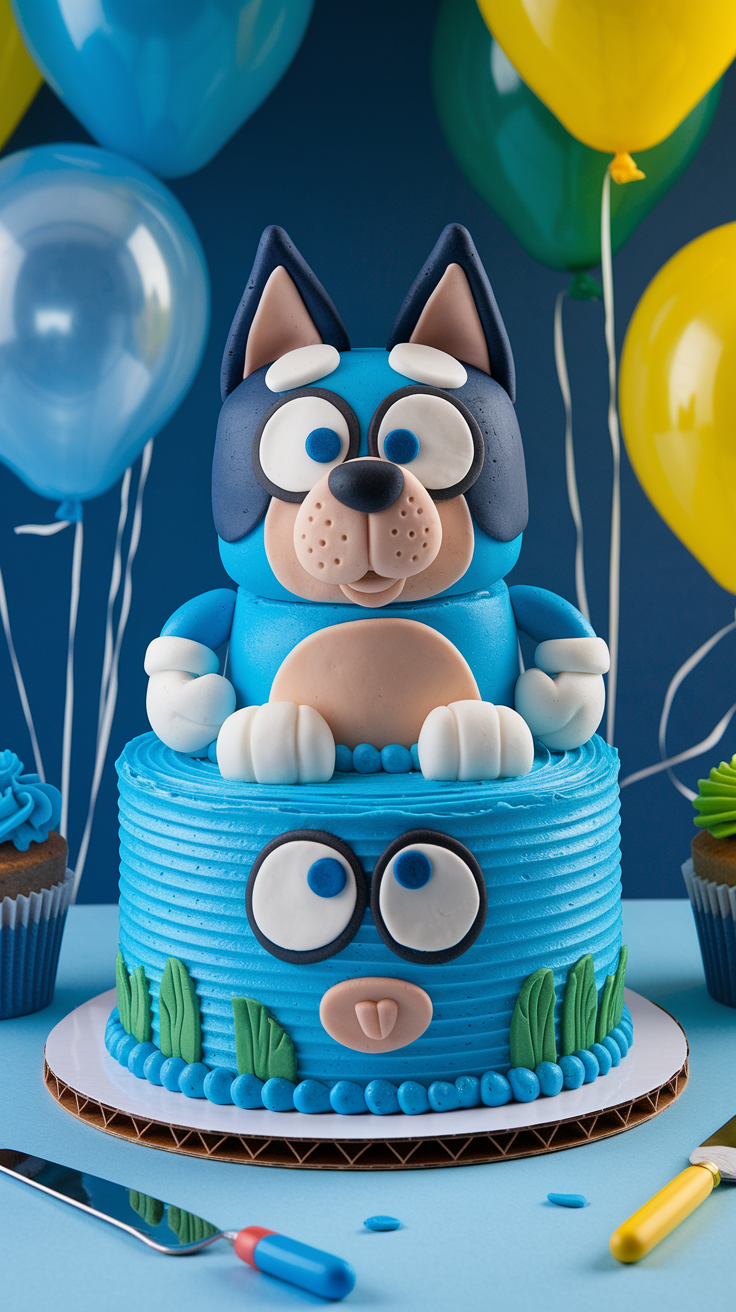
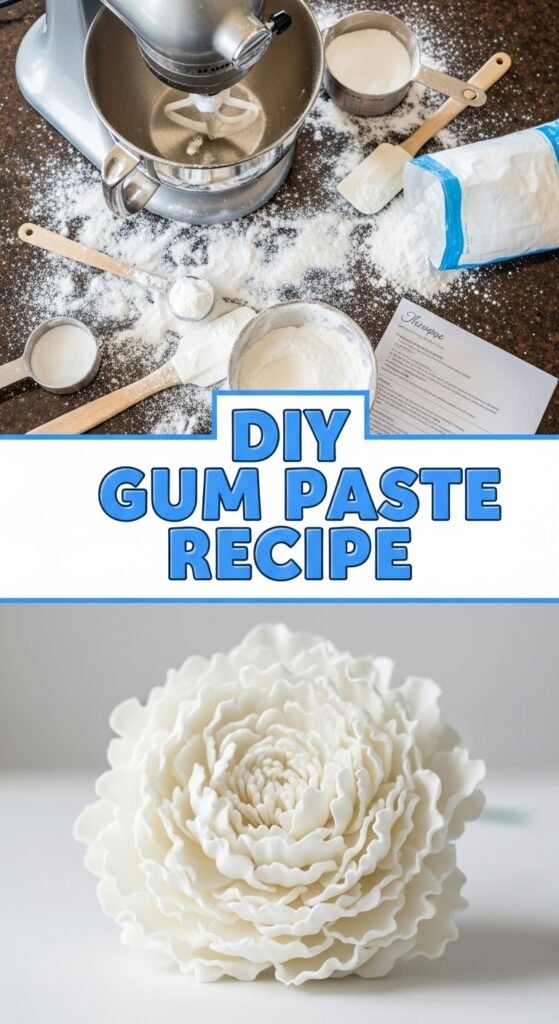
🌸 Best DIY Gum Paste Recipe: Cheaper & Better Than Store-Bought!
👩🍳 The Busy Home Cook's Arsenal
Consistently cooking incredible meals for your family doesn't mean spending three hours in the kitchen every night. These are the 5 absolute life-saving appliances and culinary tools that dramatically cut down prep time while guaranteeing restaurant-quality results.
🌪️ Ninja 4-Quart Air Fryer
The machine that completely changed weeknight dinners. It preheats in seconds and cooks frozen vegetables, chicken wings, and battered fish to an incredibly crispy, deep-fried texture using 75% less oil and taking half the time of a traditional oven.
⏱️ Instant Pot Duo 7-in-1 Pressure Cooker
Forget slow cookers that take 8 hours. This legendary appliance aggressively pressure cooks tough cuts of meat into melt-in-your-mouth tender roasts, stews, and perfectly fluffy rice in under 45 minutes, saving you when you forget to defrost dinner.
🔪 Victorinox Fibrox Pro 8" Chef's Knife
A dull knife is dangerous and makes chopping vegetables a miserable chore. This exact blade reigns supreme in professional kitchens because it holds a terrifyingly sharp edge, features a non-slip grip, and costs significantly less than heavy German steel.
🌡️ ThermoPro Instant Read Thermometer
The secret difference between dry, rubbery chicken and juicy perfection. Stop nervously slicing your proteins open to check if they're done—this waterproof digital pen gives you a highly accurate temperature reading in less than three seconds.
🥤 Vitamix 5200 Professional-Grade Blender
Whether you are making silky-smooth breakfast smoothies, pureed soups from scratch, or blending absolutely lump-free sauces, this famously indestructible motor pulverizes anything you throw at it. It literally heats soup from the friction of the blades alone.
So, you’ve decided to torture yourself—I mean, challenge yourself—by making delicate sugar flowers or gravity-defying cake toppers? Welcome to the club! If you’re reading this, you’ve probably stared at a tub of pre-made gum paste at the craft store, looked at the price tag, and thought, “For that price, it better fold my laundry, too.” Or maybe you bought the cheap stuff, tried to make a rose, and watched it droop like a sad wilting spinach leaf. We’ve all been there.
Here’s the truth: making your own gum paste recipe from scratch is one of those kitchen flexes that looks intimidating but is actually ridiculously satisfying. It’s cheaper, it smells better (because you control the flavoring), and it behaves exactly how you want it to. Put down the credit card, grab a bowl, and let’s get sticky.
Why This Recipe is Awesome
Look, I’m not going to tell you this is “easy as pie” because, frankly, pie crust can be a nightmare. But this gum paste recipe is consistent, and consistency is the holy grail of cake decorating.
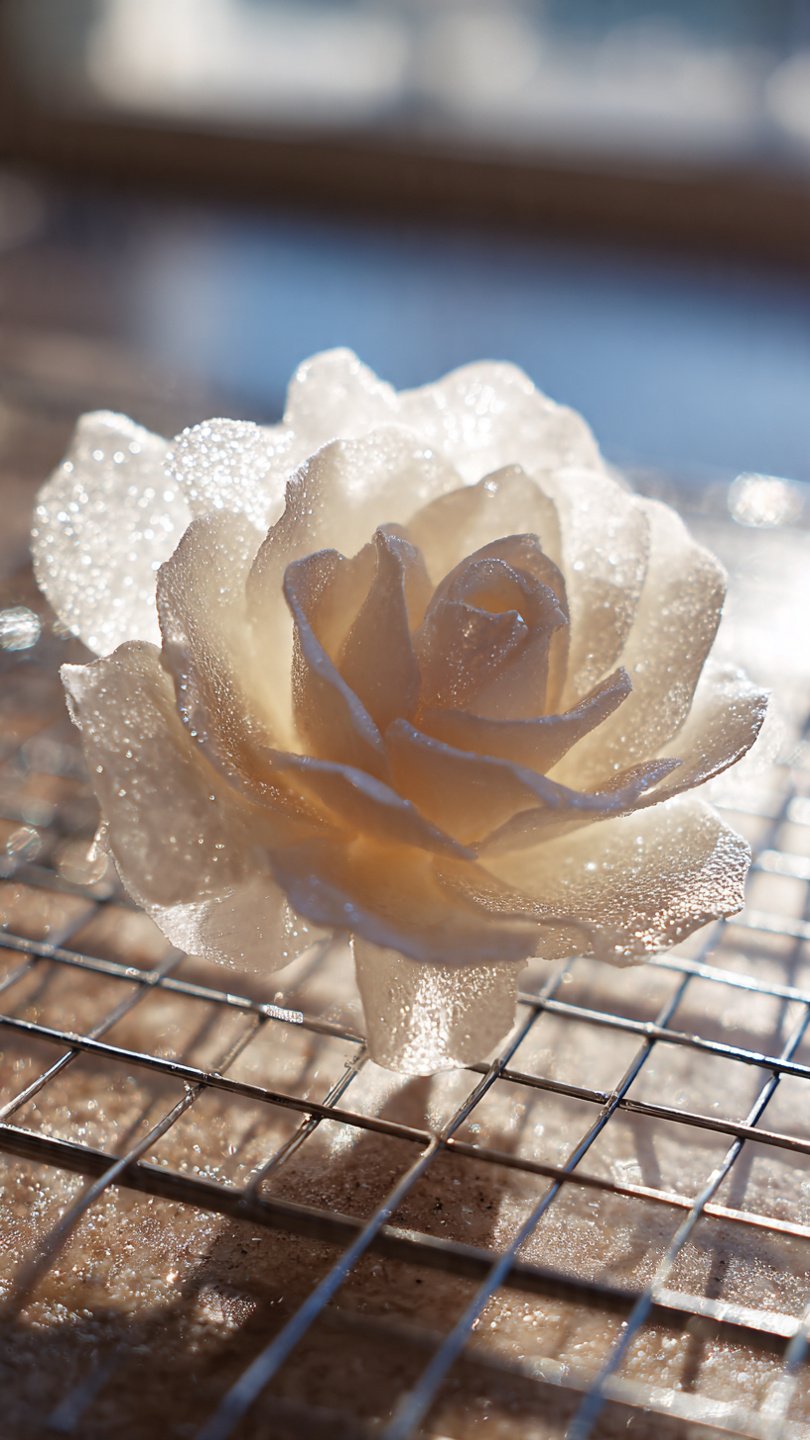
First off, the texture is unmatched. Store-bought gum paste often feels like chewing gum that’s been stuck under a desk since the 90s—rubbery and weirdly resistant. This homemade version is pliable, rolls out paper-thin (literally, you can see through it), and dries rock hard. That means your peonies won’t look like cabbages, and your figurines won’t slump over in despair.
Secondly, it is dirt cheap compared to the commercial tubs. You likely have the sugar; you just need a couple of specialty ingredients that last forever in the pantry.
Thirdly, and most importantly, it actually dries white. A lot of commercial pastes have a weird grayish or yellowish tint. This recipe gives you a stark, bright white base, which means when you dye it, your colors pop like confetti. Plus, it’s “idiot-proof”—mostly. Even if you slightly mess up the measurements, it’s usually salvageable with a little extra powder or fat. It’s forgiving, unlike my ex.
Ingredients You’ll Need
Don’t panic. You don’t need a chemistry degree, but you do need to visit the baking aisle or order one weird thing online. Here is your shopping list:
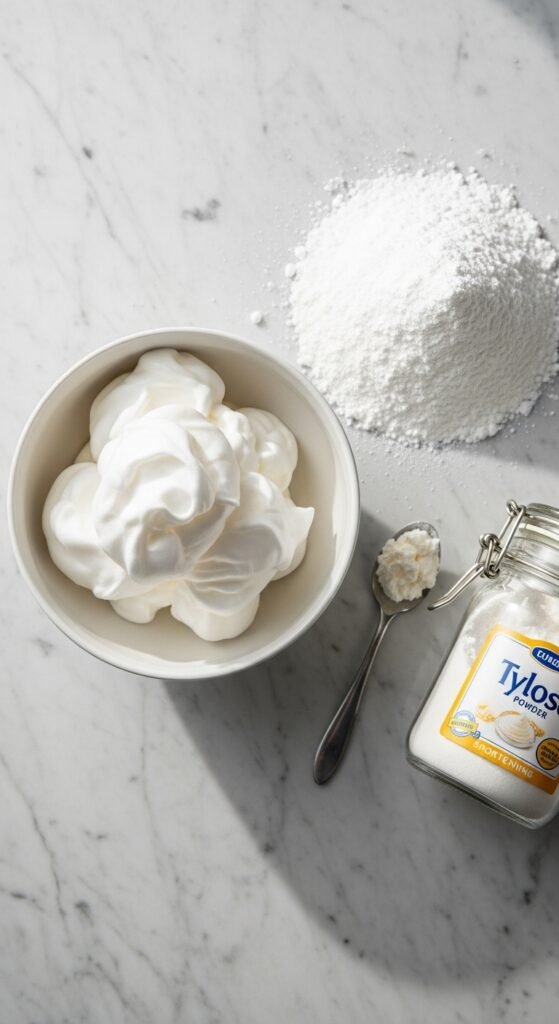
- Egg Whites (The Glue): You’ll need about 4 large egg whites (approx. 120g). Pro Tip: Use pasteurized egg whites from a carton if you’re worried about raw eggs, though the sugar content usually preserves it. If you use fresh eggs, make sure no yolk gets in there, or the fat will ruin the structure.
- Powdered Sugar (The Bulk): Also known as confectioners’ sugar or icing sugar. You need a lot—about 7 cups (approx. 900g), plus extra for dusting your surface. Do not use the organic stuff that looks slightly beige; you want the hyper-processed, snowy white stuff for the best texture.
- Tylose Powder (The Magic): This is the non-negotiable ingredient. It’s CMC powder. It stands for Carboxymethyl Cellulose, but let’s just call it Tylose because we aren’t scientists. This is what turns the icing into a hard, stretchable paste. Without it, you’re just making royal icing.
- Vegetable Shortening (The Lubricant): You need about 2 tablespoons of white vegetable shortening (like Crisco). This keeps the paste pliable and stops it from sticking to your hands (and your soul).
- Lemon Juice (optional but recommended): Just a tiny squeeze. It helps whiten the paste and cuts the sweetness slightly, though let’s be real—you aren’t eating this for flavor.
Step-by-Step Instructions
Alright, apron on. Let’s make some edible clay.
1. Sift Like Your Life Depends on It Dump your powdered sugar into a massive bowl. Now, sift it. I know, I know—sifting is boring. It’s the worst part of baking. But if you skip this, your gum paste will have tiny sugar rocks in it, and when you try to roll it thin later, it will tear. Do it for the sugar flowers. Create a “well” in the center of the sugar mountain.
2. The Egg White Froth In a separate bowl (or your stand mixer bowl), combine the egg whites. Beat them on high speed for about 10 seconds just to break them up. You aren’t trying to make a meringue here; you just want them frothy and loose. If you’re using a stand mixer, switch to the paddle attachment now.
3. The Initial Mix Pour the egg whites into the well of the powdered sugar. Turn the mixer on the lowest speed. If you turn it on high, you will create a mushroom cloud of sugar that will coat your entire kitchen (and your eyelashes). Mix until it looks like a soft, shiny royal icing.
4. Add the Magic Dust (Tylose) With the mixer running on low, slowly sprinkle in the Tylose powder. As soon as this hits the liquid, the mixture is going to tighten up fast. It’s going to go from “liquid icing” to “chunk of concrete” in seconds.
5. The Shortening Save As the mixture starts to clump up and look dry, add the vegetable shortening. This will help it come together into a ball. Increase the speed slightly for about 30 seconds. The mixture should pull away from the sides of the bowl and cling to the paddle. It will look rough and lumpy—that’s normal.
6. The Workout (Kneading) Dust your clean counter with a little cornstarch or powdered sugar. Scrape the dough out of the bowl. It will feel weirdly spongy. Grease your hands with a little shortening and knead the dough. You want to knead it until it is smooth, satin-like, and no longer sticky. This usually takes about 3 to 5 minutes. Think of it as a stress ball for all your pent-up aggression.
7. The Beauty Sleep This is the step everyone skips, and it’s the step that ruins the paste. You cannot use it immediately. Wrap the gum paste tightly in plastic wrap. Then, put that ball in a Ziploc bag. Squeeze all the air out. Let it rest at room temperature for 24 hours. This allows the Tylose to fully hydrate and the gluten-like structure to develop. If you use it now, it will be rubbery. Let it nap.
8. Ready to Roll After 24 hours, the paste will be very hard. Don’t freak out! Cut off a small chunk and knead it with warm hands. The heat from your hands will bring it back to life, making it soft and stretchy again. Now, go make something pretty!
Common Mistakes to Avoid
Listen, I’ve made all of these mistakes so you don’t have to. Learn from my failures.
- The “Sahara Desert” Syndrome: Thinking you don’t need to wrap it up immediately. Gum paste dries out faster than you can say “sugar rose.” If you aren’t actively holding the paste, it needs to be under plastic. Even leaving it out for 2 minutes creates a crusty “elephant skin” layer that ruins the texture.
- Over-Greasing the Surface: While shortening is your friend, too much of it makes the paste slippery and impossible to roll out. If your paste is sliding around the table like it’s on an ice rink, wipe the table down. Use cornstarch for rolling, shortening for kneading.
- The Humidity Battle: Trying to make gum paste flowers on a rainy day is a fool’s errand. Sugar is hygroscopic (fancy word for “it loves water”). If it’s humid, your flowers will droop. If you must work in humidity, crank up the AC or invest in a dehumidifier.
- Rushing the Drying Process: You made a beautiful lily. You want to put it on the cake now. Don’t. Gum paste needs hours, sometimes overnight, to fully set. If you touch it too early, you’ll leave fingerprints or dent it. Patience, young grasshopper.
- Using Liquid Food Coloring: Just… don’t. Liquid adds water, and water dissolves sugar. It changes the consistency of your carefully balanced paste. Always use gel paste colors or powdered colors. They pack a punch without ruining the structure.

Alternatives & Substitutions
Sometimes you open the pantry and realize you’re missing something, or maybe you have dietary restrictions. Here’s how to pivot without crying.
- No Tylose Powder?
- Substitute: You can use CMC powder (it’s basically the same thing) or Gum Tragacanth. Note: Gum Tragacanth is the “OG” ingredient, but it is wildly expensive and takes even longer to activate (like 24-48 hours). Tylose is the synthetic, cheaper, faster version. Stick with Tylose if you can.
- Vegan Option (No Egg Whites)
- Substitute: You can actually use Aquafaba! That’s the weird goopy water from a can of chickpeas. Reduce it slightly on the stove to thicken it, let it cool, and use it exactly like egg whites. It whips up surprisingly well. Is it exactly the same? No, it’s a bit softer, so you might need extra Tylose, but it works.
- No Vegetable Shortening?
- Substitute: You can use refined coconut oil. Just make sure it’s the solid kind, not the liquid kind. It might impart a tiny coconut smell, but honestly, sugar flowers aren’t meant to be sniffed that closely.
- Store-Bought Hack
- Alternative: If you absolutely cannot make this from scratch, buy fondant and knead a teaspoon of Tylose powder into it. It’s a “cheater’s gum paste.” It won’t dry quite as hard as the real deal, but it works for simple shapes and thick letters.
FAQ (Frequently Asked Questions)
1. Can I eat this gum paste recipe? Technically yes, it is edible food. Should you? Absolutely not. It dries hard as a rock and tastes like sugary chalk. It’s meant for decoration, not consumption. Unless you enjoy cracking a tooth, peel the flowers off the cake before serving.
2. How long does homemade gum paste last? If you wrap it like a mummy (plastic wrap + Ziploc bag + airtight container) and keep it in the fridge, it can last for 6 months. If you freeze it, it lasts virtually forever. Just let it thaw on the counter before using.
3. Why is my gum paste cracking when I roll it? It’s likely too dry. Knead in a pea-sized amount of vegetable shortening. If it’s still cracking, you might have added too much powdered sugar initially. Try working it with warm hands; sometimes it just needs body heat.
4. Can I use a hand mixer instead of a stand mixer? You can, but get ready for an arm workout. The mixture gets very stiff once the Tylose goes in. Your hand mixer might start whining and smelling like burning motor. If you use a hand mixer, switch to kneading by hand as soon as the powder is incorporated.
5. Can I mix gum paste and fondant together? Yes! This is called “50/50 paste.” It’s great for things that need to be sturdy but still soft enough to cut through, like drapes or ribbons on a cake. It gives you the best of both worlds: the drying power of gum paste and the flavor/softness of fondant.
6. Why are there hard little clumps in my paste? You didn’t sift the sugar, did you? I told you to sift the sugar! Once those clumps are in there, they are there to stay. You can try to pick them out with a needle tool, but honestly, it’s easier to start over or just accept your lumpy fate.
7. Is Gum Paste the same as Pastillage? Nope. They are cousins, but not twins. Pastillage dries even faster and harder (like ceramic) and has no stretch. Gum paste has “gum” in it, giving it elasticity so you can ruffle it. Use gum paste for flowers; use pastillage for structural architectural pieces (like a castle turret).

Final Thoughts
See? That wasn’t so scary. Making your own gum paste recipe is a rite of passage for any baker looking to level up their decorating game. Sure, your first batch might be a little sticky, and your kitchen might look like a snow globe exploded, but that’s part of the charm.
Once you roll out that first petal and see how translucent and delicate it is, you’ll never go back to the tub of rubbery store-bought stuff again. Now go impress someone—or yourself—with your new culinary skills. You’ve earned it! (And seriously, go wash that sugar off your hands before you touch your phone.)