🐔 Easy Chicken Filipino Recipe: Adobo
👩🍳 The Busy Home Cook's Arsenal
Consistently cooking incredible meals for your family doesn't mean spending three hours in the kitchen every night. These are the 5 absolute life-saving appliances and culinary tools that dramatically cut down prep time while guaranteeing restaurant-quality results.
🌪️ Ninja 4-Quart Air Fryer
The machine that completely changed weeknight dinners. It preheats in seconds and cooks frozen vegetables, chicken wings, and battered fish to an incredibly crispy, deep-fried texture using 75% less oil and taking half the time of a traditional oven.
⏱️ Instant Pot Duo 7-in-1 Pressure Cooker
Forget slow cookers that take 8 hours. This legendary appliance aggressively pressure cooks tough cuts of meat into melt-in-your-mouth tender roasts, stews, and perfectly fluffy rice in under 45 minutes, saving you when you forget to defrost dinner.
🔪 Victorinox Fibrox Pro 8" Chef's Knife
A dull knife is dangerous and makes chopping vegetables a miserable chore. This exact blade reigns supreme in professional kitchens because it holds a terrifyingly sharp edge, features a non-slip grip, and costs significantly less than heavy German steel.
🌡️ ThermoPro Instant Read Thermometer
The secret difference between dry, rubbery chicken and juicy perfection. Stop nervously slicing your proteins open to check if they're done—this waterproof digital pen gives you a highly accurate temperature reading in less than three seconds.
🥤 Vitamix 5200 Professional-Grade Blender
Whether you are making silky-smooth breakfast smoothies, pureed soups from scratch, or blending absolutely lump-free sauces, this famously indestructible motor pulverizes anything you throw at it. It literally heats soup from the friction of the blades alone.
So, you’re craving something tasty but too lazy to spend forever in the kitchen, huh? Same.
Let’s be real for a second. We all want that “chef’s kiss” dinner moment, but most of us have zero desire to chop eighteen different vegetables or hunt down an obscure spice that costs $20 and will sit in the pantry until the end of time.
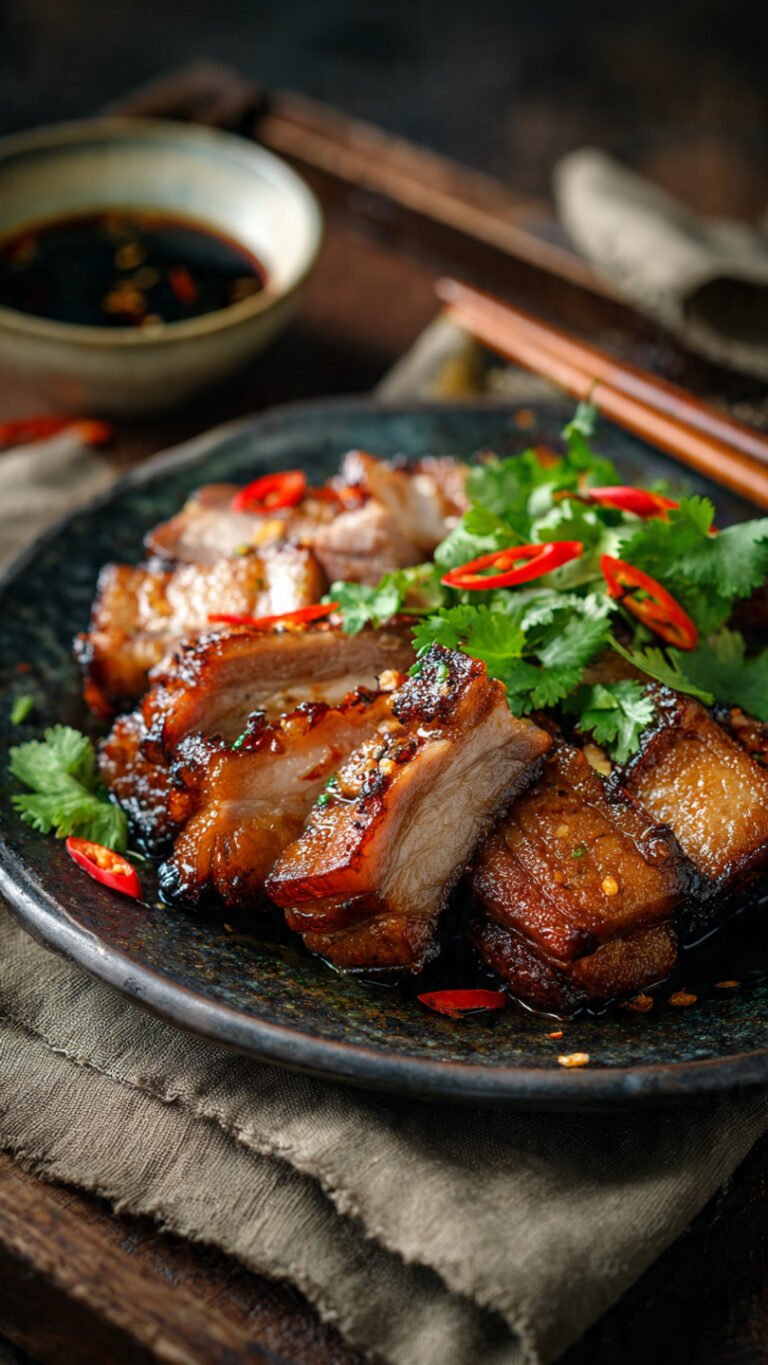
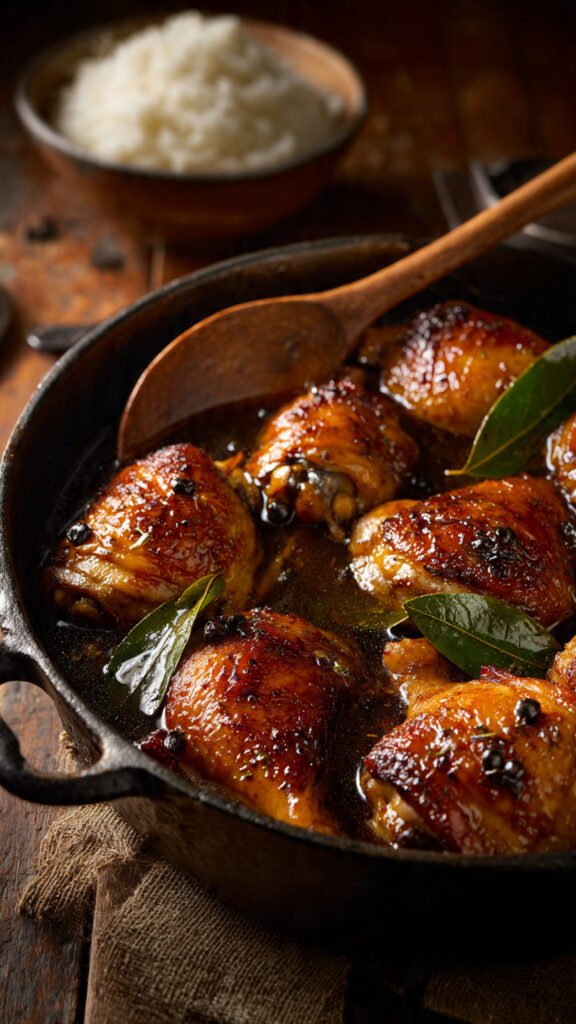
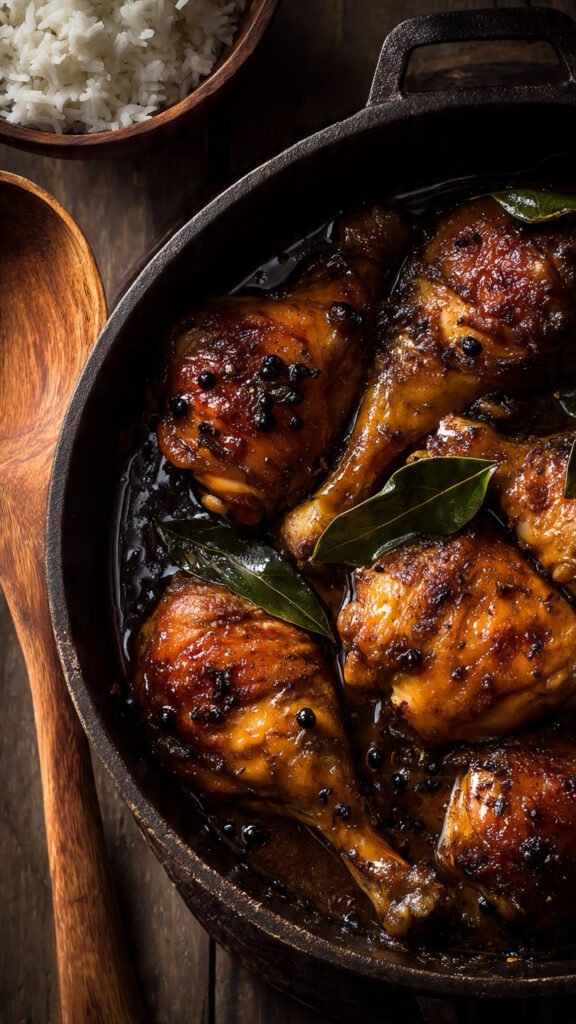
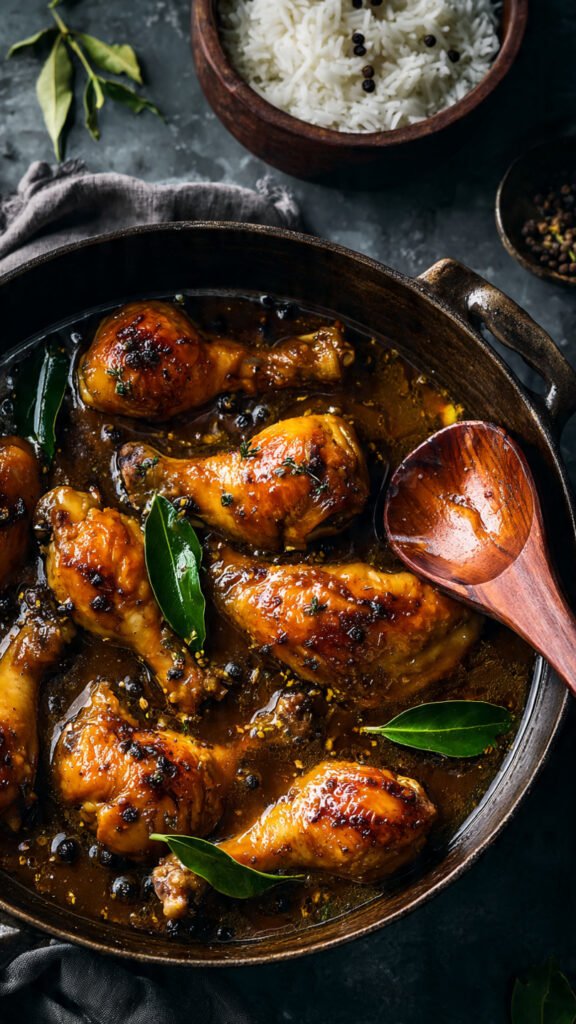
If you are looking for the Holy Grail of chicken Filipino recipe ideas, stop scrolling. You have found it. We are talking about Chicken Adobo.
If you’ve never had it, imagine chicken braised in a garlic-soy-vinegar potion until it’s fall-off-the-bone tender, then glazed in its own sticky, savory reduction. It’s not just food; it’s a hug for your stomach. If you have had it, you know exactly why you’re here. Let’s get into it before you get hangry.
Why This Recipe is Awesome
Look, I don’t use the word “perfect” lightly because, frankly, nothing is perfect except maybe a puppy sleeping or finding money in your winter coat pocket. But this chicken Filipino recipe comes pretty close.
It is virtually un-mess-up-able. Seriously. It’s idiot-proof. Even if you accidentally fall asleep for an extra 10 minutes while it simmers, it just gets more tender. It is the forgiving partner we all deserve in a relationship. Unlike baking, which requires a degree in chemistry and the precision of a sniper, Adobo is vibe-based cooking. A little more garlic? Go for it. Like it sour? Add more vinegar. It adapts to you.
The flavor-to-effort ratio is off the charts. We are talking about high-impact flavors with low-impact labor. You basically throw everything in a pot and let heat do the heavy lifting. The result is a balance of salty, sour, and savory that hits every single pleasure center in your brain. It’s got that umami punch from the soy sauce, the brightness from the vinegar to cut through the fat, and enough garlic to ward off vampires for a three-mile radius.
It tastes better the next day. This is the ultimate meal prep hack. If you think it’s good fresh off the stove, wait until you eat the leftovers out of a Tupperware container at 2 AM standing in front of the fridge. The sauce marinates the meat overnight, deepening the flavors into something truly magical.
It’s cheap. Chicken thighs, soy sauce, vinegar, garlic. That’s the core. You don’t need saffron or truffles. This is humble food that tastes like royalty.
Ingredients You’ll Need
We aren’t building a rocketship here, we’re making dinner. Here is the breakdown of what you need to grab.
- Chicken Thighs and Drumsticks (2-3 lbs):
- Crucial Note: Please, for the love of all that is holy, get bone-in, skin-on chicken. Do not bring boneless, skinless chicken breasts to this party. They will dry out, get stringy, and generally be a buzzkill. You need the fat from the skin and the collagen from the bone to thicken the sauce naturally.
- Soy Sauce (½ cup):
- Use a standard soy sauce (like Kikkoman or Silver Swan if you want to be authentic). Don’t use the “low sodium” stuff unless your doctor is literally standing behind you shaking their head. We need the salt.
- White Vinegar (½ cup):
- Cane vinegar is traditional (Datu Puti is the GOAT), but plain white distilled vinegar or apple cider vinegar works totally fine.
- Garlic (1 whole head):
- Yes, a head. Not a clove. A head. Smash it. Peel it. Mince it. If you think it’s too much garlic, you’re wrong.
- Whole Black Peppercorns (1 tablespoon):
- Leave them whole. Biting into a softened peppercorn is part of the Adobo Russian Roulette experience.
- Bay Leaves (3-4 dried leaves):
- They add a subtle earthy floral note. If you forget them, the world won’t end, but the ancestors might side-eye you.
- Brown Sugar (1-2 tablespoons):
- This is controversial in some circles, but a little sweetness balances the intense salt and acid. Just trust me on this one.
- Oil (1 tablespoon):
- Just a splash of neutral oil to sear the chicken.
- Water (½ cup):
- Just to stretch the braise so the liquid doesn’t evaporate too fast.
Step-by-Step Instructions
Alright, apron up. Or don’t. I usually cook in sweatpants. Let’s make some magic.
1. The Marinade Situation
In a large bowl, combine your chicken, soy sauce, and smashed garlic.
- Pro Tip: If you have the patience of a saint, let this marinate for at least 30 minutes, or even overnight in the fridge. If you are starving and have zero chill, you can skip the marinating time and cook it straight away. It’ll still be good, just maybe 5% less legendary.
- The Science: The salt in the soy sauce starts to denature the proteins in the chicken, allowing it to hold onto moisture better later.
2. The Sear (Don’t Skip This!)
Heat your oil in a large pot, Dutch oven, or deep skillet over medium-high heat. Remove the chicken from the marinade (save that liquid! It’s liquid gold!) and sear the chicken skin-side down.
- Why we do this: We want the Maillard reaction. That’s the fancy science term for “browning food makes it taste awesome.” You want the skin to get golden and render out some of that fat.
- Don’t Crowd the Pan: If you pile all the chicken in at once, it will steam instead of fry. Nobody likes soggy, gray chicken skin. Work in batches if you have to. Once brown, set the chicken aside.
3. The Simmer Assembly
In the fat left in the pot (flavor town!), toss in your peppercorns and bay leaves for about 30 seconds just to wake them up.
- Add the chicken back in.
- Pour in the reserved marinade.
- Pour in the vinegar, water, and sugar.
4. The “Do Not Touch” Phase
Bring the pot to a boil.
- CRITICAL RULE: Once you add the vinegar and it starts boiling, DO NOT STIR IT for at least 5 to 10 minutes.
- Why? If you stir raw vinegar, it stays harsh and pungent. You need to let the acid “cook off” and mellow out naturally. Just let it bubble. Walk away. Check Instagram. Whatever.
5. The Long Haul
Lower the heat to a simmer, cover the pot, and let it ride for about 20–30 minutes.
- Sensory Check: Your kitchen should currently smell like heaven. If neighbors come knocking, pretend you aren’t home.
- After 20 minutes, flip the chicken pieces to ensure they cook evenly. Cover and go another 10 minutes until the meat is tender.
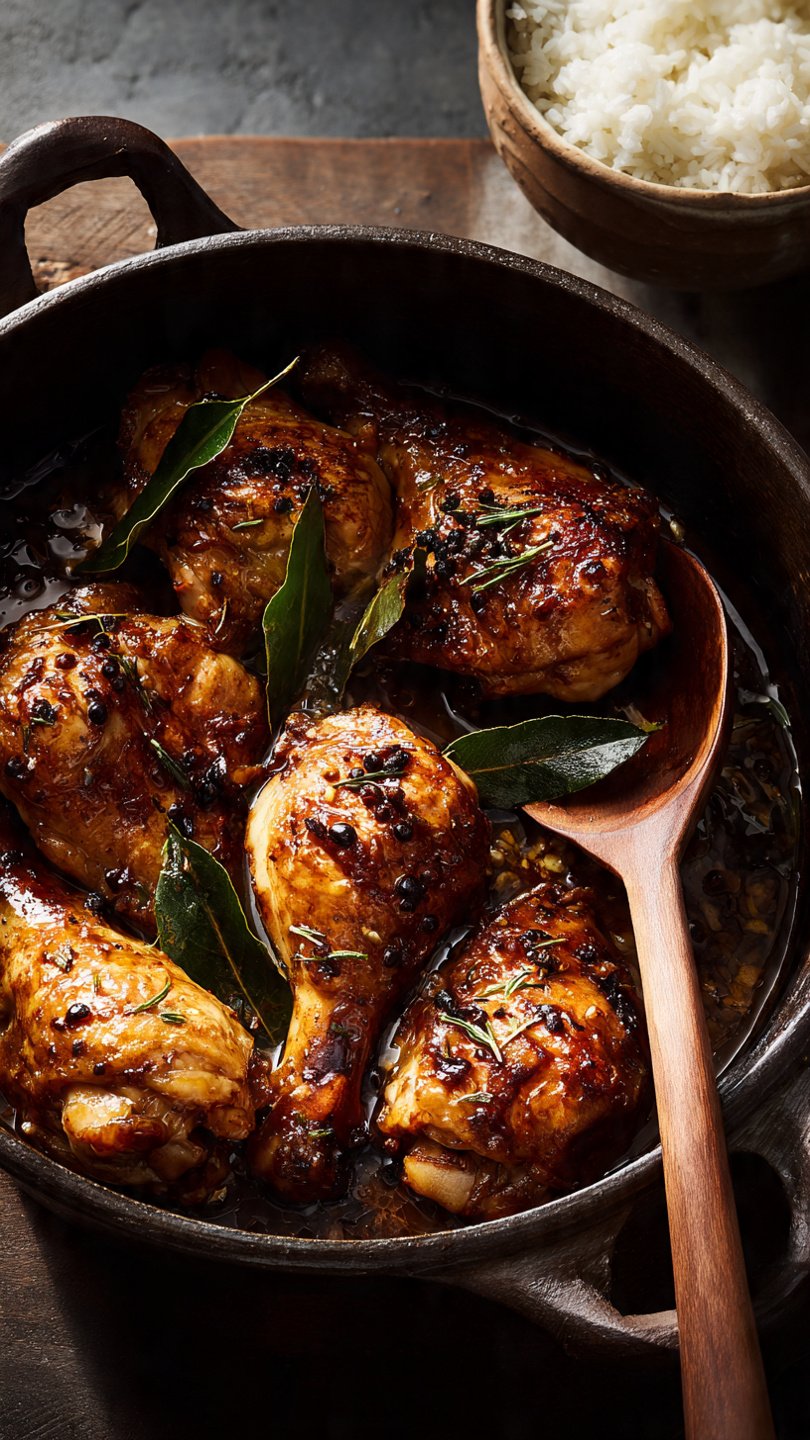
6. The Glaze Up (Optional but Recommended)
If you like your Adobo saucy (soup-style), you’re done! Serve it up.
- However, if you want that sticky, restaurant-style glaze: Remove the chicken pieces from the pot. Crank the heat up to medium-high and boil the sauce uncovered.
- Watch it reduce. It will get thicker, darker, and syrup-like. This concentrates the flavor into a “umami bomb.”
- Once it’s thick enough to coat the back of a spoon, toss the chicken back in and toss to coat. Boom.
Common Mistakes to Avoid
Even though I said this is idiot-proof, there are still ways to make it… less than ideal. Avoid these traps:
- Using Breast Meat: I cannot stress this enough. Breast meat has very little fat. In a braise like this, it turns into flavorful chalk. Stick to thighs or drumsticks. FYI: If you must use breast, reduce the cooking time significantly, or you’ll be chewing on shoe leather.
- Stirring the Vinegar: We talked about this. Don’t do it. Let the vinegar find its own path in life before you try to control it.
- Burning the Garlic: When searing the chicken or sautéing aromatics, garlic burns fast. Burnt garlic tastes bitter and sad. Keep an eye on it.
- Skimping on the Rice: This dish is salty and rich. It is biologically engineered to be eaten with a massive mound of plain white jasmine rice. If you try to eat this with a side salad, you are missing the point entirely.
Alternatives & Substitutions
Make this chicken Filipino recipe your own. Here is how you can remix the track:
- The “I Hate Vinegar” Swap: You can use lemon juice or calamansi juice (a small Filipino lime) instead of vinegar. It gives a brighter, more citrusy kick. This is actually a regional variant called Adobong Manok sa Calamansi.
- The Spicy Boi: Throw in a couple of Thai bird’s eye chilies or a teaspoon of red pepper flakes during the simmer. Spicy Adobo is elite tier.
- Vegetarian Mode: Believe it or not, this marinade works wonders on Hardy vegetables. Try it with chunks of eggplant, hard tofu, or even big Portobello mushrooms. Just reduce the cooking time so they don’t turn to mush.
- Add-Ins:
- Potatoes: Cubed potatoes are a classic addition. Throw them in during the last 15 minutes of cooking. They soak up the sauce and honestly might taste better than the chicken.
- Hard-Boiled Eggs: Peel some boiled eggs and toss them in the sauce at the end. Adobo eggs are a breakfast staple.
- Coconut Milk: Add a cup of coconut milk in the last 10 minutes for Adobo sa Gata. It makes the sauce creamy, rich, and nutty. IMO, this is the supreme version of Adobo.
FAQ (Frequently Asked Questions)
1. Can I freeze this? Absolutely. Adobo freezes beautifully. Put it in an airtight container with plenty of sauce. It will last 3 months. Thaw it, reheat it, and it’ll taste just as good as day one.
2. Why is my sauce too salty? It happens! Soy sauces vary in saltiness. If you taste it and your face implodes, just add a splash more water and a pinch more sugar. The potato trick helps here too—potatoes suck up excess salt.
3. Can I use margarine instead of oil? Well, technically yes, but why hurt your soul like that? Stick to neutral oil or even bacon fat if you want to get wild.
4. How long does it last in the fridge? Because of the high vinegar content (which is a natural preservative), Adobo lasts longer than most cooked meats. It’s good for 5–7 days in the fridge. In the old days, before refrigeration, this dish was invented specifically because the vinegar kept the meat from spoiling in the tropical heat!
5. Is this authentic? Here’s the thing about “authentic” Adobo: There are 7,000+ islands in the Philippines, and every single family on every island has a different recipe. Some put turmeric, some put pineapple, some fry it dry. So yes, this is authentic, but so is your Tita’s version that tastes completely different.
6. Can I use a slow cooker? You bet. Dump everything in (minus the water, you won’t need as much) and cook on Low for 4-6 hours. However, I still recommend searing the chicken in a pan first to get that flavor depth.
Final Thoughts
Look at you, practically a master of Filipino cuisine now.
Cooking doesn’t have to be a high-stress performance art. It should be about throwing good things in a pot and ending up with something that makes you happy. This chicken Filipino recipe is the definition of low-stress, high-reward cooking.
So, grab that soy sauce, smash that garlic, and let the aroma fill your house. Now go impress someone—or just impress yourself—with your new culinary skills. You’ve earned it!