🧁 The Ultimate Mini Muffin Recipe: Soft, Fluffy & Ready in 20 Minutes!
👩🍳 The Busy Home Cook's Arsenal
Consistently cooking incredible meals for your family doesn't mean spending three hours in the kitchen every night. These are the 5 absolute life-saving appliances and culinary tools that dramatically cut down prep time while guaranteeing restaurant-quality results.
🌪️ Ninja 4-Quart Air Fryer
The machine that completely changed weeknight dinners. It preheats in seconds and cooks frozen vegetables, chicken wings, and battered fish to an incredibly crispy, deep-fried texture using 75% less oil and taking half the time of a traditional oven.
⏱️ Instant Pot Duo 7-in-1 Pressure Cooker
Forget slow cookers that take 8 hours. This legendary appliance aggressively pressure cooks tough cuts of meat into melt-in-your-mouth tender roasts, stews, and perfectly fluffy rice in under 45 minutes, saving you when you forget to defrost dinner.
🔪 Victorinox Fibrox Pro 8" Chef's Knife
A dull knife is dangerous and makes chopping vegetables a miserable chore. This exact blade reigns supreme in professional kitchens because it holds a terrifyingly sharp edge, features a non-slip grip, and costs significantly less than heavy German steel.
🌡️ ThermoPro Instant Read Thermometer
The secret difference between dry, rubbery chicken and juicy perfection. Stop nervously slicing your proteins open to check if they're done—this waterproof digital pen gives you a highly accurate temperature reading in less than three seconds.
🥤 Vitamix 5200 Professional-Grade Blender
Whether you are making silky-smooth breakfast smoothies, pureed soups from scratch, or blending absolutely lump-free sauces, this famously indestructible motor pulverizes anything you throw at it. It literally heats soup from the friction of the blades alone.
So, you’re staring at your pantry, craving something sweet, but the idea of committing to a whole cake feels aggressive, and waiting an hour for a loaf to bake is functionally impossible. I get it.
We live in a fast-paced world, and sometimes you just need a carbohydrate delivery system that is cute, portable, and ready before you can finish an episode of The Office. Enter: the mini muffin. It is the superior baked good. Why? Because you can eat twelve of them and technically say you “only had a few.” It’s girl math. It’s science. It’s delicious.
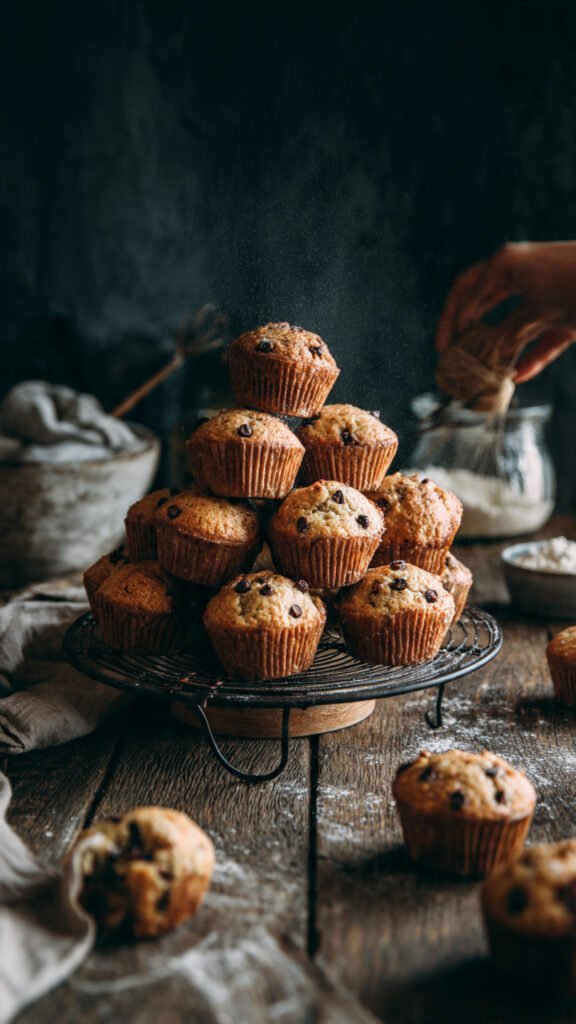
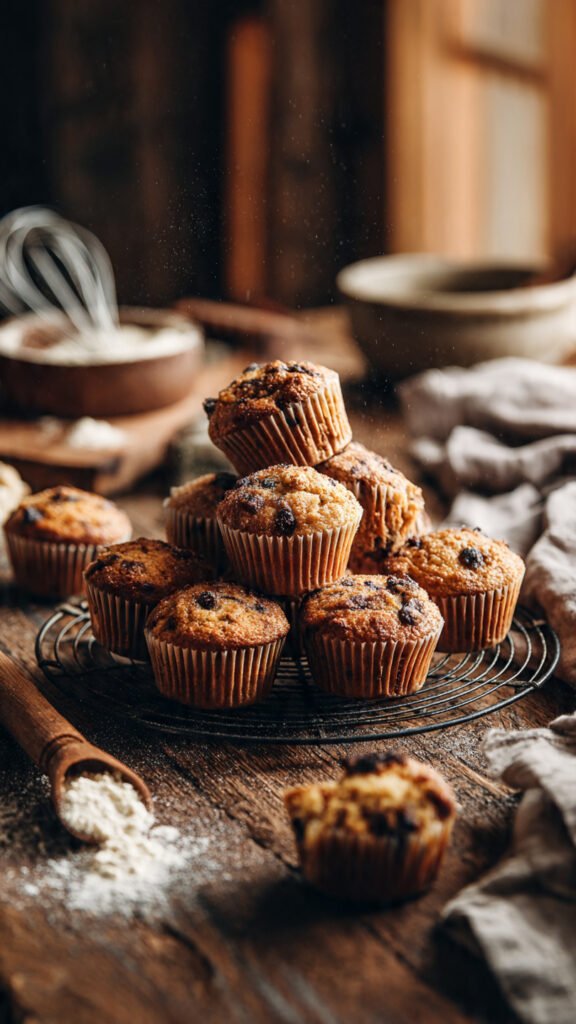
If you’ve been looking for a mini muffin recipe that yields soft, fluffy, golden little domes of happiness, you have arrived. Put on your apron (or don’t, I’m not your mom) and let’s bake.
Why This Recipe is Awesome
Look, I don’t throw around the word “perfection” lightly—mostly because perfectionism is the thief of joy—but this recipe is pretty dang close. Here is why this specific mini muffin recipe is about to become your new personality trait.
1. The Crumb-to-Crust Ratio is Superior
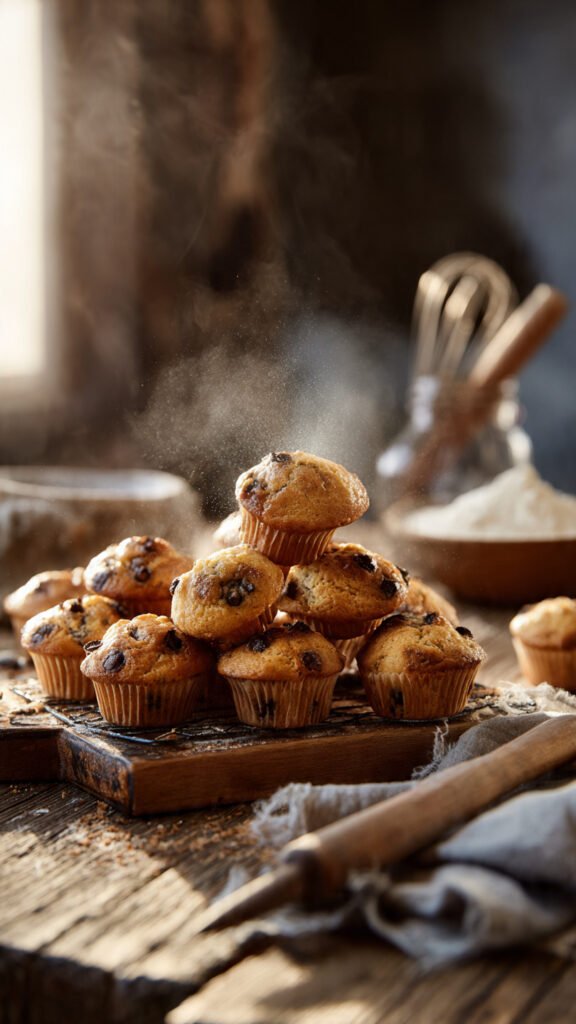
This is the hill I will die on. With a regular-sized muffin, you have that sad, stump-like bottom half that is just… soft bread. It’s fine, but it’s not the main event. With a mini muffin, the surface area-to-volume ratio changes completely. You get maximum muffin top energy in every single bite. The heat of the oven penetrates the batter faster, creating a slightly crispier, golden exterior while keeping the inside steamy and tender. It’s a texture masterpiece.
2. It’s a “Master Dough” (The Swiss Army Knife of Batters)
I’m giving you a vanilla base here, but think of it as a blank canvas. This batter is robust enough to hold chocolate chips without them sinking to the bottom (gravity is a hater), but delicate enough to work with blueberries, poppy seeds, or a cinnamon-sugar swirl. Once you nail this base, you technically know how to make 50 different desserts. FYI: That makes you a pastry chef in my book.
3. Speed Demon Baking
Standard muffins take 20–25 minutes to bake. Loaves take 50+. These little guys? They are in and out of the oven in 10 to 12 minutes flat. This is ideal for emergency snack situations, last-minute bake sales you forgot about until this morning, or just general impatience.
4. The “Cute Aggression” Factor
There is something psychologically satisfying about tiny food. They look adorable on a plate. They make people go “Aww!” before they devour them. If you are trying to impress a date, a boss, or a toddler, the mini muffin is your secret weapon.
Ingredients You’ll Need
We aren’t reinventing the wheel here; we are just making the wheel tastier. Here is your grocery list with some highly necessary commentary.
- All-Purpose Flour: The backbone of our operation. No need for fancy cake flour here; we want a little structure so they don’t collapse into sad puddles.
- Granulated Sugar: Standard white sugar helps with browning (Maillard reaction, baby!) and crisp edges.
- Baking Powder: The muscle. This provides the lift. Check the expiration date. If your baking powder is from 2019, throw it out. It’s dead.
- Salt: Do not skip this. Salt doesn’t make sweet things salty; it makes them taste more like themselves. It balances the sugar.
- Unsalted Butter (Melted & Cooled): I prefer melted butter over oil for flavor. It gives that rich, bakery-style mouthfeel. If you only have salted butter, just ditch the extra pinch of salt listed above.
- Egg (Room Temperature): This binds everything together. Pro tip: If your egg is cold, it will solidify your melted butter into weird clumps. Don’t do that.
- Milk (Whole is best): Fat equals flavor and moisture. Skim milk is just white water; don’t bring that negativity into this kitchen.
- Vanilla Extract: Measure with your heart, not the spoon. I say one teaspoon, but we all know I mean a big splashing pour.
- Add-ins (The Fun Stuff): Mini chocolate chips are the gold standard here because regular chips look massive in a mini muffin.
Step-by-Step Instructions
Okay, let’s get down to business. Read through this once before you start so you don’t panic halfway through.
1. Prep Your Station
Preheat your oven to 375°F (190°C). This is a slightly higher temperature than some cake recipes because we want that initial blast of heat to dome the muffins quickly. Grease a 24-count mini muffin tin generously with cooking spray or line them with those cute little paper liners. If you skip this, you will be scrubbing that pan until the end of time.
2. The Dry Team
In a medium bowl, whisk together your flour, sugar, baking powder, and salt. Whisking is important—it aerates the flour and ensures you don’t get a mouthful of bitter baking powder later. Create a little well (a hole) in the center of the flour.
3. The Wet Team
In a separate bowl (or a large glass measuring cup to save on dishes), whisk the melted butter, egg, milk, and vanilla extract. Whisk it vigorously until it looks fully combined and emulsified. It should smell amazing already.
4. The Marriage
Pour the wet ingredients into the well of the dry ingredients. STOP. Take a deep breath. This is the most critical moment. Switch to a rubber spatula or a wooden spoon. Gently fold the mixture together.
The Golden Rule of Muffins: Do not overmix. You want to mix just until the flour streaks disappear. If the batter is lumpy, that is actually good! Lumps dissolve in the oven. If you mix it until it’s perfectly smooth, you are developing gluten, and your muffins will be tough and rubbery. We want tender clouds, not hockey pucks.
5. The Add-Ins
Gently fold in your mini chocolate chips (or blueberries, or nuts). Two or three swipes of the spatula should do it.
6. The Scoop
This is the tedious part. Use a small cookie scoop (about 1 tablespoon size) to divide the batter into the mini muffin cups. Fill them almost to the top—about 3/4 full. This ensures you get that nice, rounded dome. If you underfill them, they look sad and flat.
7. Bake and Cool
Pop the tin into the oven. Bake for 10 to 12 minutes.
- The Smell Test: When your kitchen smells like a heavenly bakery (usually around minute 10), they are close.
- The Touch Test: Gently press the top of a muffin. If it springs back, it’s done. If your finger leaves a dent, give it another minute.
Remove from the oven. Let them cool in the pan for exactly 5 minutes. If you try to take them out too hot, they fall apart. If you leave them too long, they get soggy bottoms. Transfer to a wire rack to cool completely (or eat five of them warm, I won’t judge).
Common Mistakes to Avoid
Even the best of us have kitchen fails. Here is how to avoid the “Pinterest vs. Reality” disaster.
- The “Over-Mixer” Syndrome: I mentioned this before, but it bears repeating. Overmixing = Tough Muffins. If you take out your aggression on the batter, the batter will take its revenge on your jawline. Treat the batter like a delicate flower.
- The Cold Ingredient Clash: If your milk and eggs are straight from the fridge and you pour in melted butter, the butter will seize up into little hard grains. If you’re in a rush, put the egg in a bowl of warm water for 3 minutes to bring it to temp.
- Opening the Oven Door: I know you want to look at them. They are cute. But every time you open that door, you let out heat and interrupt the rise. Use the oven light. Be a voyeur, not an intruder.
- Guessing the Flour Amount: Baking is chemistry. If you scoop your measuring cup directly into the flour bag, you are packing it down and likely adding 20% more flour than needed. This leads to dry muffins. Instead, use the “spoon and level” method: spoon flour into the cup, then level it off with a knife.
Alternatives & Substitutions
Want to switch it up? This mini muffin recipe is super flexible.
- Lemon Poppy Seed: Rub the zest of one lemon into the sugar before mixing (this releases the oils). Add 1 tablespoon of poppy seeds. Swap the vanilla extract for lemon extract if you’re feeling zesty.
- Cinnamon Sugar Donut: Leave the batter plain (maybe a pinch of nutmeg). Once baked and still warm, brush the tops with extra melted butter and roll them in cinnamon sugar. It tastes exactly like a donut hole.
- Berry Blast: Use chopped strawberries or wild blueberries. Important: Toss the fruit in a teaspoon of flour before adding to the batter. This stops them from sinking to the bottom and creates a weird fruit-bottom layer.
- Dairy-Free: Swap the butter for melted coconut oil or a neutral vegetable oil. Swap the milk for almond or oat milk. The texture changes slightly (oil makes a softer, moister muffin; butter creates a better flavor), but both are delicious.
- Gluten-Free: You can use a high-quality 1:1 Gluten-Free All-Purpose Flour blend (like Bob’s Red Mill or King Arthur). Do not try to use straight almond flour for this specific recipe; the ratios won’t hold up.
FAQ (Frequently Asked Questions)
1. Can I freeze these? Absolutely. In fact, they freeze beautifully. Let them cool completely, throw them in a ziplock bag, and toss them in the freezer. Microwave them for 15 seconds when you have a craving. It’s like a time machine for snacks.
2. Can I make this into regular-sized muffins? Yes, but why? (Just kidding). If you must, this batter works for standard tins. Just increase the baking time to 18–22 minutes.
3. Why did my muffins stick to the paper liners? This usually happens if you try to peel the paper off while the muffin is still piping hot. The steam makes the crumb stick. Wait until they cool down, and the paper should peel off cleanly. Also, cheap liners are sometimes just sticky—invest in the parchment paper kind!
4. Can I use margarine instead of butter? Technically, yes. But why hurt your soul like that? Margarine contains water and different fats that don’t provide the same flavor profile. If you must, it works, but butter is the king here.
5. My muffins are flat. What happened? Your baking powder might be expired, or you might have let the batter sit on the counter too long before putting it in the oven. Double-acting baking powder starts working as soon as it hits liquid—you need to get that pan in the oven ASAP!
6. Can I add protein powder to this? Listen, I’m all for gains, but adding protein powder usually dries out baked goods significantly because it absorbs liquid like a sponge. If you do this, you’ll need to adjust the liquid ratios, and honestly, that’s a whole different recipe experiment. Proceed at your own risk.
Final Thoughts
There you have it. You are now the proud owner of the knowledge required to make the best mini muffin recipe on the block. These little guys are dangerous in the best way possible—easy to make, easier to eat, and perfect for literally any occasion (including 2 a.m. sadness or 10 a.m. joy).
Cooking doesn’t have to be serious, and baking doesn’t have to be stressful. It’s just flour and sugar, folks. So preheat that oven, blast your favorite playlist, and go impress someone—or just yourself—with your new culinary skills. You’ve earned it!