🥞 The Ultimate Nutella Crepes Recipe: Easy & Decadent!
👩🍳 The Busy Home Cook's Arsenal
Consistently cooking incredible meals for your family doesn't mean spending three hours in the kitchen every night. These are the 5 absolute life-saving appliances and culinary tools that dramatically cut down prep time while guaranteeing restaurant-quality results.
🌪️ Ninja 4-Quart Air Fryer
The machine that completely changed weeknight dinners. It preheats in seconds and cooks frozen vegetables, chicken wings, and battered fish to an incredibly crispy, deep-fried texture using 75% less oil and taking half the time of a traditional oven.
⏱️ Instant Pot Duo 7-in-1 Pressure Cooker
Forget slow cookers that take 8 hours. This legendary appliance aggressively pressure cooks tough cuts of meat into melt-in-your-mouth tender roasts, stews, and perfectly fluffy rice in under 45 minutes, saving you when you forget to defrost dinner.
🔪 Victorinox Fibrox Pro 8" Chef's Knife
A dull knife is dangerous and makes chopping vegetables a miserable chore. This exact blade reigns supreme in professional kitchens because it holds a terrifyingly sharp edge, features a non-slip grip, and costs significantly less than heavy German steel.
🌡️ ThermoPro Instant Read Thermometer
The secret difference between dry, rubbery chicken and juicy perfection. Stop nervously slicing your proteins open to check if they're done—this waterproof digital pen gives you a highly accurate temperature reading in less than three seconds.
🥤 Vitamix 5200 Professional-Grade Blender
Whether you are making silky-smooth breakfast smoothies, pureed soups from scratch, or blending absolutely lump-free sauces, this famously indestructible motor pulverizes anything you throw at it. It literally heats soup from the friction of the blades alone.
So, raise your hand if you’ve ever looked at a jar of Nutella in your pantry at 10 PM and seriously considered just attacking it with a spoon. No judgment here; I am right there with you in that spiritually vulnerable moment.
But what if I told you that with just a tiny bit more effort (seriously, minimal sweating involved), you could turn that impulse into something that looks incredibly fancy, tastes like a Parisian dream, and is socially acceptable to eat for breakfast, lunch, or dinner? Enter this foolproof Nutella crepes recipe. It’s basically an excuse to eat melted chocolate and hazelnuts wrapped in a buttery, carb-loaded hug. You’re welcome.
Why This Recipe is Awesome
Look, I know what you’re thinking. “Crepes? Isn’t that, like, hard? Don’t I need one of those weird little wooden rakes and a beret?”
Absolutely not. Forget everything you think you know about complicated French pastry. This recipe is ridiculously forgiving. In fact, it’s actually easier than making fluffy American pancakes because you don’t have to worry about leavening agents or achieving maximum height. Crepes are supposed to be flat. It’s lazy cooking disguised as sophistication.
Here’s the real magic of this specific recipe: the texture. We are aiming for that holy grail of crepe consistency—impossibly thin, delicate, and slightly elastic in the center, with those irresistible, crispy, lace-like edges that shatter when you bite into them.
How do we achieve this nirvana? It’s all about the ratio of liquid to flour and, crucially, letting the batter rest. When you whisk flour with liquid, two proteins (glutenin and gliadin) grab hands and start forming gluten strands. If you cook the batter immediately after mixing, those strands are tight and tense, resulting in a rubbery crepe that chews like an old tire.
By letting the batter chill out in the fridge for a bit, those gluten strands relax. The flour granules also have time to fully hydrate, soaking up the milk and eggs like little sponges. This ensures that when the batter hits the hot pan, it spreads like silk rather than clumping up. The result is a tender, melt-in-your-mouth vehicle for the real star of the show: the Nutella.
The smell alone while these are cooking—carmelizing butter, warm vanilla, and slightly toasted flour—is enough to wake up everyone in a three-mile radius. It’s the ultimate comfort food hack that makes you look like a culinary genius with minimal effort.
Ingredients You’ll Need
We are keeping it classic here. You probably have all of this stuff in your kitchen right now, staring at you, waiting to fulfill their destiny.
- All-Purpose Flour: Nothing fancy needed here. Just your standard white flour to provide the structure.
- Milk: Whole milk is best for flavor and richness. You want that fat content to keep things tender. Skim milk will work, but it will taste sadder.
- Water: Yes, water. Using 100% milk can sometimes make the crepes too heavy or thick. Cutting the milk with a little water thins the batter perfectly for that delicate, lacy texture we’re chasing.
- Eggs: The binders. They provide richness, color, and structure so your crepe doesn’t fall apart when you try to flip it.
- Butter (Melted): This goes in the batter for flavor and tenderness, and you’ll need a little extra for the pan. Salted butter is actually great here; it adds a nice savory counterpoint to the sweet filling.
- Sugar: Just a touch. American pancakes are usually quite sweet on their own, but traditional French crepe batter is barely sweetened. The sweetness comes from the filling.
- Vanilla Extract: Because if you aren’t adding vanilla to baked goods, what are you even doing?
- Salt: Crucial. It makes all the other flavors pop. Do not skip this unless you enjoy bland food.
- Nutella: The entire reason we are gathered here today. Accept no substitutes. (Okay, maybe store-brand chocolate hazelnut spread is fine if you’re on a budget, but don’t tell anyone I said that).
Step-by-Step Instructions
Alright, let’s do this. Grab your whisk (or your blender if you’re feeling extra lazy) and let’s make some magic happen.
- Mix the Wet Stuff: In a large mixing bowl, whisk together your eggs, milk, water, melted butter, and vanilla extract. Whisk it like it owes you money. You want those eggs completely broken down and incorporated.
- Add the Dry Stuff: In a separate, smaller bowl, quickly whisk together the flour, sugar, and salt. Why separate? Because dumping flour directly into liquid sometimes creates those stubborn little flour flavor-bombs (lumps) that refuse to die.
- Combine and Whisk (Gently!): Pour the dry ingredients into the wet ingredients. Now, switch gears. Whisk gently just until the flour disappears. Do not overmix. Remember that gluten talk earlier? If you go hulk-mode on the batter now, you’ll re-tighten those strands and end up with tough crepes. A few tiny lumps are okay; they will sort themselves out during the resting phase.
- Blender Option: IMO, the blender is the superior method. Chuck everything in at once and pulse for 10-15 seconds. It guarantees a smooth batter without overworking the gluten. Just don’t blend it for a minute straight.
- The Crucial Rest: Cover the bowl with plastic wrap (or just throw the blender pitcher in the fridge). Let it rest for at least 30 minutes, or up to overnight. This is the hardest part of the recipe because you want crepes now. But trust me, patience pays off in tenderness.
- Heat the Pan: Get a 10-inch non-stick skillet or a dedicated crepe pan. Place it over medium heat. You want the pan hot enough that a drop of water sizzles and dances across the surface, but not so hot that the butter instantly burns black.
- Grease and Pour: Lightly brush the pan with a little butter. Lift the pan off the heat, pour in about 1/4 cup to 1/3 cup of batter (depending on your pan size), and immediately start swirling your wrist in a circular motion. You want the batter to race across the pan and coat the bottom in a thin, even layer before it sets. If you get holes, just patch them quickly with a drop or two of extra batter.
- The Cook and The Flip: Put the pan back on the heat. Let it cook for about 60-90 seconds. You’ll know it’s ready to flip when the surface changes from glossy and wet to matte and dry, and the edges start lifting away from the side of the pan and look golden brown.
- The Flip Technique: Slide a thin spatula under the crepe to loosen it entirely. Then, with confidence, flip it over. If you mess up the first one, don’t worry. The first crepe of the batch is always a sacrifice to the kitchen gods. It’s practically a culinary law.
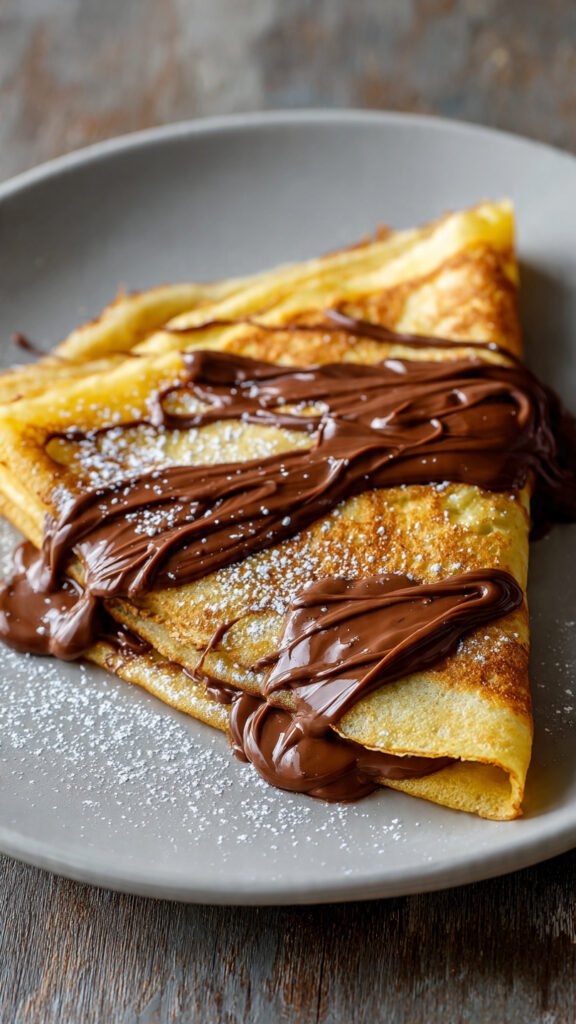
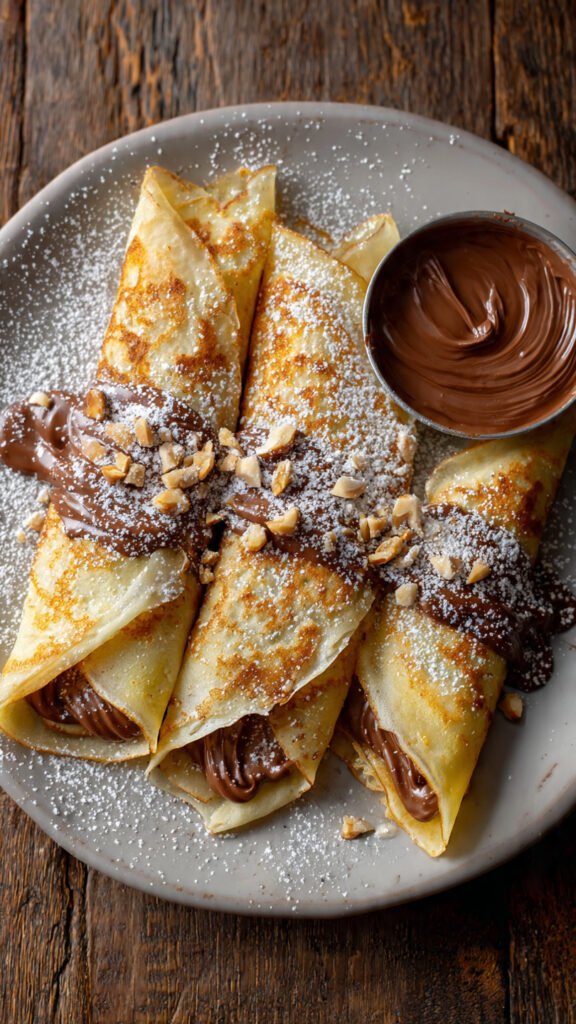
- Finish and Fill: Cook the second side for just about 30-45 seconds—it only needs to spot slightly brown. Slide the finished crepe onto a plate. While it’s still steaming hot, slather half of it with an aggressive amount of Nutella. The heat will melt the spread into a gooey puddle of joy. Fold the crepe in half, then in half again into a triangle. Repeat until the batter is gone.
Common Mistakes to Avoid
Even though this is easy, things can go sideways if you aren’t paying attention. Avoid these rookie moves:
- Skipping the Rest Period: I know I already mentioned this, but seriously. Don’t skip it. If you rush it, enjoy your chewy, rubbery pancakes that are definitely not crepes.
- The Pan is Too Cold: If the pan isn’t hot enough, the batter will just sit there sadly instead of sizzling and setting. You’ll end up with a pale, doughy mess that sticks to the pan.
- The Pan is Too Hot: If the batter solidifies the second it hits the metal, you won’t have time to swirl it into that nice thin shape. You’ll end up with a thick, uneven amoeba.
- Overfilling the Crepe: Look, I love Nutella too. But if you put half the jar inside one crepe, it’s going to explode out the sides when you try to eat it. It’s messy, and frankly, a waste of good chocolate. Aim for a generous smear, not a mountain.
Alternatives & Substitutions
This recipe is pretty flexible if you need to swap things out.
- Dairy-Free: Can you make these without cow juice? Totally. Unsweetened almond milk works wonderfully and actually adds a nice complementary nutty flavor. Oat milk works too, but it can sometimes make the crepe slightly softer. Use coconut oil or a dairy-free butter substitute instead of regular butter.
- Gluten-Free: Swap the all-purpose flour for a high-quality 1-to-1 gluten-free baking flour blend. Do not just use plain almond flour or coconut flour; they absorb liquid differently and have no structure. Your crepe will just disintegrate into sadness.
- Filling Alternatives: Okay, so you’re out of Nutella (tragic). You can obviously use fresh berries, whipped cream, a squeeze of lemon and sugar (the classic!), or even savory fillings like ham and cheese (just omit the sugar and vanilla from the batter). But let’s be real, we’re here for the chocolate hazelnut action.
FAQ (Frequently Asked Questions)
Can I make the batter the night before? Yes! In fact, it’s even better that way. The longer rest time makes for incredibly tender crepes. Just give the batter a quick whisk in the morning before cooking, as the flour will have settled to the bottom.
My crepes are tearing when I flip them. Why does the universe hate me? The universe loves you; your technique just needs tweaking. Tearing usually means one of two things: either the crepe wasn’t cooked long enough on the first side (it needs structural integrity before flipping), or you didn’t use enough butter in the pan and it stuck.
Do I really need a special crepe pan? Nope. A good quality, flat-bottomed non-stick skillet works perfectly fine. A crepe pan just has lower sides, making it slightly easier to get your spatula under there for the flip, but it’s not a dealbreaker.
How do I keep them warm while I cook the rest? You can stack them on a plate and cover them with a clean kitchen towel, or keep them on a baking sheet in a 200°F (95°C) oven. But honestly, in my house, they get eaten as fast as they come out of the pan.
Can I freeze these? Surprisingly, yes! Stack completely cooled crepes with squares of wax paper or parchment paper in between each one so they don’t stick together. Slide the stack into a freezer bag. When the craving hits, let them thaw on the counter for 10 minutes and reheat gently in a pan.

Final Thoughts
There you have it. You have successfully unlocked the secret to French cafe vibes in your own kitchen. These Nutella crepes are the perfect weekend breakfast treat, a killer easy dessert for a dinner party, or just a Tuesday night solution when you need a chocolate fix.
Don’t worry if your first few tries look a little wonky. They will still taste like buttery, chocolatey heaven, and that’s all that matters. Now go impress someone—or just impress yourself—with your new culinary skills. You’ve earned it!