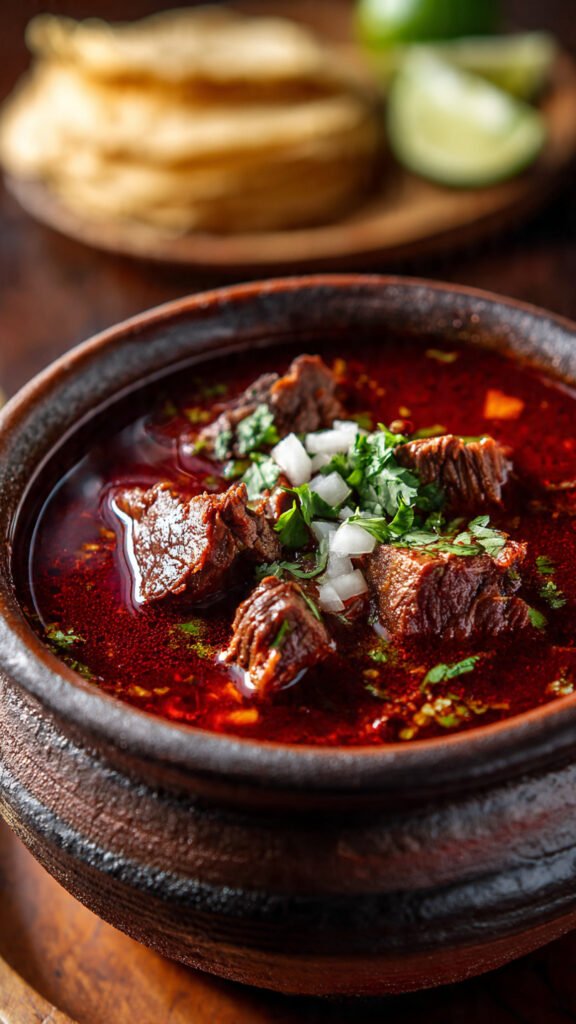
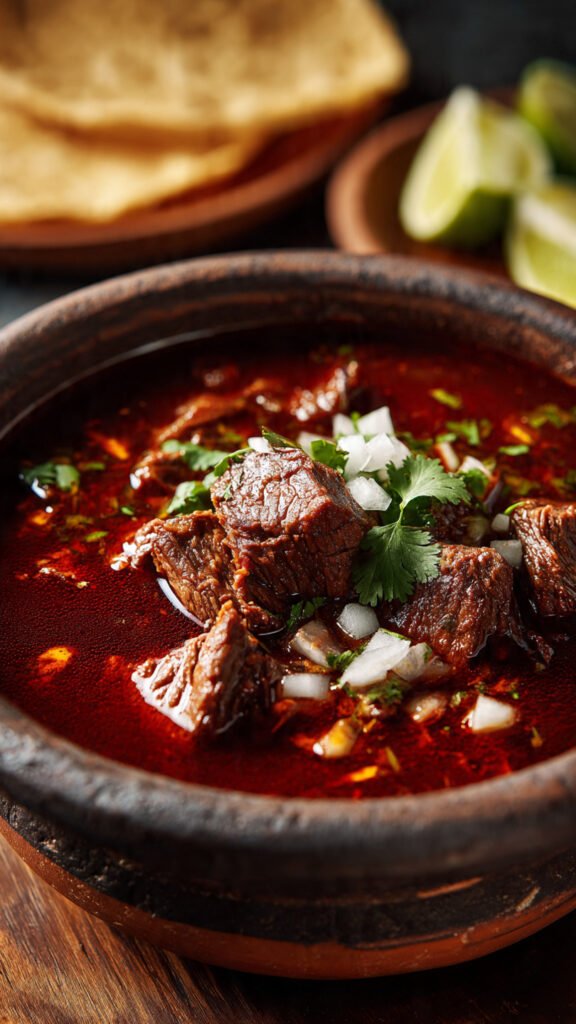
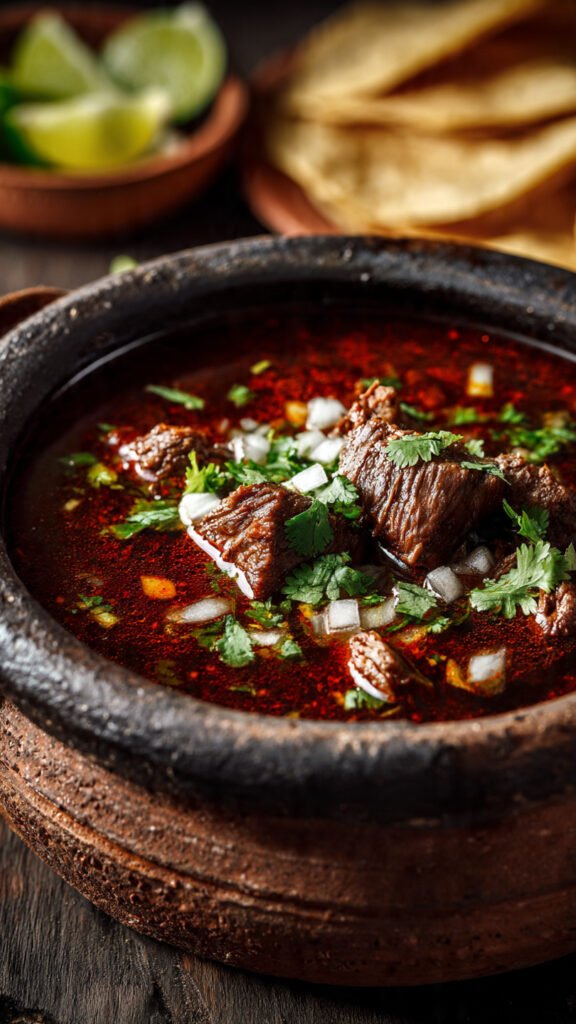
🌮 Authentic Birria Meat Recipe (Juicy & Tender)
👩🍳 The Busy Home Cook's Arsenal
Consistently cooking incredible meals for your family doesn't mean spending three hours in the kitchen every night. These are the 5 absolute life-saving appliances and culinary tools that dramatically cut down prep time while guaranteeing restaurant-quality results.
🌪️ Ninja 4-Quart Air Fryer
The machine that completely changed weeknight dinners. It preheats in seconds and cooks frozen vegetables, chicken wings, and battered fish to an incredibly crispy, deep-fried texture using 75% less oil and taking half the time of a traditional oven.
⏱️ Instant Pot Duo 7-in-1 Pressure Cooker
Forget slow cookers that take 8 hours. This legendary appliance aggressively pressure cooks tough cuts of meat into melt-in-your-mouth tender roasts, stews, and perfectly fluffy rice in under 45 minutes, saving you when you forget to defrost dinner.
🔪 Victorinox Fibrox Pro 8" Chef's Knife
A dull knife is dangerous and makes chopping vegetables a miserable chore. This exact blade reigns supreme in professional kitchens because it holds a terrifyingly sharp edge, features a non-slip grip, and costs significantly less than heavy German steel.
🌡️ ThermoPro Instant Read Thermometer
The secret difference between dry, rubbery chicken and juicy perfection. Stop nervously slicing your proteins open to check if they're done—this waterproof digital pen gives you a highly accurate temperature reading in less than three seconds.
🥤 Vitamix 5200 Professional-Grade Blender
Whether you are making silky-smooth breakfast smoothies, pureed soups from scratch, or blending absolutely lump-free sauces, this famously indestructible motor pulverizes anything you throw at it. It literally heats soup from the friction of the blades alone.
So, you’ve decided to ruin all other tacos for yourself forever? Excellent choice.
Let’s be real for a second. You’re probably here because you saw a video of someone dipping a crispy, cheesy taco into a cup of deep red, steaming broth (consommé), and your stomach did a little backflip. You want that. You need that. But maybe you’re also thinking, “Doesn’t that take like 14 years to cook?”
Well, yes and no.
This isn’t a 20-minute weeknight meal. This is a labor of love. It’s a “put on a playlist, open a drink, and let the house smell amazing for hours” kind of situation. But trust me, making your own Birria meat recipe at home is practically a spiritual experience. It’s messy, it’s savory, and it’s arguably the best thing you will ever put in your mouth. Let’s get cooking.
Why This Recipe is Awesome
Look, I don’t want to brag, but this recipe is absolute gold. Here is why you are going to fall in love with it (and why your neighbors might start knocking on your door asking “what’s cooking?”):
- It’s “Set It and Forget It” (Mostly): Once you get the prep done, the oven (or pot) does the heavy lifting. You look like a culinary genius, but really, you just let heat and time do their thing.
- The Consommé is Liquid Gold: The broth isn’t just a side note; it’s the main character. It’s rich, spicy, fatty (in the good way), and packed with collagen. It coats your tongue in a way that feels like a warm hug.
- It’s Versatile: Sure, we all know about Quesabirria tacos. But this meat? It’s good in everything. Birria ramen? Yes. Birria grilled cheese? Oh, mama. Birria over scrambled eggs for a hangover cure? You bet.
- Texture Heaven: We are using specific cuts of beef that break down slowly. We’re talking about connective tissue melting into gelatin, making the meat so tender you could shred it with a stern look. No knives required.
- The Science of Flavor: We aren’t just throwing things in a pot. We are toasting dried chiles to wake up their essential oils (making them nutty and complex) and searing the meat to get that Maillard reaction (browning = flavor). It’s chemistry, but tasty.
Ingredients You’ll Need
Don’t get intimidated by the list. You can find most of this in the “International” aisle or a local Latin grocer.
The Meat (The Stars of the Show)
- 3-4 lbs Chuck Roast: This is non-negotiable. It has the fat marbling needed for long cooking. Lean meat will turn into shoe leather here.
- 1-2 lbs Short Ribs (Bone-in): Pro Tip: The bones release marrow and collagen into the broth, giving it that sticky, lip-smacking texture.
The Chiles (The Flavor Base)
- 5-7 Guajillo Chiles: Dried. These give that bright red color and mild, tangy flavor.
- 3-4 Ancho Chiles: Dried. These are darker, sweeter, and taste almost like raisins or plums.
- 2-4 Chiles de Árbol: Optional. These are the angry little guys. Add them if you want heat; skip them if you have the spice tolerance of a toddler.
The Aromatics & Spices (The Magic)
- 1 large White Onion: Roughly chopped.
- 1 head of Garlic: Yes, the whole head. Peel the cloves. Don’t come at me with that “1 clove” nonsense.
- 3-4 Bay Leaves: Do they do anything? Who knows. But we add them out of tradition.
- 1 tsp Cinnamon: Or one stick. It adds a warmth that makes people ask, “What is that secret ingredient?”
- 1 tbsp Dried Oregano: Mexican oregano is best if you can find it (it’s more citrusy), but regular works too.
- 1 tbsp Cumin: Earthy goodness.
- 1 tsp Ground Cloves: A little goes a long way. Too much and your beef tastes like Christmas potpourri.
- Beef Broth: About 4–6 cups. Enough to cover the meat.
- Apple Cider Vinegar: A splash (about 1/4 cup) to cut through the richness.
Step-by-Step Instructions
Alright, apron on. Let’s make some magic.
1. Prep the Meat
Take your meat out of the fridge. Cut the chuck roast into large chunks (think baseball size). Season it generously with salt and pepper. I mean generously. It’s a big pot of stew; under-salting is a crime here. Let it sit while you prep the chiles.
2. Chile CPR (Resuscitation)
Remove the stems and seeds from the dried chiles. You can rip them open with your hands.
- The Toast: In a dry skillet over medium heat, toast the chile skins for about 1-2 minutes per side.
- Sensory Check: You want them to smell nutty and fragrant. If they smell like burning tires, you went too far. Throw them out and start over (seriously, burnt chili tastes bitter).
- The Soak: Toss the toasted chiles into a bowl and cover them with boiling hot water. Let them soak for 20 minutes until they are soft and pliable.
3. Make the Adobo (The Sauce)
Fish the softened chiles out of the water (discard the soaking water, it can be bitter). Throw them in a blender. Add the garlic, onion, oregano, cumin, cloves, cinnamon, vinegar, and a cup of fresh beef broth.
- Blitz it: Blend until completely smooth. It should look like thick, red lava.
4. The Sear (Optional but Recommended)
In your large heavy-bottomed pot or Dutch oven, heat some oil. Sear the meat chunks on high heat. You aren’t cooking them through, just getting a brown crust on the outside.
- Science Fact: This adds a depth of savory flavor that boiling alone just can’t achieve. Do it in batches so you don’t steam the meat.
5. The Marriage
Put all the seared meat back into the pot. Pour that beautiful red chili sauce (adobo) over the meat. Add the rest of the beef broth until the meat is mostly covered. Toss in your bay leaves and the short rib bones.
6. The Long Haul
Bring it to a boil, then immediately drop the heat to low. Cover it with a lid.
- Simmer Time: Let it cook for 3 to 4 hours.
- The Check: You know it’s done when you can pull a piece of meat apart effortlessly with two forks. If there is resistance, it needs more time. Be patient!
7. Shred and Serve
Remove the meat from the pot. Shred it (it should fall apart). Important: Skim the fat from the top of the broth, but DO NOT THROW IT AWAY. Save that red grease in a separate bowl—that is the “paint” you use to fry your tortillas later.
Common Mistakes to Avoid
Listen, I’ve messed this up before so you don’t have to. Here is the “Don’t Do This” list:
- Using Lean Meat: If you use a lean round roast, it will be dry and stringy. You need that connective tissue from the chuck and ribs to melt down and keep things juicy.
- Rushing the Blend: If you don’t blend the sauce enough, or if your blender is weak, you might end up with bits of chili skin in your teeth. Pro move: Strain the sauce through a fine-mesh sieve before adding it to the pot if you want a silky smooth consommé.
- Throwing Away the Fat: I mentioned this above, but it bears repeating. That red oil floating on top is pure flavor. It is essential for making crispy Quesabirria tacos.
- Under-salting: It’s a lot of liquid and meat. Taste the broth at the end. Does it taste flat? Add more salt. The broth should punch you in the face with flavor.
Alternatives & Substitutions
Cooking is art, not law. Here is how you can tweak things:
- The Authentic Route (Goat): Traditional Birria from Jalisco is made with goat (chivo). It has a gamier, stronger flavor. If you can find goat meat, try a 50/50 mix with the beef!
- The “I Have No Time” Route (Instant Pot): Yes, you can pressure cook this. Sear the meat, add the sauce, and cook on High Pressure for 45–50 minutes with a natural release. It’s 90% as good as the slow simmer.
- The “Set It Before Work” Route (Slow Cooker): Dump it all in the slow cooker on LOW for 8 hours. IMO, the Dutch oven is better for reduction, but the slow cooker is undeniably convenient.
- Spice Swaps: Can’t find Guajillos? You can use New Mexico chiles or California chiles. Just don’t use straight Cayenne powder; you’ll regret it.
FAQ (Frequently Asked Questions)
1. Is this going to set my mouth on fire? Not really! Guajillo and Ancho chiles are mild and fruity, not spicy. The heat comes from the Chiles de Árbol. If you skip those, this is a very family-friendly dish.
2. Can I freeze the leftovers? Absolutely. In fact, Birria tastes even better the next day after the flavors have had a slumber party in the fridge. It freezes beautifully for up to 3 months.
3. What do I serve this with? Traditionally? Warm corn tortillas, diced white onion, fresh cilantro, and lime wedges. And the broth on the side for sipping/dipping.
4. My sauce tastes bitter. What happened? You probably burned the chiles during the toasting step. Sad to say, there’s no fixing that. You have to be gentle with dried chiles!
5. Do I have to use cinnamon? I know, it sounds weird in a beef stew. But you aren’t making cinnamon rolls. In savory Mexican cooking, cinnamon adds an undetectable warmth. Just try it.
6. Why is my meat tough? You didn’t cook it long enough. Connective tissue takes time to break down. Put the lid back on and give it another 45 minutes.
7. Can I use chicken? Technically, yes (it’s called Birria de Pollo), but the cooking time will be much shorter, and you won’t get that same rich, beefy depth. But hey, you do you.
Final Thoughts
There you have it. You are now armed with the knowledge to make the most tender, flavorful, life-changing Birria meat recipe known to man.
Is it a quick 30-minute meal? No. Will your kitchen look like a crime scene of red splatter afterward? Probably. But when you take that first bite of juicy meat dripping in consommé, you’ll realize it was worth every single minute.
Now go impress someone—or yourself—with your new culinary skills. You’ve earned it!