Pop Cakes Recipe: The Easiest & Most Adorable Treat!
👩🍳 The Busy Home Cook's Arsenal
Consistently cooking incredible meals for your family doesn't mean spending three hours in the kitchen every night. These are the 5 absolute life-saving appliances and culinary tools that dramatically cut down prep time while guaranteeing restaurant-quality results.
🌪️ Ninja 4-Quart Air Fryer
The machine that completely changed weeknight dinners. It preheats in seconds and cooks frozen vegetables, chicken wings, and battered fish to an incredibly crispy, deep-fried texture using 75% less oil and taking half the time of a traditional oven.
⏱️ Instant Pot Duo 7-in-1 Pressure Cooker
Forget slow cookers that take 8 hours. This legendary appliance aggressively pressure cooks tough cuts of meat into melt-in-your-mouth tender roasts, stews, and perfectly fluffy rice in under 45 minutes, saving you when you forget to defrost dinner.
🔪 Victorinox Fibrox Pro 8" Chef's Knife
A dull knife is dangerous and makes chopping vegetables a miserable chore. This exact blade reigns supreme in professional kitchens because it holds a terrifyingly sharp edge, features a non-slip grip, and costs significantly less than heavy German steel.
🌡️ ThermoPro Instant Read Thermometer
The secret difference between dry, rubbery chicken and juicy perfection. Stop nervously slicing your proteins open to check if they're done—this waterproof digital pen gives you a highly accurate temperature reading in less than three seconds.
🥤 Vitamix 5200 Professional-Grade Blender
Whether you are making silky-smooth breakfast smoothies, pureed soups from scratch, or blending absolutely lump-free sauces, this famously indestructible motor pulverizes anything you throw at it. It literally heats soup from the friction of the blades alone.
Pop cakes, those delightful bite-sized balls of cake on a stick, are the perfect treat for parties, holidays, or just a fun afternoon baking project. Forget complicated decorating techniques – this recipe focuses on simplicity and deliciousness, making it accessible for bakers of all skill levels. Whether you’re a seasoned pro or a complete beginner, you’ll be whipping up these adorable treats in no time. This recipe uses a shortcut that makes the process incredibly fast and easy, so you can spend less time baking and more time enjoying!
Why This Recipe Works
This pop cake recipe is a winner for several reasons:
- Simplicity: We use store-bought cake mix and frosting, eliminating the need to bake a cake from scratch. This cuts down on time and effort significantly.
- Customization: The possibilities are endless! You can use any flavor of cake mix and frosting you like, and decorate them with your favorite sprinkles, candies, or chocolate drizzles.
- Foolproof: The method is straightforward and easy to follow, even for beginner bakers.
- Kid-Friendly: This is a great recipe to make with kids! They’ll love helping with mixing, rolling, and decorating.
- Crowd-Pleaser: Everyone loves pop cakes! They’re the perfect bite-sized treat for parties and gatherings.
Ingredients
- 1 box (15.25 oz) cake mix (any flavor)
- Ingredients called for on the cake mix box (usually eggs, oil, and water)
- 1 can (16 oz) frosting (any flavor, complimenting the cake mix)
- Candy melts or chocolate chips (for coating)
- Vegetable shortening (if using chocolate chips, to thin the chocolate)
- Sprinkles, edible glitter, chopped nuts, or other decorations
- Lollipop sticks
- Optional: Food coloring (gel or liquid) to tint the candy melts
Instructions
- Bake the Cake: Prepare the cake mix according to the package directions. Bake in a 9×13 inch pan (or any pan of your choice, adjusting baking time accordingly). Let the cake cool completely.
- Crumble the Cake: Once the cake is completely cool, use your hands or a fork to crumble it into a large bowl. Make sure there are no large chunks remaining.
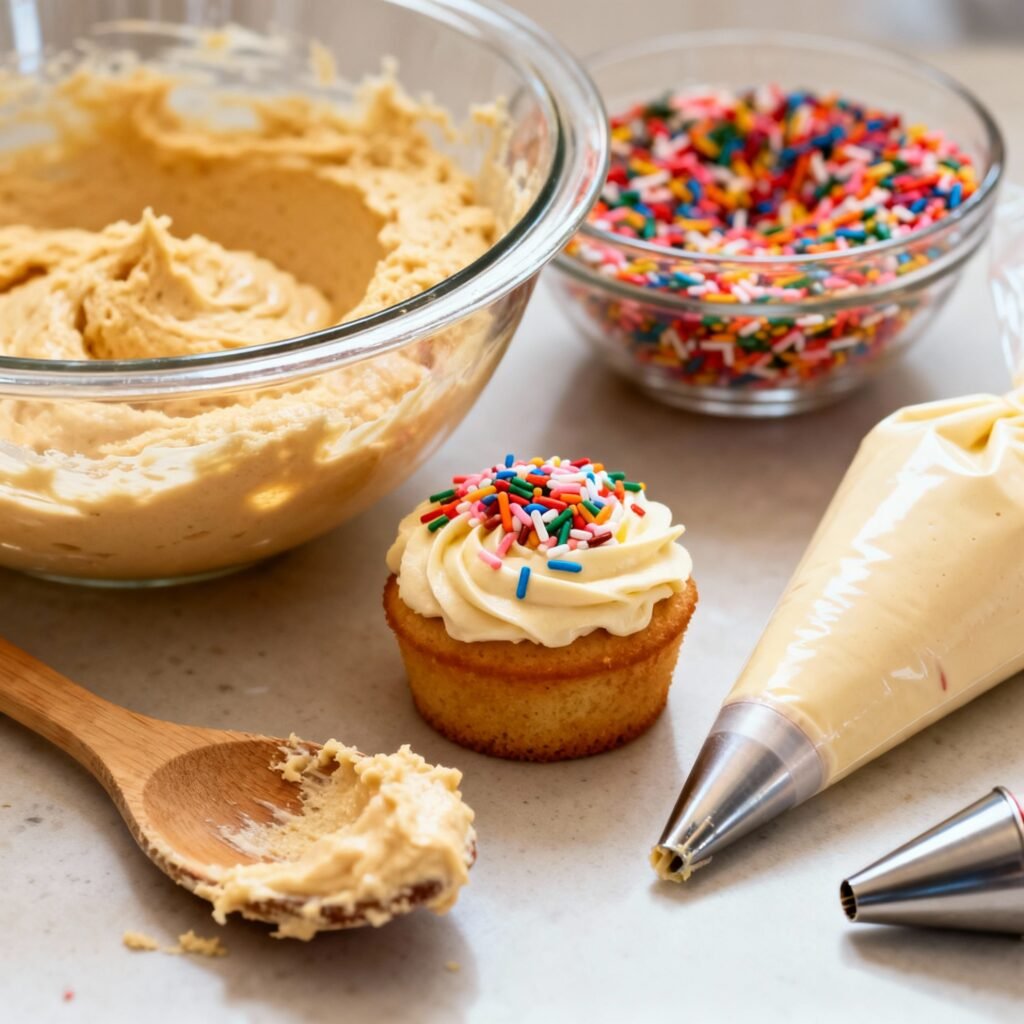
- Mix in the Frosting: Add the frosting to the crumbled cake and mix well until everything is evenly combined. The mixture should be moist and hold its shape when squeezed.
- Roll into Balls: Use a cookie scoop or your hands to roll the cake mixture into 1-inch balls. Place the balls on a baking sheet lined with parchment paper.
- Chill the Balls: Place the baking sheet with the cake balls in the refrigerator for at least 30 minutes, or in the freezer for 15 minutes. This will help them firm up and make them easier to dip.
- Melt the Coating: While the cake balls are chilling, melt the candy melts or chocolate chips according to the package directions. If using chocolate chips, add a teaspoon of vegetable shortening at a time until the chocolate is smooth and easily dippable. Be careful not to overheat the chocolate, as it can seize up.
- Insert the Sticks: Remove the cake balls from the refrigerator. Dip the tip of a lollipop stick into the melted candy melts or chocolate and insert it about halfway into a cake ball. Repeat with all the cake balls. Return the cake balls to the refrigerator for another 5-10 minutes to allow the candy melts to set and secure the sticks.
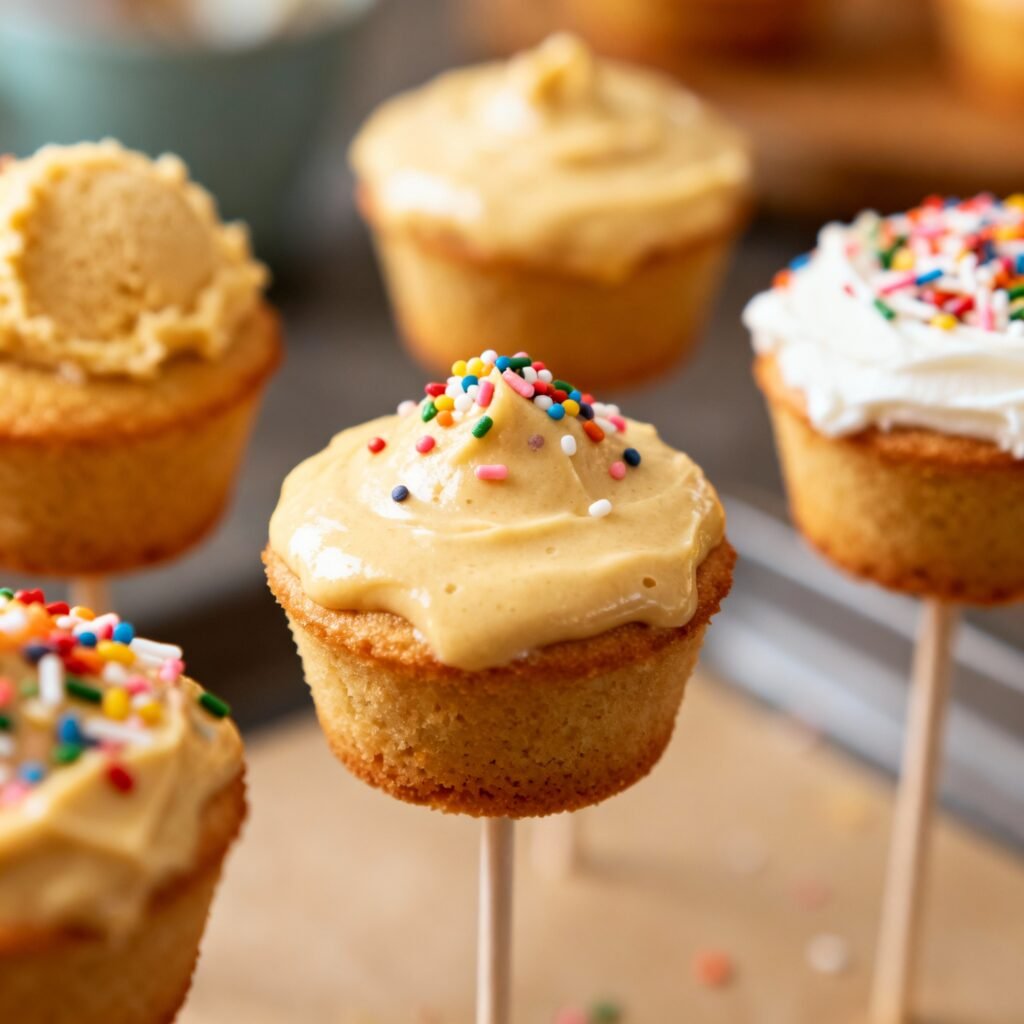
- Dip and Decorate: Dip each cake ball into the melted candy melts or chocolate, swirling to coat completely. Gently tap off any excess coating. Immediately decorate with sprinkles, edible glitter, chopped nuts, or other decorations.
- Let Set: Place the decorated pop cakes on a parchment-lined baking sheet or in a styrofoam block to allow the coating to set completely.
- Enjoy! Once the coating is set, your pop cakes are ready to enjoy!
Tips for Success
- Don’t Overbake the Cake: Overbaked cake will be dry and crumbly, making it harder to form into balls.
- Cool the Cake Completely: Make sure the cake is completely cool before crumbling it. Warm cake will be too sticky to work with.
- Don’t Overmix the Frosting: Overmixing the frosting can make the cake balls dense and heavy. Mix just until everything is combined.
- Chill the Cake Balls: Chilling the cake balls is crucial for preventing them from falling apart during dipping.
- Use Good Quality Candy Melts or Chocolate: Good quality candy melts or chocolate will melt smoothly and provide a nice, even coating.
- Thin the Chocolate: If using chocolate chips, thinning them with a little vegetable shortening will make them easier to dip and create a smoother coating.
- Work Quickly: Work quickly when dipping and decorating the pop cakes, as the coating will start to set quickly.
- Use a Styrofoam Block: A styrofoam block is a great way to hold the pop cakes upright while the coating sets. You can find these at most craft stores.
- Double Dip for a Thicker Coating: For a thicker coating, you can dip the pop cakes twice, allowing the first layer to set slightly before dipping again.
Storage Instructions
Pop cakes are best stored in an airtight container at room temperature. They will stay fresh for up to 3-4 days. You can also store them in the refrigerator for up to a week, but the coating may become slightly sticky. For longer storage, you can freeze the pop cakes for up to 2 months. Thaw them in the refrigerator before serving.
FAQ
Q: Can I use a homemade cake instead of cake mix?
A: Yes, you can absolutely use a homemade cake! Just make sure it’s completely cool before crumbling it.
Q: Can I use a different type of frosting?
A: Yes, you can use any type of frosting you like. Cream cheese frosting, buttercream frosting, and even ganache would work well.
Q: My cake balls are falling apart. What am I doing wrong?
A: This usually happens when the cake mixture is too dry. Try adding a little more frosting until the mixture is moist enough to hold its shape. You can also try chilling the cake balls for a longer period of time.
Q: My candy melts are seizing up. What should I do?
A: This usually happens when the candy melts are overheated or come into contact with water. Try adding a teaspoon of vegetable shortening to the candy melts and stirring until smooth. Be careful not to overheat the candy melts again.
Q: Can I make these ahead of time?
A: Yes, you can make these ahead of time. They store well in the refrigerator or freezer.
🍽️ The Entertainer's Presentation Kit
We eat with our eyes first. If you love hosting friends for dinner, drinks, or holiday parties, these 5 elegant serving upgrades instantly transform casual home cooking into a luxurious, highly photogenic fine-dining experience.
🍲 Le Creuset Enameled Cast Iron Dutch Oven
The ultimate flex for a dinner party. You can braise short ribs or bake sourdough bread in the oven, then bring this stunning enameled pot directly to the center of your dining table to serve your guests from its wildly beautiful colored casing.
🍷 RIEDEL Crystal Wine Glass Set
Stop serving good wine in cheap, thick-rimmed glasses. The remarkably thin crystal lip and specifically engineered bowl shapes of these glasses genuinely elevate the aroma and flavor profiles of your favorite vintages, making a $15 bottle taste significantly more expensive.
🧀 Premium Bamboo Charcuterie Board Set
The easiest appetizer strategy ever invented. This massive carved board features hidden slide-out drawers containing stainless steel cheese knives and ceramic ramekins, giving you the perfect canvas to build massive, Instagram-worthy grazing spreads.
✨ Genuine Marble Drink Coasters
A simple, brilliant aesthetic upgrade that protects your expensive furniture. These heavy, elegant real marble coasters with subtle gold accents look incredibly chic tossed around a living room while completely preventing water rings from sweaty cocktails.
🌿 100% Cotton Cloth Dinner Napkins
Throwing away a mountain of paper towels at a dinner party ruins the vibe. Swapping to soft, highly-absorbent, fully machine-washable cloth napkins instantly pulls a tablescape together and makes even a Tuesday night pizza feel like a fancy event.
Conclusion
So there you have it – a simple, delicious, and customizable pop cake recipe that’s sure to impress. With just a few ingredients and a little bit of creativity, you can create adorable treats that are perfect for any occasion. So grab your cake mix, frosting, and sprinkles, and get ready to bake some pop cake magic!