Seafoam Candy Recipe: Light, Airy, and Irresistibly Crunchy!
👩🍳 The Busy Home Cook's Arsenal
Consistently cooking incredible meals for your family doesn't mean spending three hours in the kitchen every night. These are the 5 absolute life-saving appliances and culinary tools that dramatically cut down prep time while guaranteeing restaurant-quality results.
🌪️ Ninja 4-Quart Air Fryer
The machine that completely changed weeknight dinners. It preheats in seconds and cooks frozen vegetables, chicken wings, and battered fish to an incredibly crispy, deep-fried texture using 75% less oil and taking half the time of a traditional oven.
⏱️ Instant Pot Duo 7-in-1 Pressure Cooker
Forget slow cookers that take 8 hours. This legendary appliance aggressively pressure cooks tough cuts of meat into melt-in-your-mouth tender roasts, stews, and perfectly fluffy rice in under 45 minutes, saving you when you forget to defrost dinner.
🔪 Victorinox Fibrox Pro 8" Chef's Knife
A dull knife is dangerous and makes chopping vegetables a miserable chore. This exact blade reigns supreme in professional kitchens because it holds a terrifyingly sharp edge, features a non-slip grip, and costs significantly less than heavy German steel.
🌡️ ThermoPro Instant Read Thermometer
The secret difference between dry, rubbery chicken and juicy perfection. Stop nervously slicing your proteins open to check if they're done—this waterproof digital pen gives you a highly accurate temperature reading in less than three seconds.
🥤 Vitamix 5200 Professional-Grade Blender
Whether you are making silky-smooth breakfast smoothies, pureed soups from scratch, or blending absolutely lump-free sauces, this famously indestructible motor pulverizes anything you throw at it. It literally heats soup from the friction of the blades alone.
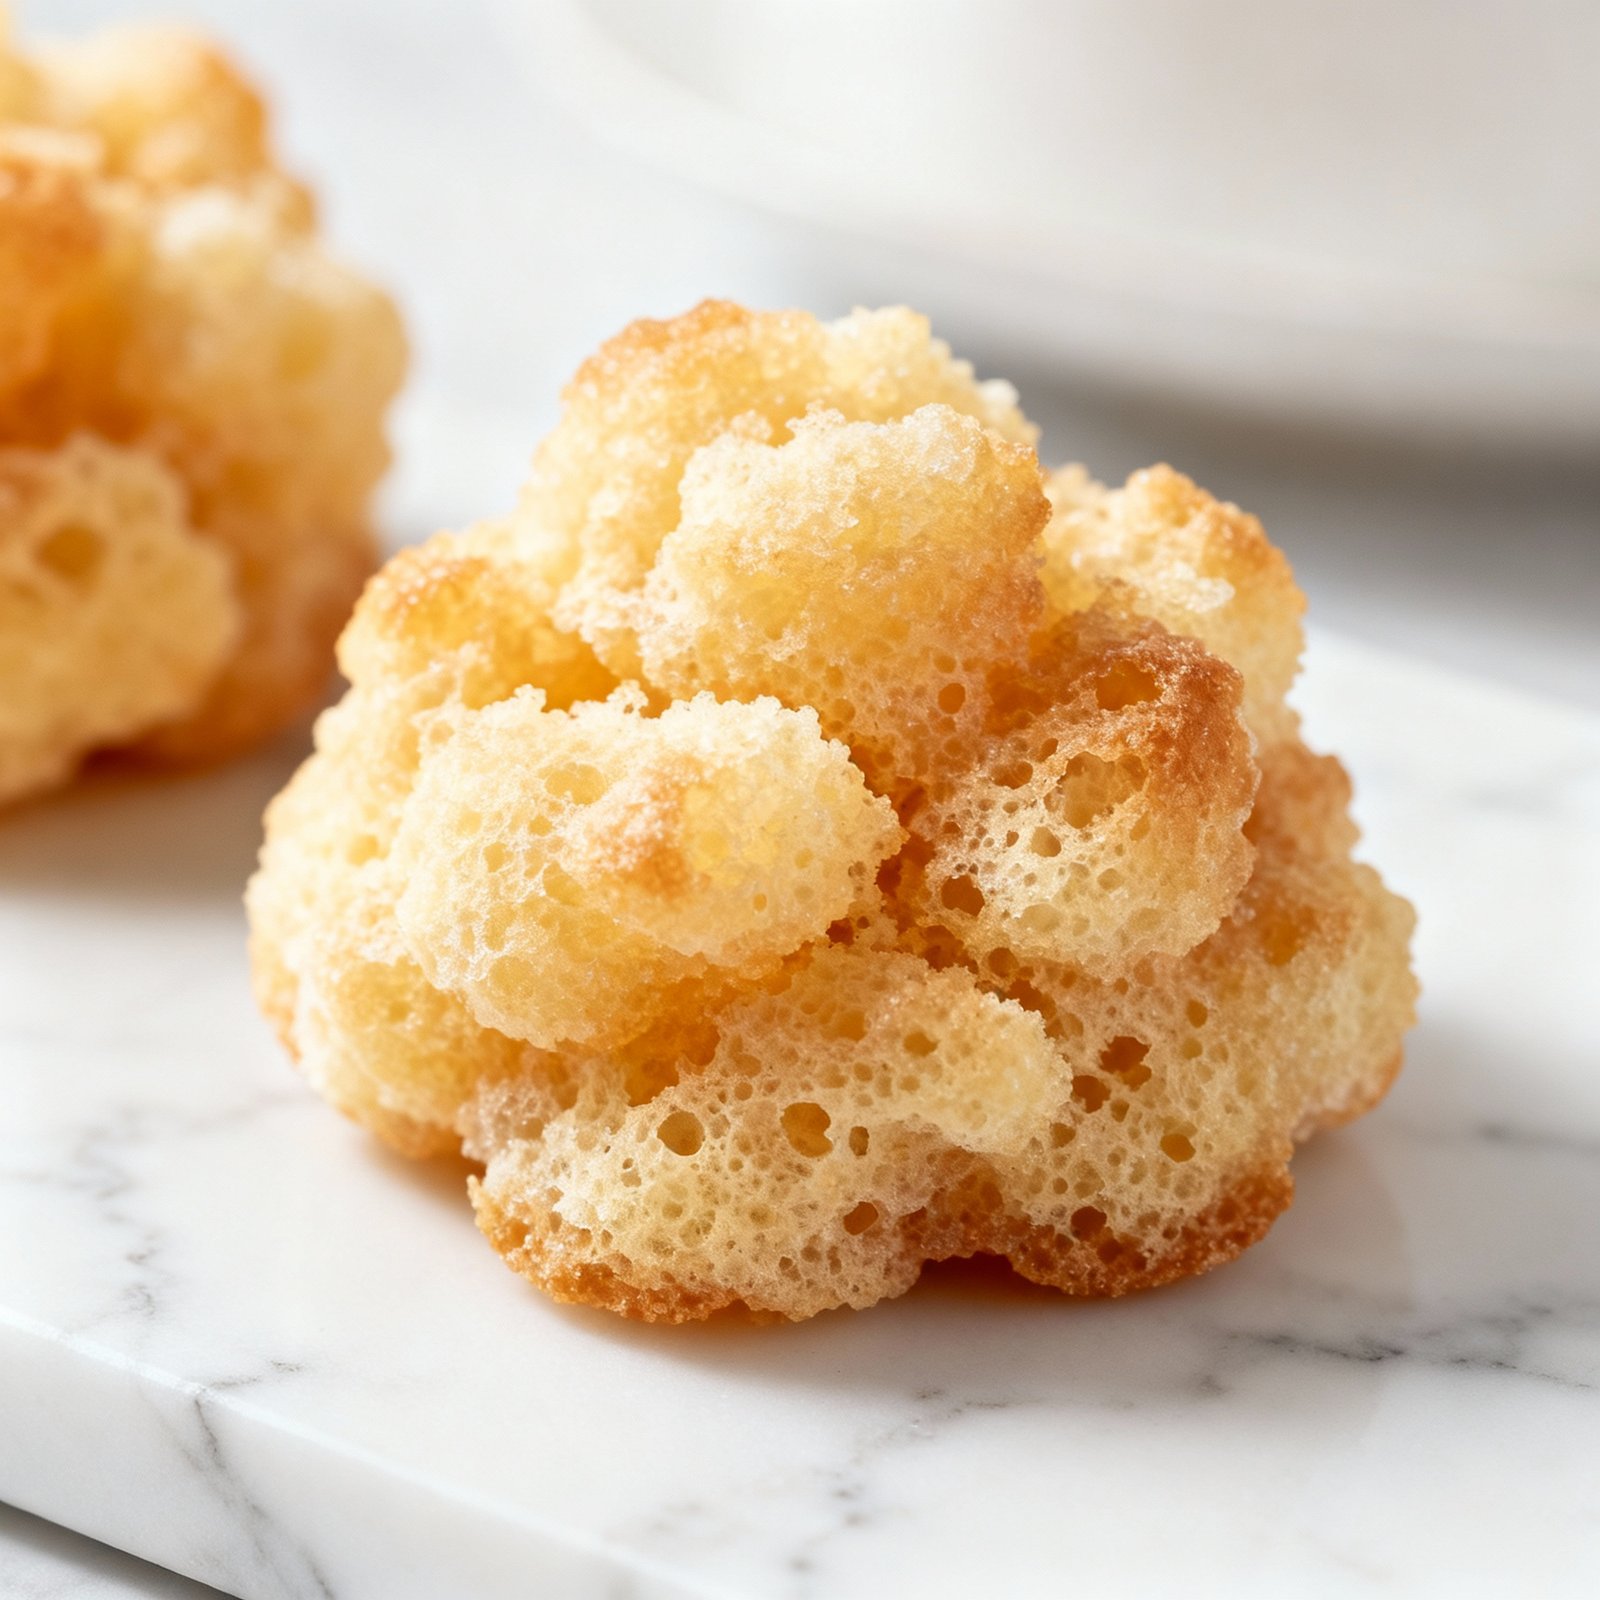
Seafoam candy, also known as honeycomb candy, sponge candy, or cinder toffee, is a delightful confection that boasts a unique, airy texture and a sweet, slightly caramelized flavor. Imagine biting into a cloud of sugary goodness, punctuated by a satisfying crunch. That’s the magic of seafoam candy. This recipe walks you through creating this iconic treat at home, offering foolproof instructions and helpful tips to ensure your seafoam turns out perfectly every time.
Why This Recipe Works
Making seafoam candy can seem intimidating, but this recipe breaks down the process into manageable steps. We focus on:
- Precise Measurements: Accurate measurements are crucial for achieving the right consistency and texture. We provide specific quantities for each ingredient, minimizing the risk of failure.
- Temperature Control: The key to seafoam’s signature honeycomb structure lies in reaching the correct sugar temperature. We guide you through using a candy thermometer to ensure optimal results.
- Proper Technique: We detail the exact method for adding the baking soda, which is responsible for the candy’s airy texture. Timing and technique are critical here.
- Troubleshooting Tips: We address common issues and provide solutions to help you overcome any challenges you may encounter.
Ingredients
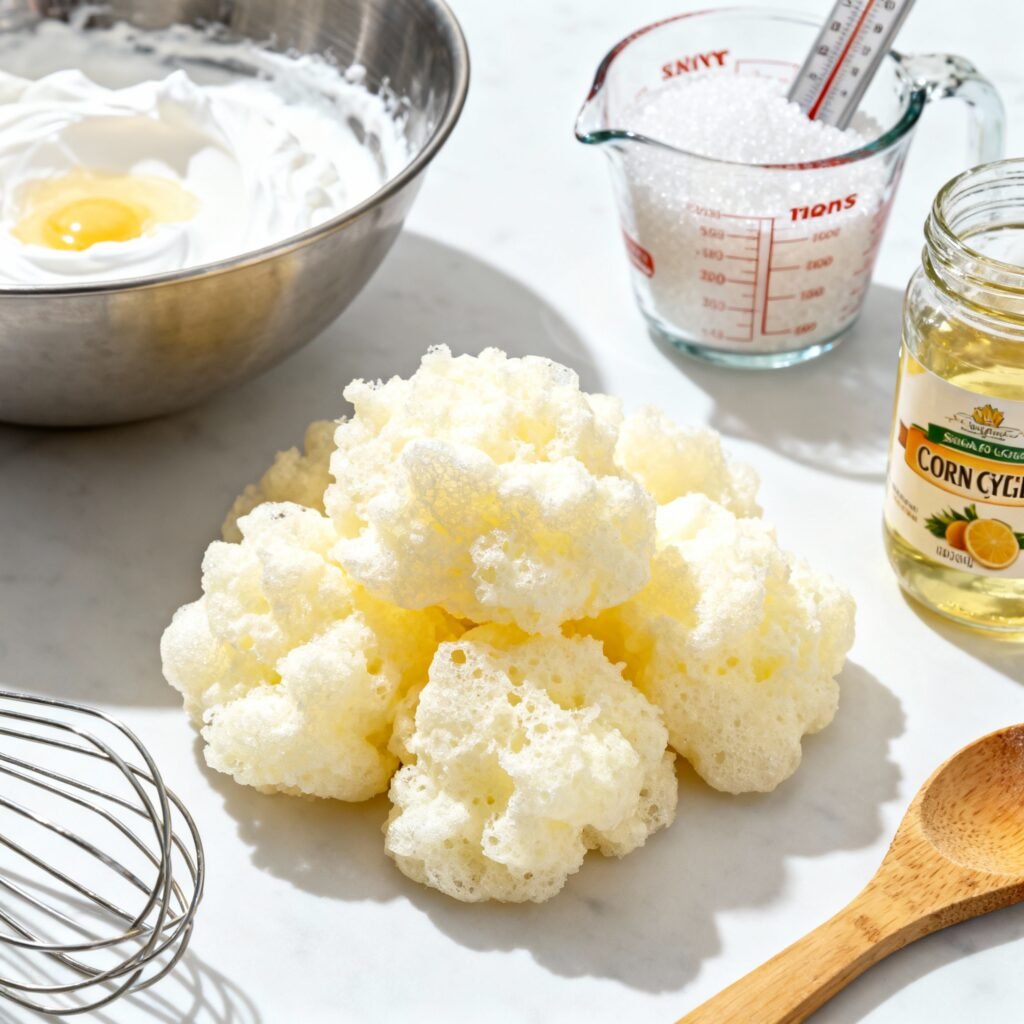
- 1 cup granulated sugar
- 1/2 cup light corn syrup
- 1/4 cup water
- 1 tablespoon baking soda
- 1 teaspoon vanilla extract (optional)
- Pinch of salt (optional, enhances flavor)
Instructions
- Prepare Your Workspace: Line a 9×9 inch baking pan with parchment paper. Make sure the parchment paper overhangs the sides for easy removal. Have your baking soda measured out and ready to go in a small bowl, along with a whisk. This is crucial as the reaction happens quickly.
- Combine Sugar, Corn Syrup, and Water: In a medium-sized, heavy-bottomed saucepan, combine the granulated sugar, light corn syrup, and water. Stir until the sugar is mostly dissolved.
- Cook the Mixture: Place the saucepan over medium heat. Clip a candy thermometer to the side of the pan, ensuring it doesn’t touch the bottom.
- Monitor the Temperature: Cook the mixture, without stirring, until it reaches 300°F (149°C), also known as the hard-crack stage. This will take approximately 10-15 minutes. Be patient and keep a close eye on the temperature.
- Remove from Heat: Once the mixture reaches 300°F, immediately remove the saucepan from the heat.
- Add Baking Soda and Vanilla (Optional): Quickly add the baking soda and vanilla extract (if using) to the hot sugar mixture. Immediately whisk vigorously. The mixture will foam up rapidly.
- Pour into Prepared Pan: Immediately pour the foamy mixture into the prepared baking pan. Do not spread or level it. Let it settle on its own.
- Cool Completely: Allow the seafoam candy to cool completely undisturbed for at least 1-2 hours. Do not refrigerate.
- Break into Pieces: Once completely cool and hardened, lift the parchment paper from the pan and gently break the seafoam candy into irregular pieces. You can use a knife or your hands.
- Enjoy! Your homemade seafoam candy is ready to enjoy.
Tips for Success
- Use a Heavy-Bottomed Saucepan: This will help prevent the sugar from burning.
- Don’t Stir After Dissolving Sugar: Stirring after the sugar has dissolved can cause crystallization, resulting in a grainy texture.
- Accurate Temperature is Key: Reaching the hard-crack stage (300°F) is crucial for the right texture. A candy thermometer is essential.
- Work Quickly: Once you add the baking soda, the reaction happens very fast. Have everything ready to go beforehand.
- Don’t Overmix: Overmixing after adding the baking soda can cause the foam to collapse. Whisk just until combined.
- Avoid Humid Days: Humidity can affect the candy’s texture, making it sticky.
- Troubleshooting:
- Candy Didn’t Foam: The baking soda may have been old or not enough was used. Make sure your baking soda is fresh and measure accurately. Also, the mixture may not have reached a high enough temperature.
- Candy is Sticky: The candy may not have reached a high enough temperature or the humidity was too high.
- Candy is Too Hard: The candy may have been cooked at too high a temperature for too long.
- Candy is Grainy: The sugar may have crystallized during cooking. Avoid stirring after the sugar dissolves and ensure there are no sugar crystals on the sides of the pan.
Storage Instructions
Seafoam candy is best enjoyed fresh, but it can be stored in an airtight container at room temperature for up to 3-4 days. To prevent it from becoming sticky, store it in a single layer with parchment paper between the pieces. Avoid storing it in the refrigerator, as the humidity can make it sticky.

FAQ
Q: Can I use honey instead of corn syrup?
A: While you can experiment with honey, it will alter the flavor and texture of the seafoam. Corn syrup helps prevent crystallization and provides a smoother consistency. Using honey may result in a softer, less crunchy candy.
Q: Can I add chocolate to this recipe?
A: Absolutely! Once the seafoam candy has cooled and hardened, you can drizzle melted chocolate over the top or dip the pieces in chocolate. Let the chocolate set completely before storing.
Q: My candy is burning. What am I doing wrong?
A: Ensure you are using a heavy-bottomed saucepan and that the heat is set to medium. If the candy is burning, immediately reduce the heat to low and monitor it closely. Scrape the bottom of the pan gently to prevent sticking.
Q: Can I add other flavorings besides vanilla?
A: Yes! You can experiment with other extracts like almond, peppermint, or lemon. Add the extract along with the baking soda.
Q: Why is my seafoam so dense and not airy?
A: This is likely due to insufficient baking soda, old baking soda, or not reaching a high enough temperature. Ensure your baking soda is fresh and measure accurately. Double-check your candy thermometer to ensure it’s calibrated correctly.
🍽️ The Entertainer's Presentation Kit
We eat with our eyes first. If you love hosting friends for dinner, drinks, or holiday parties, these 5 elegant serving upgrades instantly transform casual home cooking into a luxurious, highly photogenic fine-dining experience.
🍲 Le Creuset Enameled Cast Iron Dutch Oven
The ultimate flex for a dinner party. You can braise short ribs or bake sourdough bread in the oven, then bring this stunning enameled pot directly to the center of your dining table to serve your guests from its wildly beautiful colored casing.
🍷 RIEDEL Crystal Wine Glass Set
Stop serving good wine in cheap, thick-rimmed glasses. The remarkably thin crystal lip and specifically engineered bowl shapes of these glasses genuinely elevate the aroma and flavor profiles of your favorite vintages, making a $15 bottle taste significantly more expensive.
🧀 Premium Bamboo Charcuterie Board Set
The easiest appetizer strategy ever invented. This massive carved board features hidden slide-out drawers containing stainless steel cheese knives and ceramic ramekins, giving you the perfect canvas to build massive, Instagram-worthy grazing spreads.
✨ Genuine Marble Drink Coasters
A simple, brilliant aesthetic upgrade that protects your expensive furniture. These heavy, elegant real marble coasters with subtle gold accents look incredibly chic tossed around a living room while completely preventing water rings from sweaty cocktails.
🌿 100% Cotton Cloth Dinner Napkins
Throwing away a mountain of paper towels at a dinner party ruins the vibe. Swapping to soft, highly-absorbent, fully machine-washable cloth napkins instantly pulls a tablescape together and makes even a Tuesday night pizza feel like a fancy event.
Conclusion
Seafoam candy is a truly unique and rewarding treat to make at home. With its light, airy texture and sweet, caramelized flavor, it’s sure to impress your friends and family. By following this recipe and the helpful tips, you’ll be well on your way to creating perfect seafoam candy every time. So, gather your ingredients, grab your candy thermometer, and get ready to experience the delightful crunch of homemade seafoam!