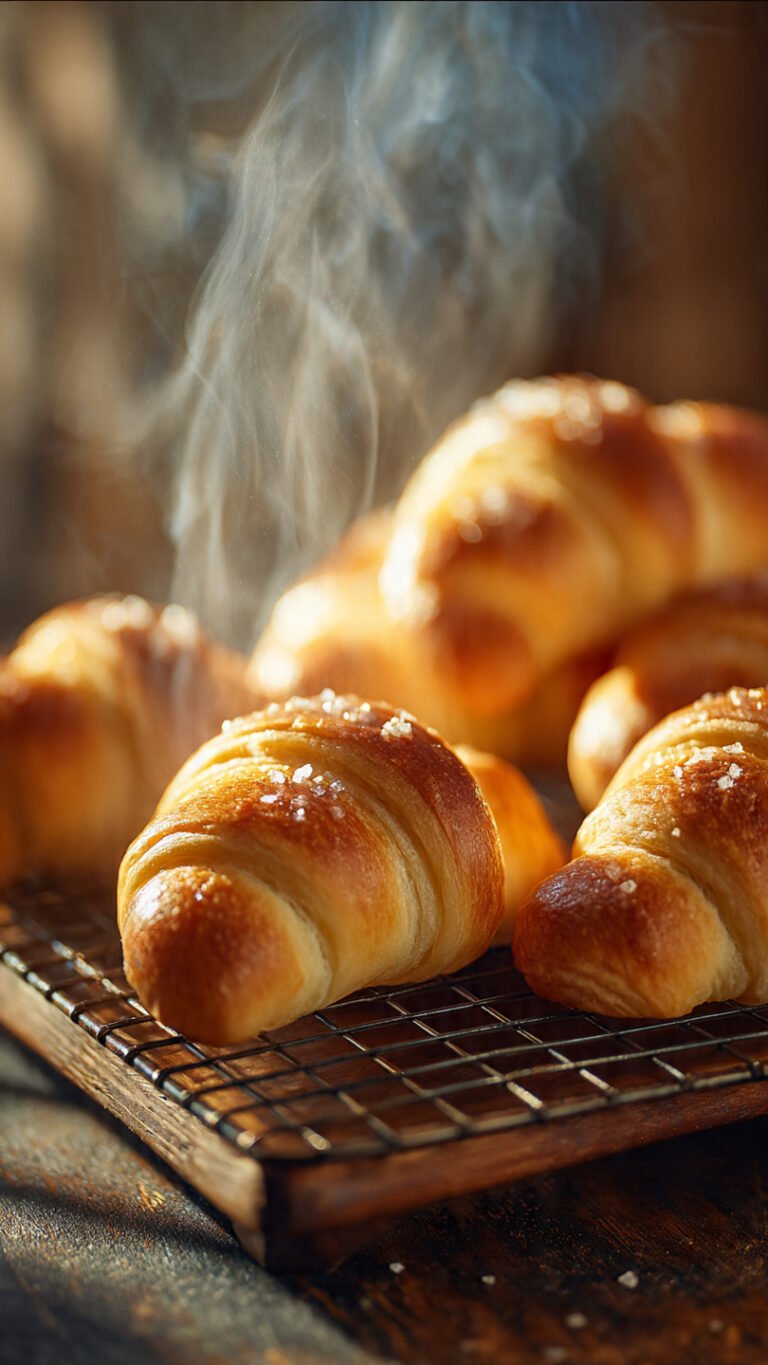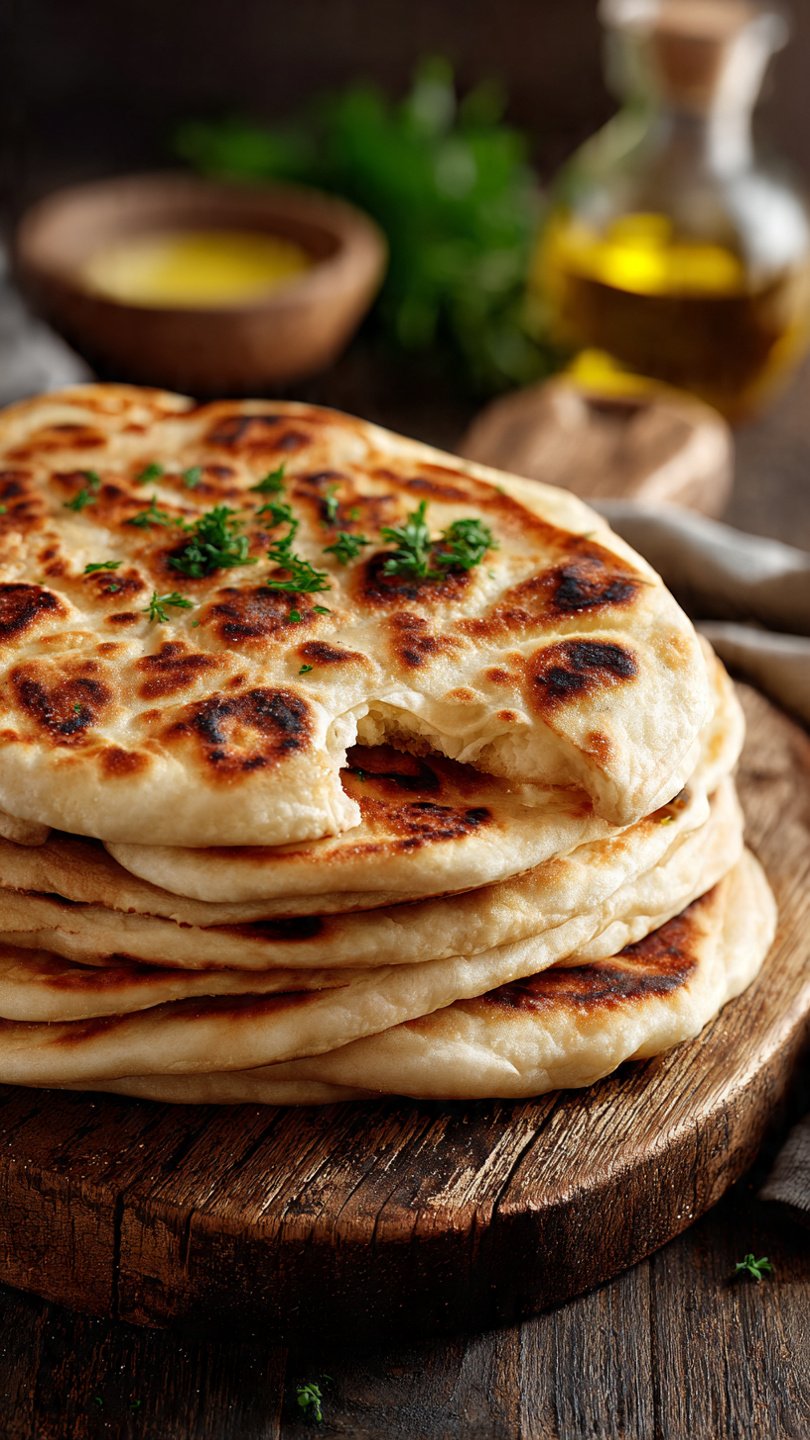
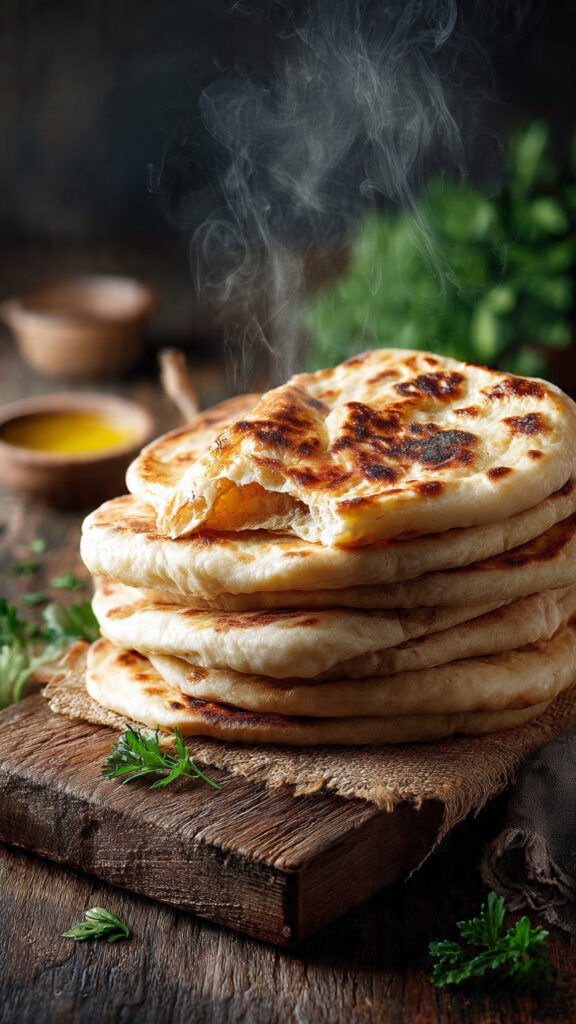
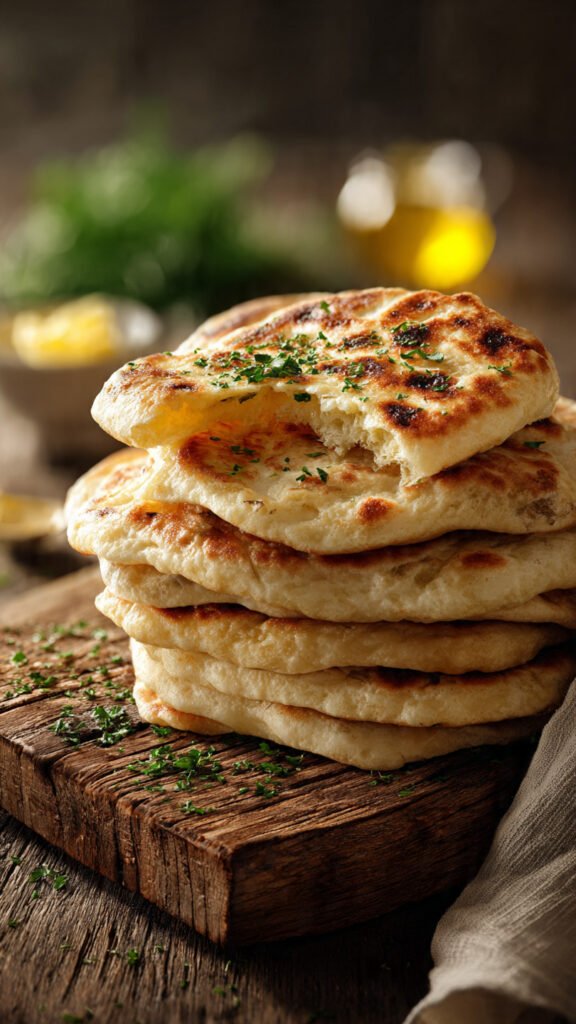
🎈 Balloon Bread Recipe: Soft, Puffed & Easy!
So, you’ve been scrolling through social media, seeing those mesmerizing videos of dough puffing up like a magical edible pillow, and thought, “I need that in my life immediately.” Same. There is something deeply primal and satisfying about watching a flat piece of dough suddenly inflate into a golden, steamy cloud of carbohydrates.
But here’s the kicker: you’re probably thinking this requires a fancy pizza oven, a degree in chemistry, or a sacrifice to the baking gods. Spoiler alert: It doesn’t.
If you have a skillet, some flour, and the ability to not fall asleep while the dough rises, you are qualified to make this balloon bread recipe. It’s basically a rite of passage for home cooks. Forget store-bought pita that tastes like cardboard coasters; we are making soft, pillowy, chewy glory right on the stovetop. Let’s get messy.
Why This Recipe is Awesome
Okay, aside from the fact that it’s literally called balloon bread (which sounds festive as heck), there are about a dozen reasons why this recipe is going to become your new obsession.
First off, no oven is required. That’s right. If your oven is currently being used as storage for sweaters (don’t judge, small apartment life is real) or it’s just too hot outside to turn it on, this recipe saves the day. We are doing this purely on the stovetop. It’s old school. It’s rustic. It makes you feel like an artisan baker in a cottage, even if you’re actually in your pajamas listening to a true-crime podcast.
Secondly, the gratification factor is off the charts. Baking can sometimes be a letdown. You spend three days making sourdough only to pull out a brick. But this? This is high-speed rewards. Watching the bread puff up is arguably better than therapy. It’s instant visual confirmation that you did something right.
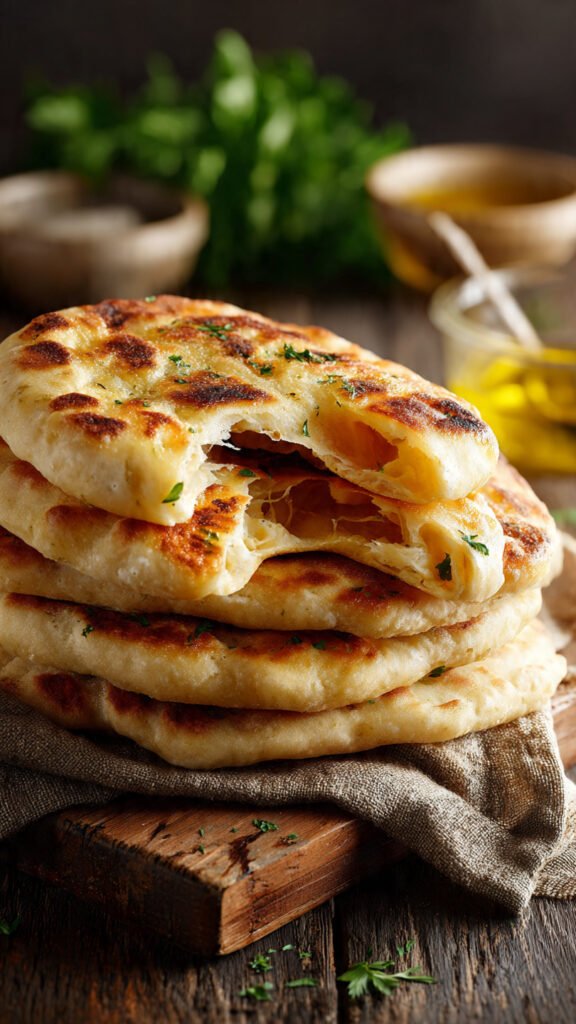
Let’s talk about the texture science for a second—because yes, we are nerds here. This isn’t just dry flatbread. The high hydration in the dough, combined with the intense heat of the skillet, creates rapid steam generation inside the dough. Because we’ve developed the gluten (the protein network), that steam gets trapped, pushing the walls of the dough outward. The result? A pocket of air surrounded by the softest, chewiest crumb you can imagine.
It’s also versatile AF. Use it as a scoop for hummus, stuff it with gyro meat, wrap it around grilled veggies, or—let’s be honest—slather it in garlic butter and eat it standing over the stove like a goblin. There is no wrong way to consume this.
Ingredients You’ll Need
We are keeping this simple. You don’t need truffle oil or Himalayan tears. You just need the basics.
- All-Purpose Flour: The backbone of our operation. You can use bread flour if you want a chewier texture (higher protein = more structure), but standard AP flour works perfectly.
- Warm Milk: This adds richness and softness. Water works, but milk makes the crumb tender and velvety. Think of it as a spa day for your yeast.
- Warm Water: To cut the richness slightly and get the hydration right.
- Active Dry Yeast: The living organism we must keep alive. If your yeast has been sitting in the back of your pantry since 2012, throw it out. It’s dead. Buy fresh yeast.
- Sugar: Yeast needs a snack to wake up. This feeds the yeast so it can produce the gas that makes the bread fluff.
- Greek Yogurt or Olive Oil: I prefer a dollop of yogurt for a slight tang and insane softness, but olive oil is the classic choice. It keeps the bread from drying out.
- Salt: Essential. Bread without salt tastes like sadness. Do not forget this.
- Melted Butter & Parsley (Optional but highly recommended): For brushing on top after they come off the heat. This is the “chef’s kiss” moment.
Step-by-Step Instructions
Alright, apron up. Or don’t. I’m not your mom. But you will get flour on your shirt.
1. Wake Up the Yeast
In a large bowl (or your stand mixer bowl), combine your warm milk, warm water, and sugar.
- Tip: The liquid should be warm to the touch, like a nice bath—not hot. If it burns your finger, it will murder your yeast. Sprinkle the yeast on top, give it a little stir, and let it sit for about 5–10 minutes. It should get foamy and bubbly. If it just sits there looking like dirty pond water, your yeast is dead. Start over.
2. Mix the Dough
Add your yogurt (or oil), flour, and salt. If you’re using a stand mixer, use the dough hook and let it run on low. If you’re doing this by hand, grab a wooden spoon and stir until it looks like a shaggy mess.
3. The Knead (Your Arm Workout)
Dump the dough onto a floured surface. Knead it for about 5–8 minutes. You want to push the dough away with the heel of your hand, fold it back, and turn. Goal: You want a smooth, elastic ball of dough. It should be “tacky” (sticky like a Post-it note) but not “sticky” (sticking to your fingers in globs). If it’s too sticky, add flour one tablespoon at a time. Do not turn this into a dry brick.
4. The Nap (Proofing)
Lightly oil your bowl and place the dough ball inside. Cover it with a damp towel or plastic wrap. Place it somewhere warm. Let it rise for about 1 hour or until it has doubled in size.
- Science Note: This downtime allows the gluten to relax and the yeast to produce carbon dioxide bubbles. This is crucial for the “puff” later.
5. Divide and Conquer
Punch the dough down (satisfying, right?) to release the air. Divide the dough into 6–8 equal pieces. Roll each piece into a smooth little ball. Cover these balls with a towel and let them rest for another 10–15 minutes. This relaxes the gluten again so they don’t snap back like rubber bands when you roll them out.
6. Roll It Out
Heat a non-stick skillet or cast-iron pan over medium-high heat. You want it hot. While the pan heats, take a dough ball and roll it out into a circle, about 1/4 inch thick. CRITICAL: Do not roll it too thin (cracker) or too thick (pancake). And try to keep the thickness even. If there’s a thin spot, the steam will break through there and your balloon will pop before it inflates.
7. The Cook (The Magic Moment)
Place the rolled dough into the hot, dry pan (no oil in the pan yet!).
- Cook for about 30–45 seconds until bubbles start to form on the surface.
- Flip it! Cook the other side for about 30 seconds.
- Flip it again! This is usually when the magic happens. The bread should start to swell up. If it’s being shy, you can gently press the edges with a spatula to encourage the steam to move to the center.
8. The Anointing
Once it’s puffed and has nice golden-brown spots, remove it from the pan. Immediately brush with garlic butter and sprinkle with parsley if you’re feeling fancy. Stack them under a towel to keep them soft while you cook the rest.
Common Mistakes to Avoid
Look, I’ve failed at this plenty of times so you don’t have to. Here is how to avoid disaster:
- The Pan Was Too Cold: If the heat is too low, the yeast won’t get that thermal shock needed to create a burst of steam. You’ll just get a dense, sad flatbread. Crank that heat up—but watch it closely.
- The Pan Was Nuclear Hot: If the pan is smoking, you will burn the outside before the inside is cooked. It’s a delicate balance. Medium-high is the sweet spot.
- You Rolled It Too Thin: If the dough is paper-thin, there isn’t enough structure to hold the steam. You’re making crackers, not balloons.
- Popped bubbles: If you see a giant bubble forming on one side during the first flip, try not to puncture it. If the steam escapes, the game is over. No puff for you.
- Impatience: Cutting the resting time short means the gluten will be tight. When you try to roll it, the dough will shrink back. Just let it rest. Go scroll TikTok for 10 minutes.
Alternatives & Substitutions
Cooking is jazz, not a military drill. Feel free to improvise.
- Dairy-Free / Vegan: Swap the milk for water or oat milk. Swap the yogurt for olive oil. It works perfectly fine, though the texture might be slightly less “cakey” and more “chewy.”
- Whole Wheat: You want to be healthy? Okay, fine. You can substitute up to 50% of the white flour with whole wheat flour. Don’t go 100% whole wheat unless you want a bread that can double as a doorstop. Whole wheat flour cuts through gluten strands, making it heavier.
- Flavor Add-ins: You can knead spices directly into the dough! Cumin, chili flakes, or dried oregano work great. Just don’t add chunky things like raw garlic or cheese chunks inside the dough, as they can tear the dough wall and prevent the puff.
- The “Cheater” Method: If you don’t have yogurt, a tablespoon of mayonnaise actually works wonders for softness. Don’t make that face; it’s just eggs and oil!
FAQ (Frequently Asked Questions)
1. Why didn’t my bread puff up? Am I a failure? First, you are not a failure. You are learning! It’s usually one of three things: the pan wasn’t hot enough, you rolled the dough too thick/thin, or there was a tiny hole in the dough where the steam escaped. It still tastes good, right? Dip it in hummus and move on.
2. Can I make the dough ahead of time? Absolutely. You can make the dough and let it do its first rise in the fridge overnight (slow fermentation = better flavor). Just let it come to room temperature for 30 minutes before rolling it out the next day.
3. Can I use a regular stainless steel pan? Technically, yes. But proceed with caution. Stainless steel loves to stick. A cast-iron skillet or a decent non-stick pan is your best friend here. If using stainless steel, make sure it’s properly preheated.
4. How do I store leftovers? Put them in a Ziploc bag or airtight container once they are completely cool. They stay soft for about 2 days.
5. How do I reheat them without them turning into rocks? Do not microwave them for long. They will turn into rubber. The best way is to sprinkle a few drops of water on them and pop them back in a hot pan for 30 seconds, or wrap them in foil and warm them in the oven.
6. Can I use instant yeast instead of active dry? Yes! If using instant yeast (also called Rapid Rise), you don’t need to dissolve it in the water/milk first. Just mix it in with the flour. However, I still like to dissolve it just to make sure the yeast is actually alive.
7. Can I use margarine instead of butter for the topping? Well, technically yes, but why hurt your soul like that? Real butter has that creamy, salty goodness that this bread deserves. Treat yourself.
Final Thoughts
There you have it. You are now armed with the knowledge to create the balloon bread recipe of your dreams. There is honestly nothing cooler than serving a stack of warm, homemade bread that you made with your own two hands.
It’s a cheap meal upgrade, it’s a fun party trick, and it smells like heaven. Even if your first batch doesn’t puff perfectly, remember: it’s still warm bread. And warm bread is always a win.
Now go impress someone—or yourself—with your new culinary skills. You’ve earned it!