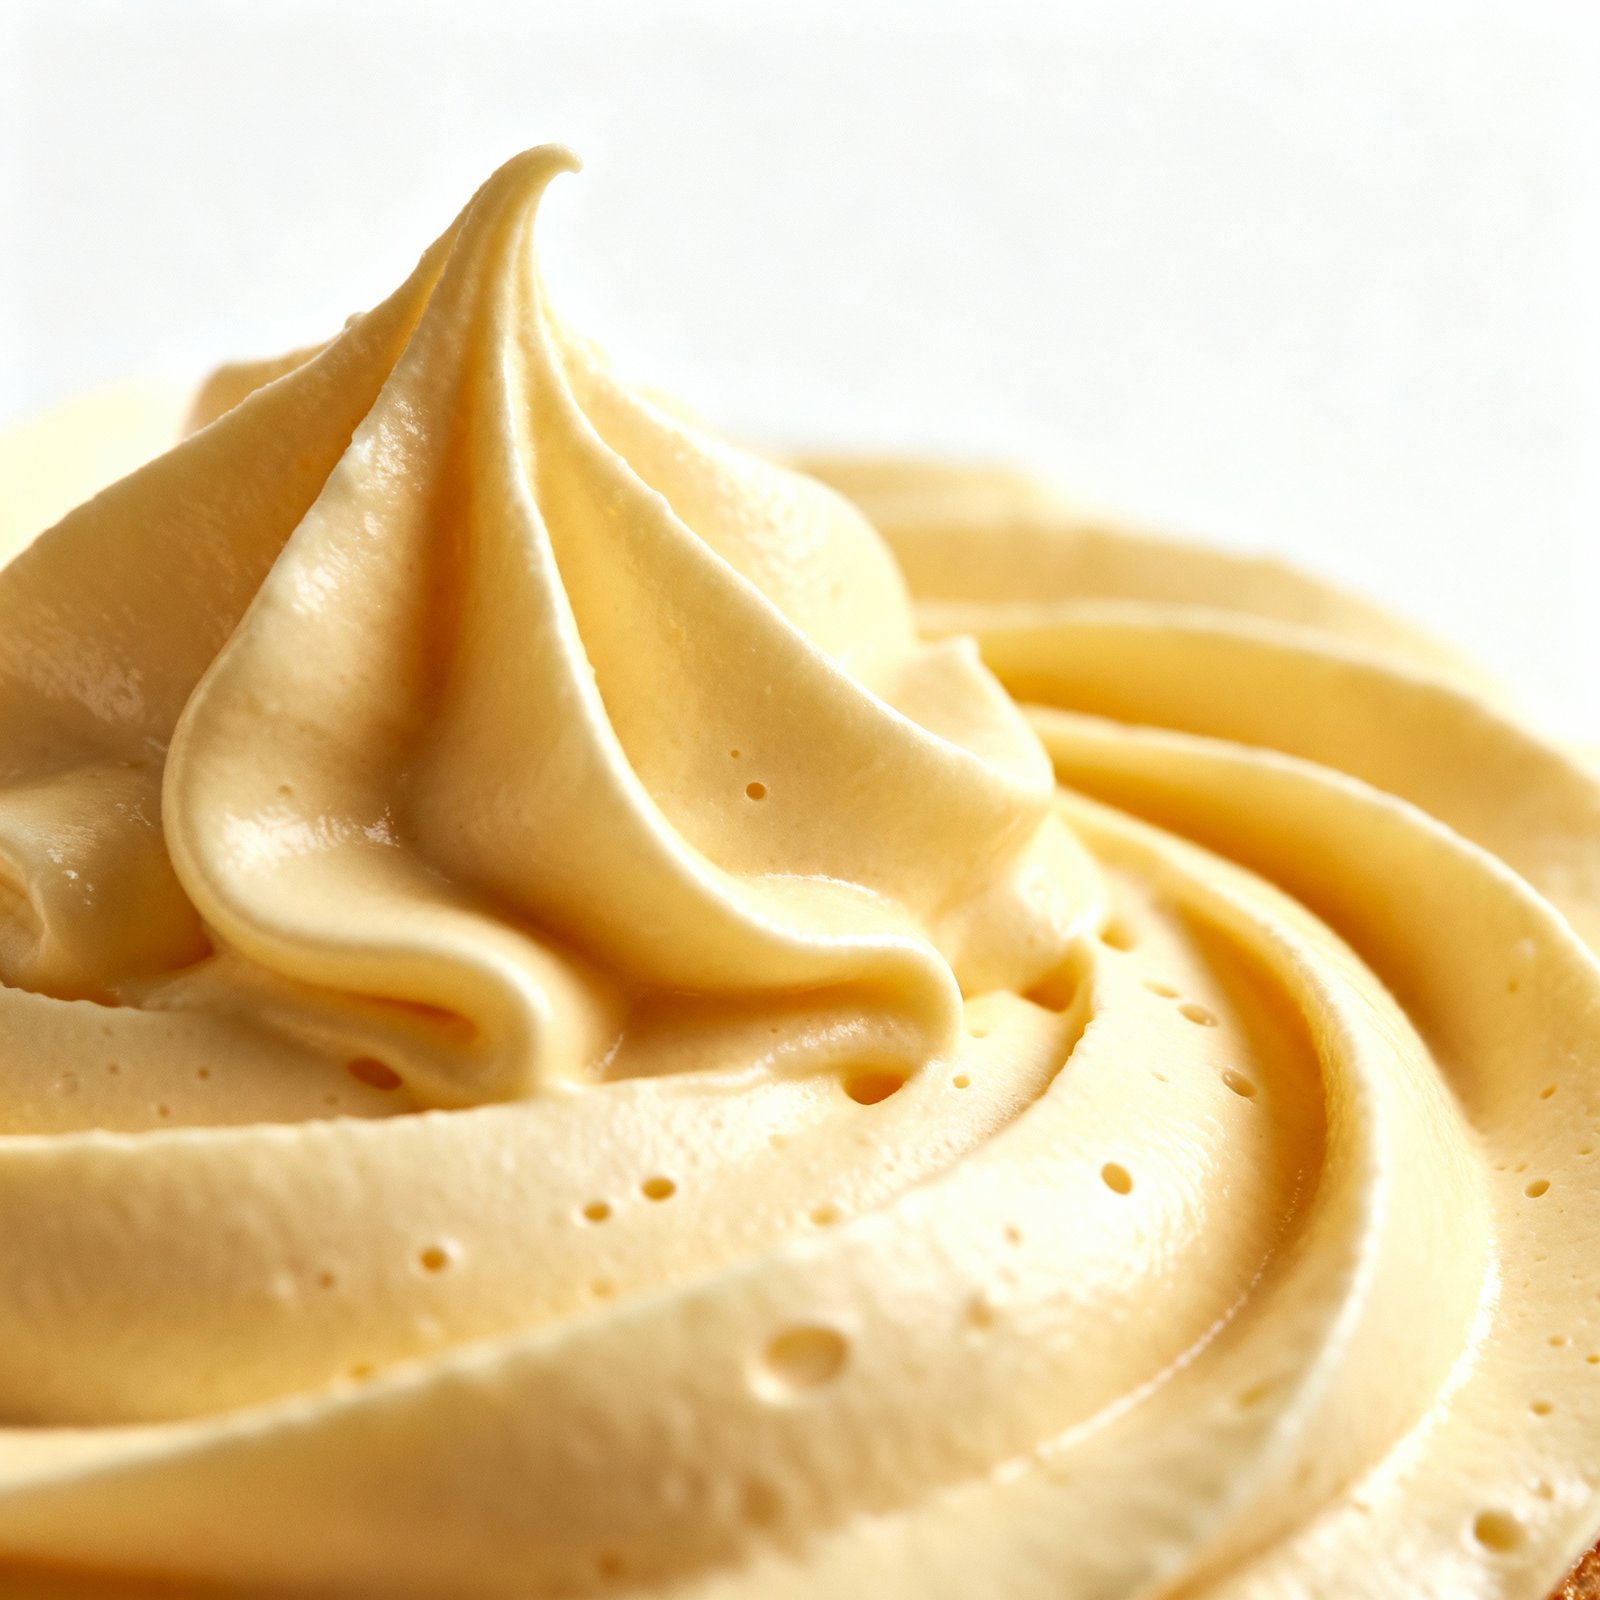
Buttercreme Frosting Recipe: The Silky Smooth Dream
Buttercreme frosting. Just the name evokes images of fluffy clouds of sweetness, perfectly piped onto cupcakes, elegantly swirled on cakes, and dolloped generously on cookies. It’s the quintessential frosting, the foundation upon which countless dessert masterpieces are built. But achieving that perfect, silky-smooth buttercream texture can sometimes feel like a daunting task. Fear not, aspiring bakers! This recipe will guide you through the process, step-by-step, ensuring a buttercream frosting that’s not only delicious but also a dream to work with. Get ready to transform your baked goods into works of art!
Why This Recipe Works
This recipe isn’t just another frosting recipe; it’s a carefully crafted method that prioritizes both flavor and texture. Here’s why it works so well:
- The right butter-to-sugar ratio: We’ve found the sweet spot to balance sweetness and buttery flavor. Too much sugar, and it’s cloyingly sweet; too little, and it lacks structure.
- Room temperature ingredients are key: Softened butter is crucial for creating a smooth, emulsified base. Cold butter will result in lumps, and melted butter will create a greasy frosting.
- The power of whipping: Extended whipping time incorporates air, creating a light and airy frosting that’s easy to spread and pipe.
- Gradual addition of sugar: Adding the powdered sugar gradually prevents a sugary, gritty texture. It allows the butter to fully incorporate the sugar, resulting in a smooth finish.
- Liquid for consistency: Adding a touch of milk or cream allows you to adjust the frosting’s consistency to your liking, making it perfect for spreading, piping, or even filling macarons.
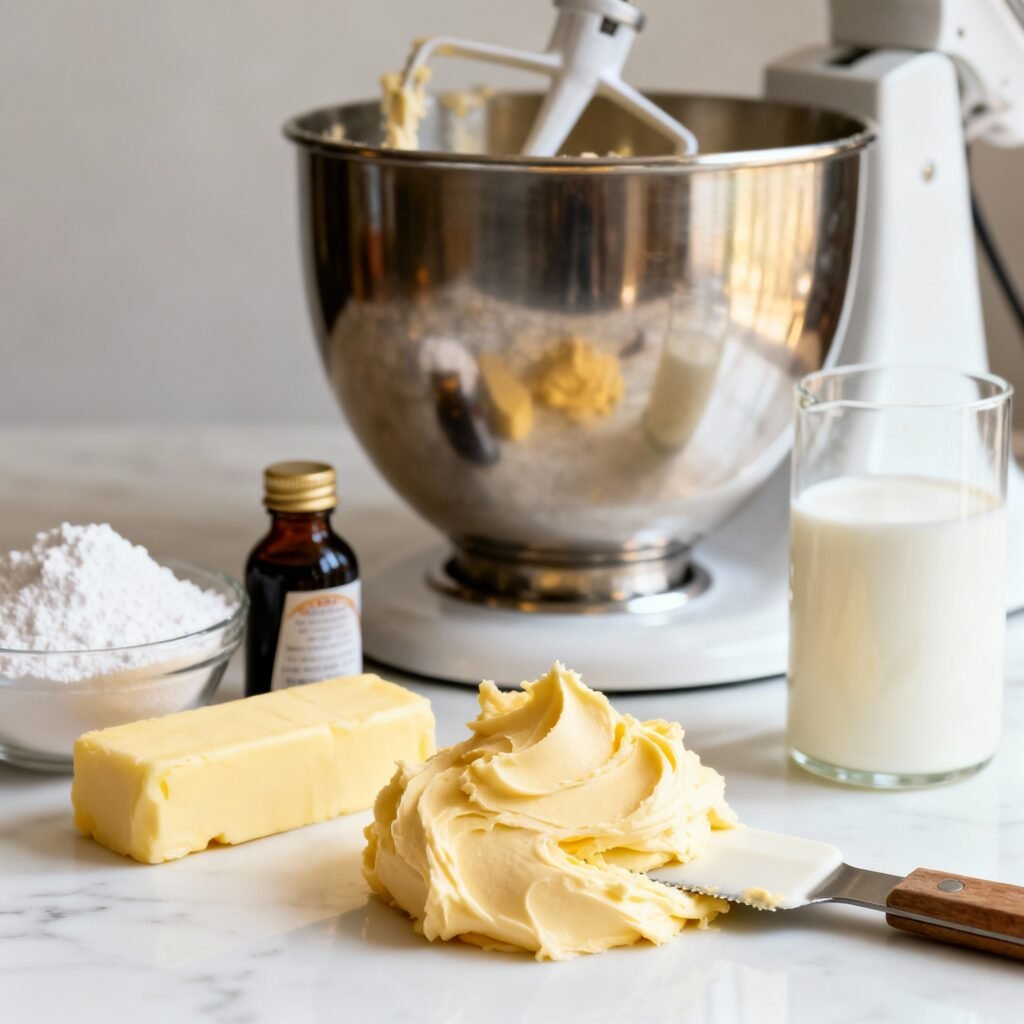
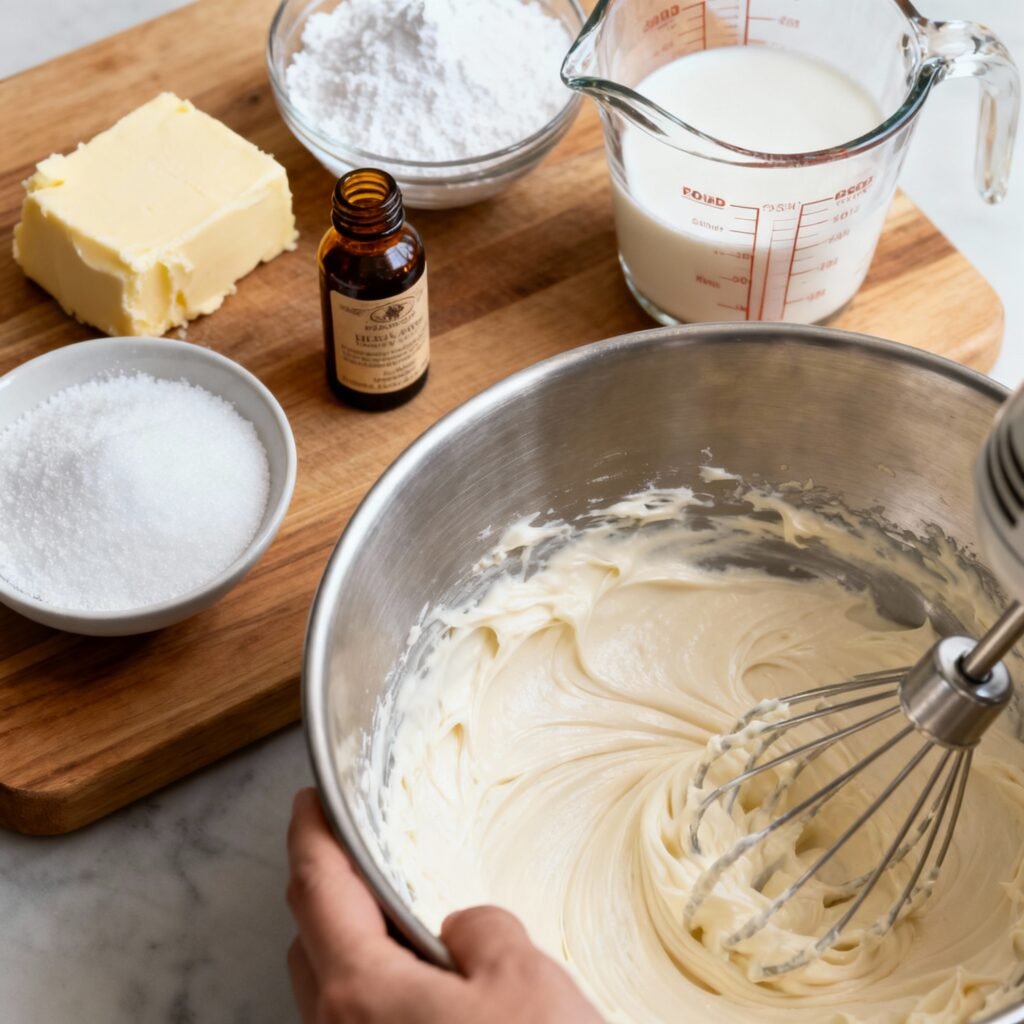
Ingredients
- 1 cup (2 sticks) unsalted butter, softened to room temperature
- 3-4 cups powdered sugar, sifted
- 2-4 tablespoons milk or heavy cream
- 1 teaspoon vanilla extract
- Pinch of salt (optional, but enhances flavor)
Instructions
- Prepare the Butter: Ensure your butter is truly softened. It should be pliable and easily indent with your finger but not melted or greasy. This is the most crucial step!
- Cream the Butter: In a large mixing bowl (or the bowl of a stand mixer fitted with the paddle attachment), beat the softened butter on medium speed for 2-3 minutes, until light and fluffy. This step incorporates air into the butter, which is essential for a light and airy frosting.
- Add the Powdered Sugar (Gradually!): Reduce the mixer speed to low. Gradually add the sifted powdered sugar, one cup at a time, beating well after each addition. Sifting the powdered sugar prevents lumps in your frosting.
- Incorporate the Liquid: Add 2 tablespoons of milk or heavy cream and the vanilla extract. Beat on low speed until just combined.
- Whip to Perfection: Increase the mixer speed to medium-high and beat for 3-5 minutes, or until the frosting is light, fluffy, and smooth. The longer you whip, the airier the frosting will become. Scrape down the sides of the bowl as needed to ensure even mixing.
- Adjust Consistency (If Needed): If the frosting is too thick, add a tablespoon of milk or cream at a time until you reach your desired consistency. If the frosting is too thin, add a little more sifted powdered sugar, a tablespoon at a time, until thickened.
- Taste and Adjust: Taste the frosting and adjust the sweetness or vanilla extract to your preference. Add a pinch of salt to enhance the flavors.
- Use Immediately or Store: The buttercream frosting is now ready to use! Spread it on cakes, pipe it onto cupcakes, or use it as a filling for cookies.
Tips for Success
Here are a few extra tips to ensure buttercream frosting perfection:
- Use High-Quality Butter: The flavor of the butter will shine through in the frosting, so use a good quality unsalted butter.
- Don’t Overmix: Overmixing can incorporate too much air and cause the frosting to become unstable. Mix until just smooth and fluffy.
- Sift, Sift, Sift: Sifting the powdered sugar is essential for preventing lumps and ensuring a smooth texture.
- Room Temperature is Key: Emphasizing this again – room temperature butter is paramount!
- Coloring Your Frosting: Gel food coloring is the best choice for coloring buttercream frosting, as it won’t add excess liquid. Add the coloring gradually, mixing well after each addition, until you achieve your desired shade.
- Flavor Variations: Get creative with your buttercream! Add a teaspoon of lemon zest for a bright citrus flavor, a tablespoon of cocoa powder for chocolate buttercream, or a few drops of peppermint extract for a festive holiday treat.
Storage Instructions
Buttercream frosting can be stored in an airtight container at room temperature for up to 2 days, or in the refrigerator for up to 1 week. Before using refrigerated frosting, allow it to come to room temperature and re-whip it until light and fluffy.
For longer storage, buttercream frosting can be frozen for up to 2 months. Thaw the frosting in the refrigerator overnight and re-whip it before using.
FAQ
Q: My buttercream frosting is too stiff. What should I do?
A: Add a tablespoon of milk or cream at a time until you reach your desired consistency. Be careful not to add too much liquid, or the frosting will become too thin.
Q: My buttercream frosting is too thin. What should I do?
A: Add a tablespoon of sifted powdered sugar at a time until thickened. Be sure to mix well after each addition.
Q: My buttercream frosting is grainy. What did I do wrong?
A: This is usually caused by using cold butter or not sifting the powdered sugar. Make sure your butter is softened to room temperature and that you sift the powdered sugar before adding it to the frosting.
Q: Can I use salted butter instead of unsalted butter?
A: While you *can* use salted butter, the amount of salt can vary greatly between brands. It’s best to use unsalted butter so you can control the salt level yourself. If you use salted butter, omit the pinch of salt in the recipe.
Q: Can I make this recipe vegan?
A: Yes! Substitute the butter with a vegan butter alternative and the milk/cream with a plant-based milk alternative like soy or almond milk. Be sure to choose a vegan butter that’s specifically designed for baking, as some can be too soft.
Conclusion
Congratulations! You’re now equipped with the knowledge and tools to create perfect buttercream frosting every time. With a little practice and patience, you’ll be piping beautiful swirls and creating stunning desserts that will impress your friends and family. So go ahead, grab your ingredients, and get ready to experience the joy of homemade buttercream frosting!