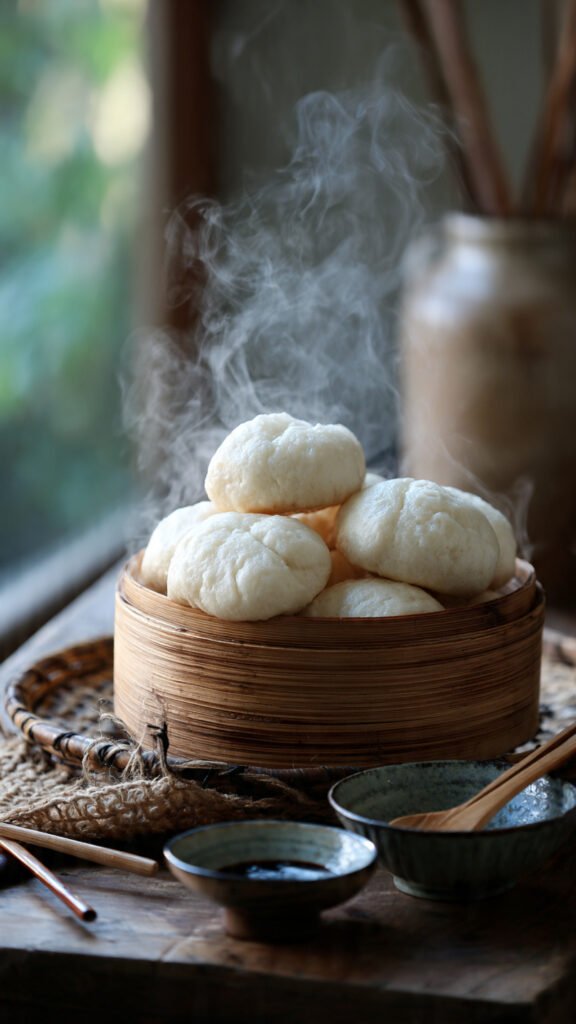
☁️ Fluffy Chinese Buns Recipe: Better Than Takeout! (Easy Steamed Bao)
Okay, listen up. You’re craving those impossibly fluffy, slightly sweet, pure-comfort steamed buns you get at dim sum, right? The ones that practically deflate when you squeeze them and bounce right back? Same.
But let’s be real: sometimes putting on real pants to go to a restaurant is just too much asking. The good news? You don’t need a culinary degree or a terrifyingly hot wok to make them at home. You just need some patience, some flour, and this Chinese buns recipe. Let’s make some carb magic happen.
Why This Recipe is Awesome
Look, I’ve tried a lot of bread recipes that promise “easy” results and end up tasting like drywall. This isn’t one of them. This is the holy grail base recipe for steamed buns (often called Mantou when plain, or used as the dough for Baozi when filled).
Here’s why you’re going to be obsessed with this specific method:
1. The Texture is Ridiculous. We aren’t aiming for “dense and chewy” here. We are aiming for ethereal. When done right, the interior of these buns should look almost like super-fine sandwich bread, but with a moisture and bounce that baked bread just can’t achieve. Steaming cooks the dough gently (around 212°F/100°C), unlike the violent heat of an oven (350°F+). This means the starches gelatinize differently, keeping things soft instead of forming a hard crust. It’s basically a spa treatment for dough.
2. It’s Surprisingly Forgiving. If the idea of working with yeast makes you want to hide under the covers, don’t panic. Unlike a crusty sourdough that requires sacrificing a goat to the fermentation gods, this dough is pretty chill. Because we want a soft, tender crumb rather than massive airy holes, the kneading process is straightforward, and the proofing times are flexible. It’s hard to mess this up too badly unless you actively try to kill the yeast with boiling water.
3. The Versatility Factor. Think of this recipe as your blank canvas.
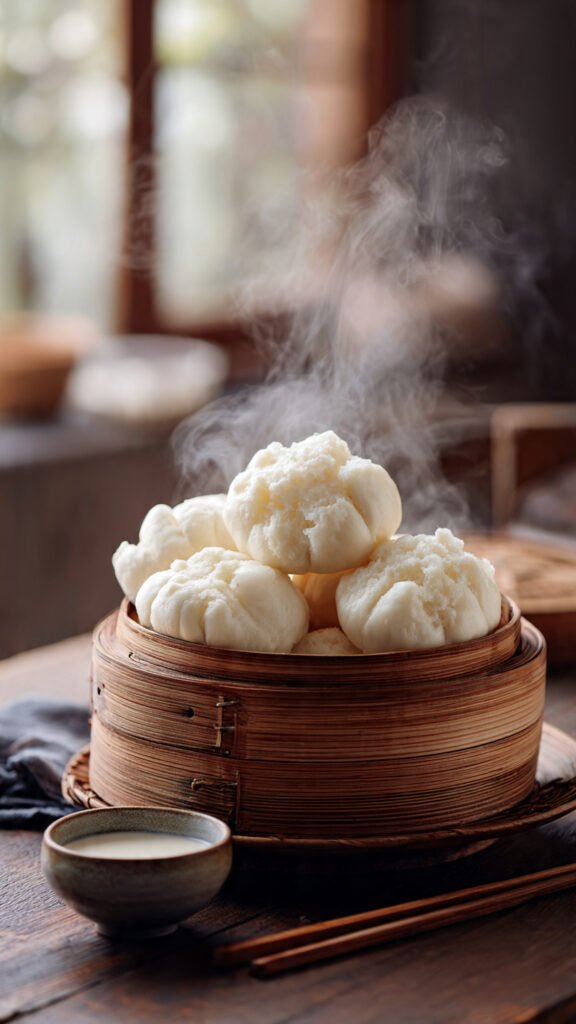
- Eat them plain: Fresh out of the steamer, maybe dipped in a little condensed milk if you’re feeling naughty? Heaven.
- Make sandwiches: Shape them into those folded “Gua Bao” shapes and stuff them with pork belly, fried chicken, or tofu.
- Fill them later: Once you master this dough, you can start stuffing them with BBQ pork (Char Siu Bao) or sweet red bean paste before steaming.
4. It’s Oddly Therapeutic. There is something deeply satisfying about transforming a shaggy mess of flour and water into a smooth, satiny ball of dough that feels like a baby’s cheek. (Weird comparison? Maybe. Accurate? totally.) Slapping that dough around on the counter is better than stress balls, FYI.
Ingredients You’ll Need
We aren’t dealing with obscure ingredients here. You probably have most of this stuff in your pantry right now looking sad and unused.
- All-Purpose Flour: The backbone of our operation. You don’t need fancy bread flour here; in fact, bread flour can sometimes make these too chewy. Some pros use low-protein cake flour for ultra-whiteness, but good ol’ AP flour works perfectly fine and tastes better, IMO.
- Instant Yeast: Notice I said Instant. Not “Active Dry.” Instant yeast is the low-maintenance friend who is ready to party immediately without needing to be “bloomed” in water first. It just makes life easier.
- Warm Water (or Milk): The liquid activator. Milk makes for a slightly richer, whiter bun, while water is cleaner and more traditional for plain Mantou. Use whatever you have. Crucial: It needs to be lukewarm (think cozy bathwater), around 105°F to 110°F. Too hot, and you commit yeasticide.
- Sugar: This isn’t just for sweetness (though a little sweetness is characteristic of Chinese buns). Sugar is literal food for the yeast, helping it wake up, fart out carbon dioxide, and make your buns puffy.
- Neutral Oil: A tablespoon or two of vegetable, canola, or avocado oil helps lubricate the gluten strands, making the final bun tender rather than tough.
- Baking Powder: Wait, yeast AND baking powder? Yes. This is a common trick in Asian steamed bun recipes. The baking powder provides an extra little chemical lift during the steaming process, acting as insurance against dense buns.
- A Pinch of Salt: Just to balance the flavors so it doesn’t taste flat.
Step-by-Step Instructions
Ready to get your hands dirty? Let’s do this.
Step 1: The Awkward Mixing Phase Grab your biggest mixing bowl. Toss in the flour, sugar, instant yeast, baking powder, and salt. Give it a quick whisk to ensure the yeast isn’t clumped together. Pour in your lukewarm liquid (milk or water) and the oil. Use a sturdy spatula or chopsticks to stir it up into a shaggy, messy dough. It won’t look pretty yet. That’s okay.
Step 2: The Workout (Kneading) Once the dough has mostly come together in the bowl, dump it onto a clean counter. You don’t need mountains of extra flour for dusting; this dough shouldn’t be overly sticky.
Now, knead. Push the dough away with the heel of your hand, fold it back over, turn it slightly, and repeat. We are developing gluten here—organizing those wheat proteins into a stretchy network that will trap the gas the yeast creates.
- How long? About 8–10 minutes of solid effort.
- The Goal: You want a dough that is incredibly smooth, pliable, and passes the “poke test.” Poke it gently with your finger; if it slowly springs back, you’re golden. It should feel tacky but not stick to your hands.
Step 3: The First Rise (The Nap) Lightly oil your mixing bowl and plop the dough ball back in, rolling it around to coat it. Cover the bowl with plastic wrap or a damp towel. Find a warm spot in your kitchen—on top of the fridge or inside a turned-off oven with the light on works wonders.
Let it rise until it’s double in size. This usually takes 60 to 90 minutes, depending on how cold your kitchen is. Don’t rush this. The yeast is working hard developing flavor and structure. It’s ready when you push two fingers in, and the indentation stays put without collapsing.
Step 4: De-gassing and Shaping This part is fun. Punch the dough down to release the big air bubbles. Turn it out and knead it gently for another minute or two to redistribute the yeast. This “de-gassing” step is vital for getting that fine, uniform, fluffy interior crumb instead of big, uneven holes.
Divide the dough into equal pieces (I usually do 10–12 for medium buns). Roll each piece into a smooth, tight ball. To get a smooth surface, cup your hand over the dough ball gently on the counter and move your hand in rapid circles.
Tip: Place each shaped bun on a small individual square of parchment paper. This is your life raft for getting them in and out of the steamer later without them sticking to everything.
Step 5: The Second Rise (The Puff) Place your shaped buns (on their little paper squares) into your steamer baskets, leaving at least an inch or two between them because they will grow. Cover them and let them proof again for about 20–30 minutes. They should look noticeably puffy and feel light to the touch. If you skip this, your buns will be dense bullets.
Step 6: The Steam Sauna Get a wok or large pot of water boiling. Once it’s a rolling boil, turn the heat down to medium-high—you want steady steam, not a violent volcanic eruption.
Stack your steamer baskets on top. Put the lid on. set a timer for 12–15 minutes. Do not lift the lid. Do not peek. Trust the process.
Step 7: The Most Crucial Step (The Cool Down) When the timer goes off, turn off the heat. STOP! DO NOT OPEN THE LID.
This is where 90% of rookie bun-makers fail. If you rip that lid off immediately, the sudden rush of cold kitchen air hitting the hot, delicate buns will cause them to shock and collapse, turning your beautiful fluffy clouds into sad, wrinkly prunes.
Let the buns sit in the steamer, off the heat, with the lid cracked open just a tiny sliver (stick a chopstick under the lid) for 5 minutes. This allows them to cool slowly and equalize pressure.
Now you can open it. Behold your magnificent creation.
Common Mistakes to Avoid
Even the best of us mess up. Here’s how to avoid the dreaded “sad bun” syndrome:
- The “Hot Tub” Incident: Using water that is too hot and killing your yeast before it even started. If the water feels hot to your wrist, it’s too hot for the yeast.
- The “Wrinkly Prune” Effect: We just covered this, but it bears repeating: opening the steamer too fast after cooking. Patience, grasshopper.
- The “Drip of Doom”: If you are using a metal steamer instead of bamboo, condensation will collect on the underside of the lid and drip onto your buns, creating weird, blistered spots. The Fix: Tie a clean kitchen towel tightly around the inside of the metal lid to absorb the moisture. Bamboo steamers naturally absorb moisture, so they don’t usually have this issue.
- Over-proofing: Leaving the dough to rise for too long (like, forgetting it for 4 hours). The yeast runs out of food, the gluten structure weakens, and the buns will taste sour and collapse when steamed.
Alternatives & Substitutions
- Can I make them vegan? Absolutely. Just use water or unsweetened plant milk (soy or oat work great) instead of dairy milk. The recipe is already egg-free.
- I don’t have a bamboo steamer! No sweat. You can use a metal steamer basket insert in a big pot. Or, in a pinch, rig up a heat-proof plate sitting on three balls of aluminum foil inside a large Dutch oven with a little water in the bottom. Just make sure the plate isn’t touching the water.
- Can I make whole wheat buns? Ezh. Technically yes, but they won’t be fluffy clouds. Whole wheat flour cuts through gluten strands. If you must, try substituting only 25% of the white flour with whole wheat flour so you don’t end up with savory bricks.
FAQ (Frequently Asked Questions)
Q: My buns came out yellowish instead of white. What gives? A: This can happen for a few reasons. Sometimes unbleached flour lends a creamy color. Sometimes it’s over-proofing. Often, it’s because your steaming water was too alkaline (common with tap water). A tiny splash of vinegar in the steaming water can sometimes help keep them whiter.
Q: Can I freeze these? A: Yes! These freeze amazingly well. Steam them completely, let them cool, then bag them up airtight. When the craving hits, re-steam them straight from frozen for about 8–10 minutes until heated through. Meal prep win.
Q: Why is the skin of my bun bumpy and ugly? A: Usually, this means you didn’t knead the dough long enough to get it perfectly smooth before shaping, or you didn’t “de-gas” the dough thoroughly enough before the second rise. Those big air bubbles push out and create bumps.
Q: Do I really need the parchment paper squares? A: Only if you enjoy scraping sticky dough remnants off your steamer basket while crying. Yes, use the paper. You can also use flattened cupcake liners or even cabbage leaves!
Final Thoughts
There is honestly nothing quite like breaking open a steaming hot, homemade bun that you made with your own two hands. It’s a major kitchen flex.
Don’t get discouraged if your first batch isn’t picture-perfect. They will still taste amazing, and practice really does make perfect with yeasted doughs. You start to get a feel for when the dough is “happy.”
Now go forth, flour your counter, and impress someone—or just yourself—with your new culinary skills. You’ve earned those carbs!