🪱 Best Ever Dirt Cup Recipe: Easy No-Bake Dessert
So, you’re craving something sweet, chocolatey, and strictly comforting, but you are absolutely too lazy to preheat an oven or deal with measuring flour? Same. Honestly, mood.
Welcome to the safe space of low-effort, high-reward desserts. We aren’t making a soufflé here. We aren’t tempering chocolate. We are making the undisputed king of 90s cafeteria cuisine and birthday parties: the Dirt Cup Recipe.
If you didn’t grow up eating pudding covered in crushed cookies with a gummy worm sticking out of it, I’m sorry for your loss, but we are going to fix that childhood trauma right now. This isn’t just a dessert; it’s a cup of pure serotonin. Whether you’re five years old or thirty-five and strictly needing a mental health chocolate break, this recipe is the answer.
Why This Recipe is Awesome
Look, I could just say “it has chocolate,” and that should be enough. But let’s really break down why this specific dirt cup recipe deserves a spot in your regular rotation (and your heart).
1. It’s The Ultimate “I Can’t Bake” Hack If you have burned water before, this recipe is for you. It is entirely no-bake. It requires zero heat source unless you count the friction of you aggressively crushing Oreos. It is legally impossible to mess this up unless you, like, drop the bowl on the floor. And even then… 5-second rule? (Kidding. Mostly.)
2. The Textural Symphony Let’s get a little fancy for a second. Culinary school graduates talk about “mouthfeel.” Well, this dirt cup recipe has elite mouthfeel. You have the creamy, velvety smoothness of the pudding mixture, the airy fluffiness of the whipped topping, and then—BAM—the gritty, satisfying crunch of the cookie crumbs. And then, the chewy resistance of the gummy worm. It hits every sensory button in your brain.
3. Nostalgia is a powerful spice One bite of this takes you back to a simpler time. A time when your biggest worry was whether you’d get the blue Scooby-Doo fruit snack or the red one. Making these for a party instantly makes you the coolest person in the room. It tells your guests, “I’m fun, I’m relaxed, and I’m not afraid of high-fructose corn syrup.”
4. Speed Demon From start to finish, you can have this ready in about 15 minutes. Maybe 20 if you get distracted eating the ingredients while you work (which is a required step, IMO).
5. Customizable Chaos While the classic version is sacred, this recipe is a blank canvas. Want to make it a beach theme? Use vanilla pudding and Golden Oreos. Want to make it “adult”? A splash of coffee liqueur never hurt anyone. We will get into substitutions later, but just know: the world is your oyster. Or, in this case, your gummy worm.
Ingredients You’ll Need
Here is your shopping list. It’s short, sweet, and incredibly processed. Just how we like it.
- Instant Chocolate Pudding Mix (1 Box, 3.9 oz): Do not—I repeat, do NOT—get the “cook and serve” kind. We do not have time for stovetops. We need the instant gratification of the instant powder.
- Cold Milk (2 Cups): Whole milk creates the creamiest texture. You can use 2% or skim, but the pudding might be a little thinner. If you use almond or soy milk, just know the pudding might not set as firmly (science is rude like that).
- Cool Whip (1 Tub, 8 oz, Thawed): Yes, the stuff in the blue tub. Could you whip your own heavy cream with vanilla and sugar? Sure, if you want to be an overachiever. But the stabilized oil-based magic of Cool Whip holds up better over time.
- Oreos (1 Package): Or “chocolate sandwich cookies” if you’re balling on a budget. You need the crème filling included; don’t scrape it out! That sugary lard is essential for binding the “dirt.”
- Gummy Worms (1 Bag): The classic neon ones. Sour worms are controversial here—some people love the tang against the chocolate, others think it’s a crime against humanity. You do you.
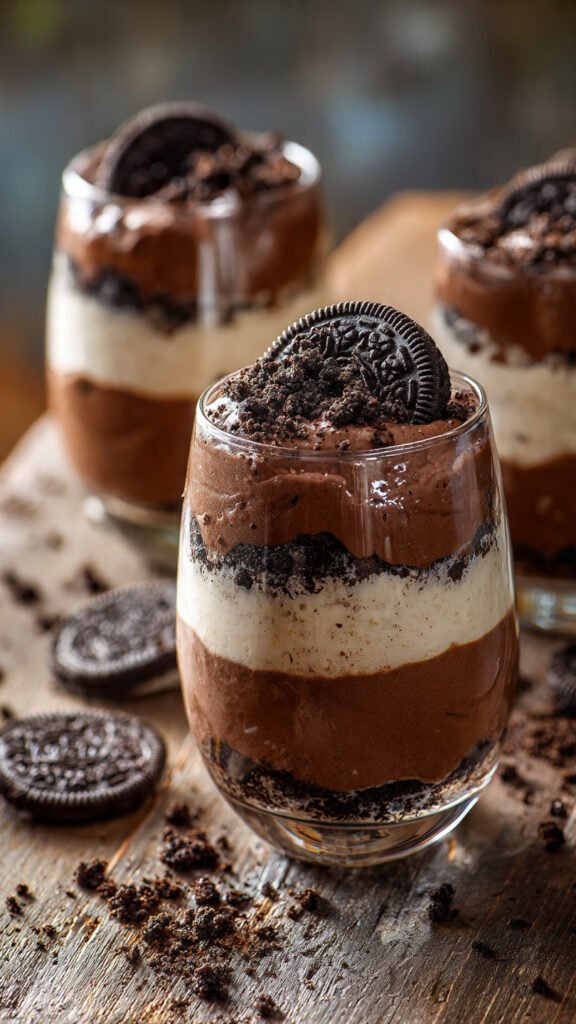
- Clear Plastic Cups (8-10): You need to see the layers! Seeing the dirt stratification is half the fun. 9oz cups are the sweet spot—big enough to be satisfying, small enough that you don’t go into a diabetic coma.
Step-by-Step Instructions
Alright, apron on (just kidding, you don’t need an apron). Let’s get dirty.
1. The Great Crush
We need to turn those cookies into soil. You have two options here, depending on your aggression levels:
- The “Therapy” Method: Put the Oreos (creme and all!) into a large gallon-sized Ziploc bag. Seal it tight—double check this, or you will have cookie dust in your eyebrows. Take a rolling pin, a heavy frying pan, or just your fists, and smash those cookies. You want a mix of fine dust and small chunks for texture.
- The “I Have Appliances” Method: toss them in a food processor and pulse a few times. Don’t turn them into powder; keep it a little chunky. Set these crumbs aside.
2. The Pudding Alchemy
In a large mixing bowl, dump your instant pudding mix. Pour in that cold milk.
- Whisk it like you mean it: Whisk vigorously for about 2 minutes. You’ll feel the physics changing in your hand—the mixture will start to drag and thicken as the modified food starch hydrates.
- Let it sit for about 5 minutes to fully “set” into a pudding consistency. Do not skip the resting period; patience is a virtue, even for pudding.
3. The Fluff Factor
This is the secret to why this dirt cup recipe is better than the cafeteria sludge. We are lightening the load.
- Take your thawed Cool Whip and gently fold it into the chocolate pudding.
- Technique Tip: “Folding” means scooping from the bottom and pulling over the top. Do not aggressively whisk it, or you will knock all the air bubbles out of the Cool Whip and lose that mousse-like texture. You want a uniform, light brown, fluffy cloud.
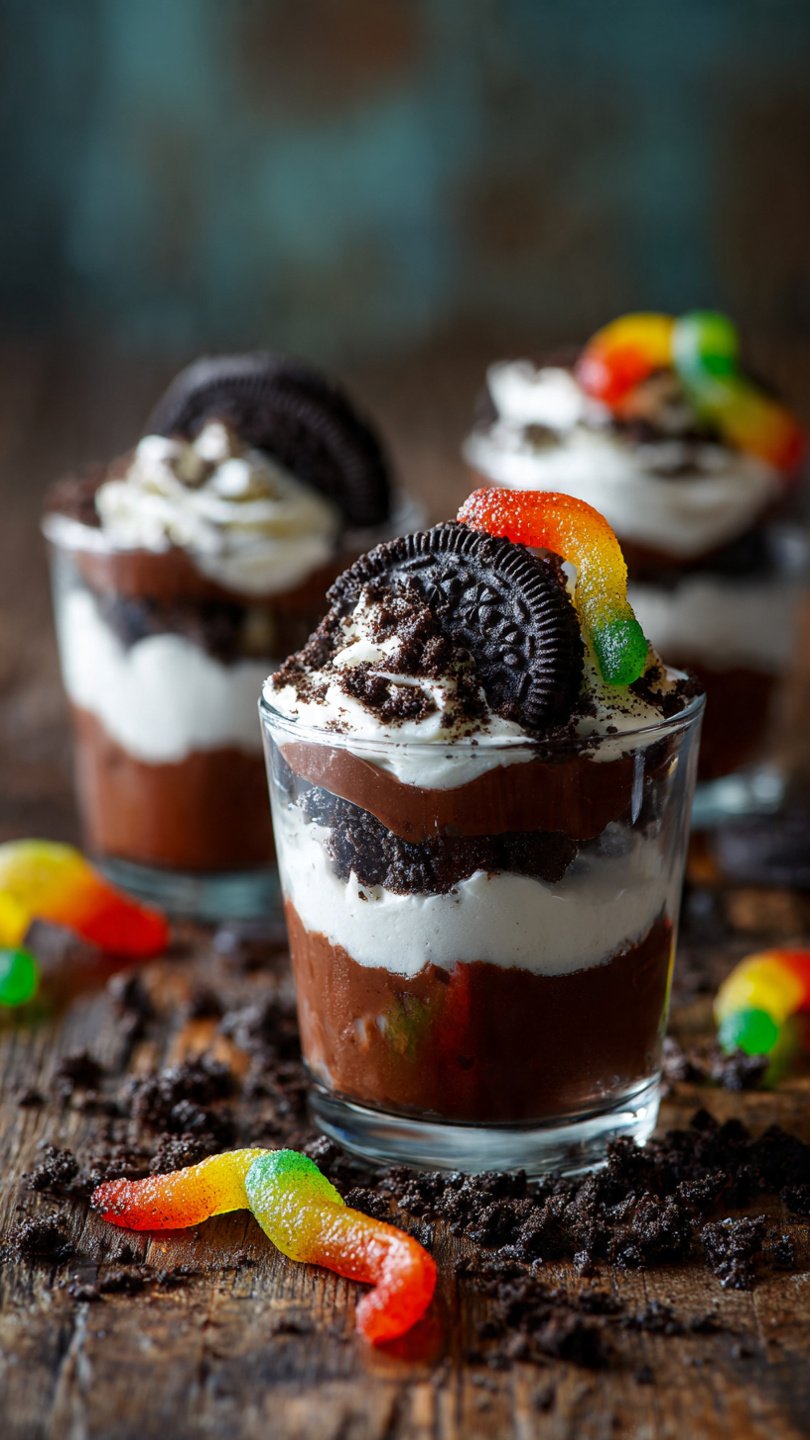
4. Construction Time
Now, we assemble the architecture of the cup.
- Base Layer: Spoon about a tablespoon of crushed Oreos into the bottom of each cup. This is the bedrock.
- The Mud: Spoon (or pipe, if you’re feeling fancy) the pudding/Cool Whip mixture on top of the crumbs until the cup is about 3/4 full.
- Topsoil: Generously—and I mean generously—cover the top of the pudding with the remaining Oreo crumbs. You shouldn’t see any pudding peeking through. It should look like a cup of actual dirt.
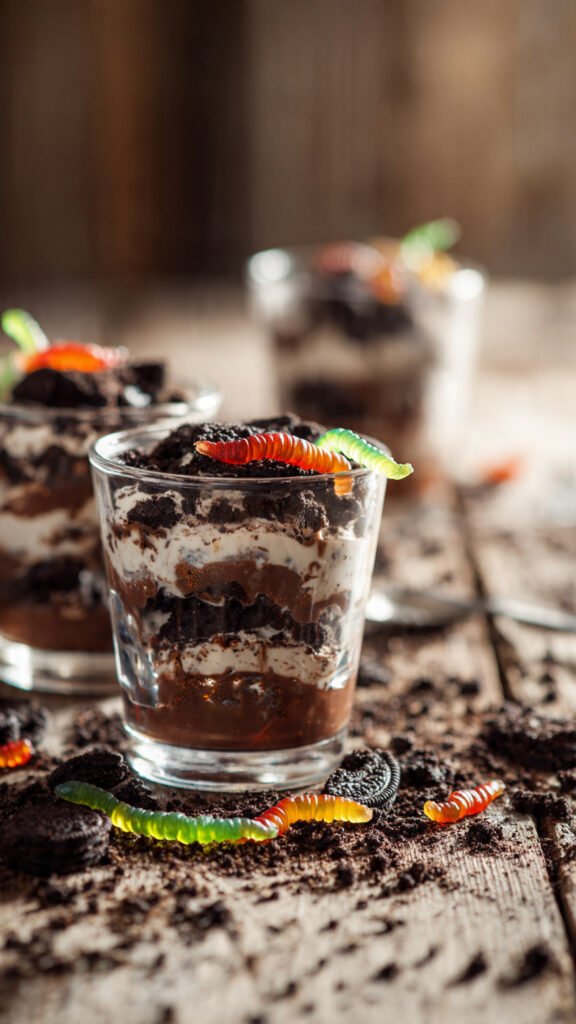
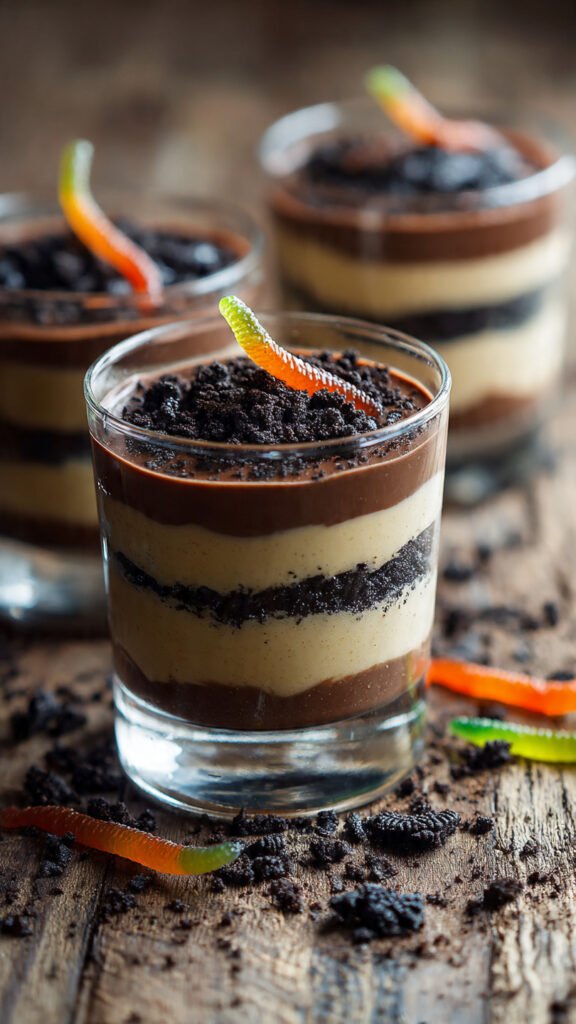
5. The Wildlife
The final touch. Take your gummy worms and stick them into the dirt.
- Styling Tip: Have some worms burrowing halfway out, some just draping over the side. Make it look like a distinct ecosystem.
Chill Out (Optional but Recommended): You can eat them immediately, but if you let them chill in the fridge for an hour, the cookies soften slightly (becoming cake-like) and the pudding firms up. It elevates the experience from “snack” to “dessert.”
Common Mistakes to Avoid
Even though I said this is idiot-proof, life finds a way. Here is how to avoid a pudding disaster.
- The “Frozen Whip” Fiasco: Trying to fold frozen Cool Whip into pudding results in lumpy, sad sludge. You must thaw it in the fridge beforehand. If you try to microwave it to thaw it, it will turn into soup. Don’t do it.
- The Milk Mistake: Using warm milk or a milk alternative with too little protein can result in runny pudding. If you are using almond milk, look for a pudding box that specifically says it works with non-dairy, or use less liquid (1.5 cups instead of 2).
- Premature Assembly: If the pudding hasn’t set before you start layering, the heavy Oreo crumbs will just sink to the bottom, and you won’t get that distinct “dirt” layer on top. It’ll just be mud. Which is fine, but less aesthetically pleasing.
- The “Healthy” Oreo: Do not buy “Thins.” You need the volume and the crème ratio of the standard Oreo or Double Stuf. Thins just don’t yield enough dirt per capita.
Alternatives & Substitutions
Variety is the spice of life, even in the dirt.
- The “Sand Cup” (Beach Theme): Swap chocolate pudding for vanilla or banana pudding. Swap chocolate Oreos for Golden Oreos (vanilla). Use cocktail umbrellas and gummy bears instead of worms. Boom, you’re in the Bahamas.
- The “Graveyard” (Halloween): Use rectangular cookies (like Milanos) to write “RIP” on with icing gel. Stick them in the dirt like tombstones. Add candy pumpkins. Spooky and delicious.
- The Grown-Up Dirt Cup: Okay, hear me out. Mix a shot of Baileys Irish Cream or Kahlúa into the pudding mixture before folding in the whip. It adds a depth of flavor that cuts the sweetness. (Obviously, label these clearly so the kids don’t get the “happy” pudding).
- Dairy-Free/Vegan: Use almond milk (reduce liquid amount), a dairy-free whipped topping (CocoWhip is great), and check your gummy worms (some have gelatin, which isn’t vegan—Swedish Fish are usually a safe vegan alternative for the “creature”). Oreos are accidentally vegan, so you’re good there!
FAQ (Frequently Asked Questions)
1. Can I make these ahead of time? Absolutely. In fact, they are better the next day. The crumbs absorb some moisture and become like a soft cake. Just don’t go past 3 days, or the worms get weirdly hard and the dirt gets too soggy.
2. Can I use real whipped cream instead of Cool Whip? You can, but real whipped cream deflates faster. If you are eating them immediately, go for it. If they need to sit in the fridge for a party, stick to the stabilized oil-stuff (Cool Whip).
3. Do I have to use gummy worms? Technically no, but why do you hate fun? If worms gross you out, you can use gummy bears, chocolate rocks, or even a sprig of mint if you want to trick people into thinking you’re growing a plant.
4. Can I freeze these? Actually, yes! Frozen dirt cups are like pudding pops. Just let them thaw for 10 minutes before eating so you don’t crack a tooth on a frozen gummy worm.
5. Is this recipe healthy? Next question, please. (But seriously, no. It is sugar and joy. That is good for the soul, which is a type of health, right?)
6. My pudding is runny! What did I do? You probably used a milk alternative or didn’t whisk long enough. You can try to save it by adding a little more pudding powder or just freezing it and calling it a “milkshake cup.”
Final Thoughts
And there you have it. The Dirt Cup Recipe that will make you the hero of the potluck, the ruler of the bake sale, or just the happiest person on your couch on a Friday night.
It’s messy, it’s sugary, and it looks like something you dug out of the backyard—which is exactly why it’s perfect. Life is complicated enough; your dessert shouldn’t be.