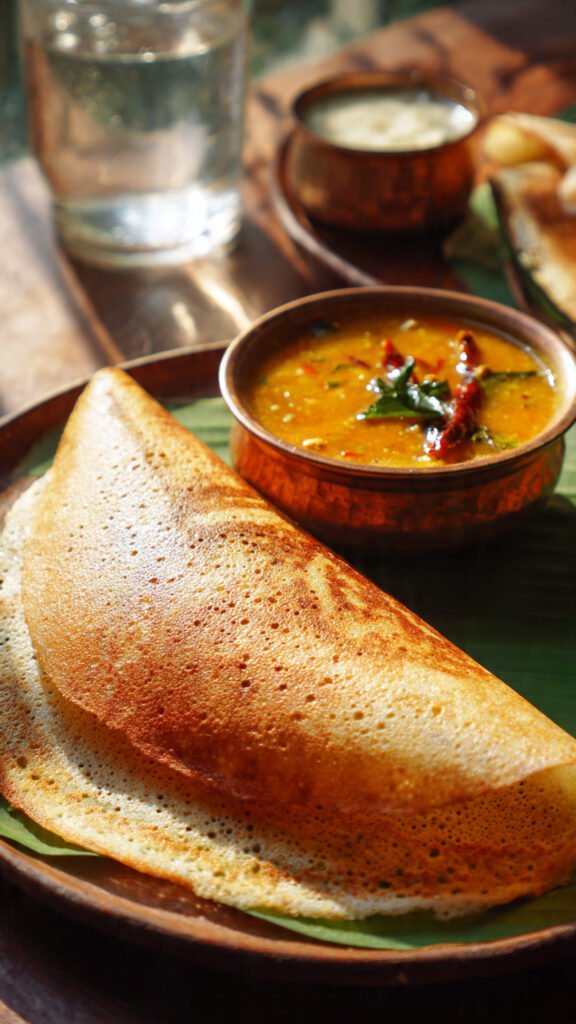
🥞 Dosa Sambhar Recipe: The Ultimate South Indian Duo
Okay, pop quiz: What is golden, crispy, taller than a toddler, and smells like heaven? If you said “my golden retriever standing on his hind legs,” you’re cute, but wrong. The answer is Dosa. And what is Dosa without its spicy, tangy, soul-warming best friend, Sambhar? Nothing. It’s just a lonely crepe.
So you’re craving something tasty but too lazy to spend forever in the kitchen, right? Or maybe you’ve stared at those massive, paper-thin dosas at restaurants and thought, “There is literally no way I can make that physics-defying circle of joy at home.”
Well, grab an apron and prepare to be wrong.
We are going to tackle the holy grail of South Indian breakfast (or dinner, let’s be real): the Dosa Sambhar recipe. Is it a quick 5-minute meal? No. Good things take time. Is it worth every second of soaking and waiting? Absolutely. By the end of this, you’ll be swirling batter like a pro and dunking crispy goodness into a bowl of spicy lentil stew that you made from scratch. Let’s do this.
Why This Recipe is Awesome
Look, I’m not here to sell you a dream that doesn’t exist. Making dosa batter from scratch is a commitment. It’s like getting a puppy—lots of work upfront, but then it brings you joy for days. Here is why this specific Dosa Sambhar recipe is going to change your life (and your weekend brunch game).
1. The Texture is Unmatched We aren’t making limp, sad pancakes here. We are aiming for that restaurant-style glass-shattering crunch on the outside with that slightly spongy, fermented tang on the inside. The ratio of rice to lentils in this recipe is scientifically tweaked to ensure you get that golden-brown roast without turning the dosa into a rock.
2. It’s Accidentally Healthy Did you know dosa is a fermented food? That means it’s basically a spa day for your gut microbiome. It’s gluten-free, packed with protein from the lentils, and easier to digest than that bagel you were eyeing. Plus, the Sambhar is essentially a “clean out the fridge” veggie stew loaded with turmeric and tamarind. It’s health food masquerading as comfort food.
3. The “I Made This” Factor There is a specific type of swagger you get when you successfully ferment your own batter. When you see that batter rise up fluffy and aerated after a night on the counter, you feel like a wizard. Serving this to friends isn’t just serving dinner; it’s a flex. You are saying, “Yes, I harnessed the power of wild yeast and time to feed you. You’re welcome.”
4. The Sambhar is Forgiving While the dosa requires some precision, the Sambhar is the chill cousin at the party. Did you add too many carrots? Fine. Forgot the drumsticks (the veg, not the instrument)? No worries. It absorbs flavor like a sponge. This recipe gives you a Sambhar that strikes the perfect balance between the sourness of tamarind, the heat of chilies, and the earthiness of lentils.
Ingredients You’ll Need
Don’t panic. The list looks long, but half of it is spices you probably have hiding in the back of your cabinet.
The Dosa Batter (The Foundation)
- Idli Rice or Parboiled Rice: You need the short, fat grains. Basmati is not invited to this party (it lacks the starch needed for fermentation).
- Raw Rice (Sona Masoori): A mix of parboiled and raw rice gives the best texture.
- Urad Dal (Whole Skinless Black Gram): This is the backbone. It provides the fluffiness.
- Chana Dal (Bengal Gram): Just a handful. Pro Tip: This is the secret ingredient that gives the dosa its golden-red color.
- Fenugreek Seeds (Methi): These are non-negotiable. They aid fermentation and give that distinct aroma.
- Salt: Non-iodized is best for fermentation, but table salt works if you aren’t picky.
- Water: For soaking and grinding.
The Sambhar (The Flavor Bomb)
- Toor Dal (Split Pigeon Peas): The standard lentil for sambhar.
- Vegetables: Drumsticks (moringa), carrots, pumpkin, radish, okra, or pearl onions. Use what you have, but don’t skip the onions.
- Tamarind: A lemon-sized ball soaked in water (or prepared tamarind paste). This brings the zing.
- Tomato: For body and acidity.
- Turmeric Powder: For that vibrant yellow glow.
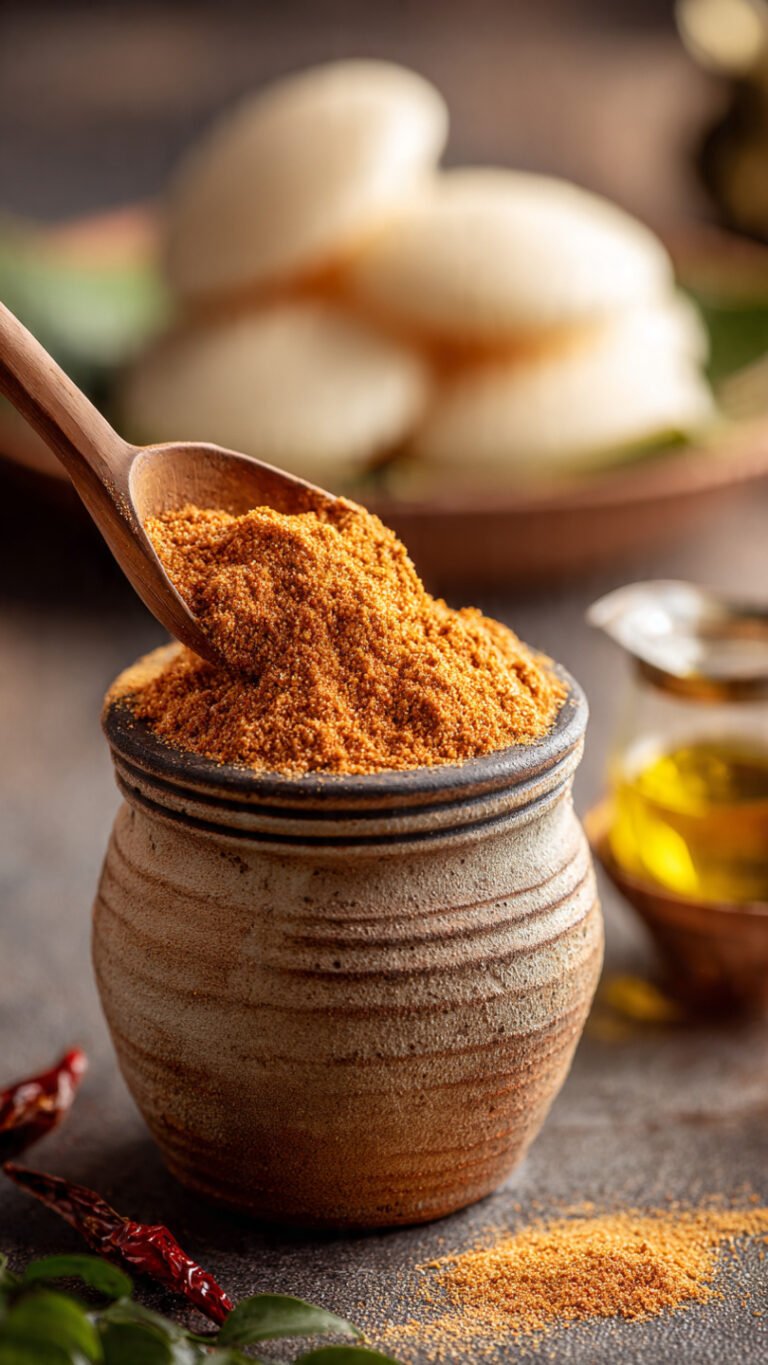
- Sambhar Powder: You can buy this pre-made (MTR or Everest brands are solid), or make your own. For the sake of your sanity, store-bought is totally fine today.
- Jaggery (or Brown Sugar): A tiny pinch to balance the sour and spicy.
The Tempering (The Tadka – crucial finish!)
- Oil or Ghee: Ghee is superior. I don’t make the rules.
- Mustard Seeds: They need to pop!
- Curry Leaves: Fresh is best. If you use dried, I will judge you silently.
- Dried Red Chilies: For the smoky heat.
- Asafoetida (Hing): The smell is… strong. But it adds that “umami” onion-garlic flavor without the bulk.
Step-by-Step Instructions
We are breaking this down into phases because we aren’t heathens.
Phase 1: The Batter (Start this the day before!)
- The Great Soak: In one large bowl, wash your rice (both types) thoroughly until the water runs clear. In a separate bowl, wash the Urad Dal, Chana Dal, and Fenugreek seeds. Soak the rice and the dal mixture in plenty of water for at least 4 to 6 hours. Go live your life. Watch a movie.
- The Grind: Drain the water (but keep some of the dal soaking water—it helps fermentation). Using a high-speed blender (or a wet grinder if you’re fancy), grind the dal mixture first. You want it fluffy, smooth, and buttery. It should look like clouds. Transfer to a huge pot.
- Rice Grind: Now grind the rice. You want this slightly gritty—like very fine sand. Not a smooth paste. This texture is what makes the dosa crispy.
- The Mix: Pour the rice batter into the pot with the dal batter. Add salt. Now, use your clean hand (yes, your hand) to mix them together vigorously. Science Alert: The heat from your hand kickstarts the fermentation.
- The Nap: Cover the pot with a loose lid. Let it sit in a warm place for 8–12 hours.
- Check: The next morning, it should have risen, doubled in volume, and smell slightly sour/yeasty. If it looks bubbly, you win.
Phase 2: The Sambhar (Make this while batter rests or before cooking)
- Cook the Lentils: Pressure cook or boil the Toor Dal with water and turmeric until it is absolute mush. Mash it further with a ladle. We want creamy, not grainy.
- Cook the Veggies: In a separate pot, boil your chopped veggies, onions, and tomatoes with a little salt and turmeric. Don’t overcook them into baby food; keep a little bite.
- The Tamarind Swirl: Once veggies are soft, add the tamarind extract (soak the ball in warm water and squeeze out the juice). Let the raw smell of tamarind boil away (about 5 mins).
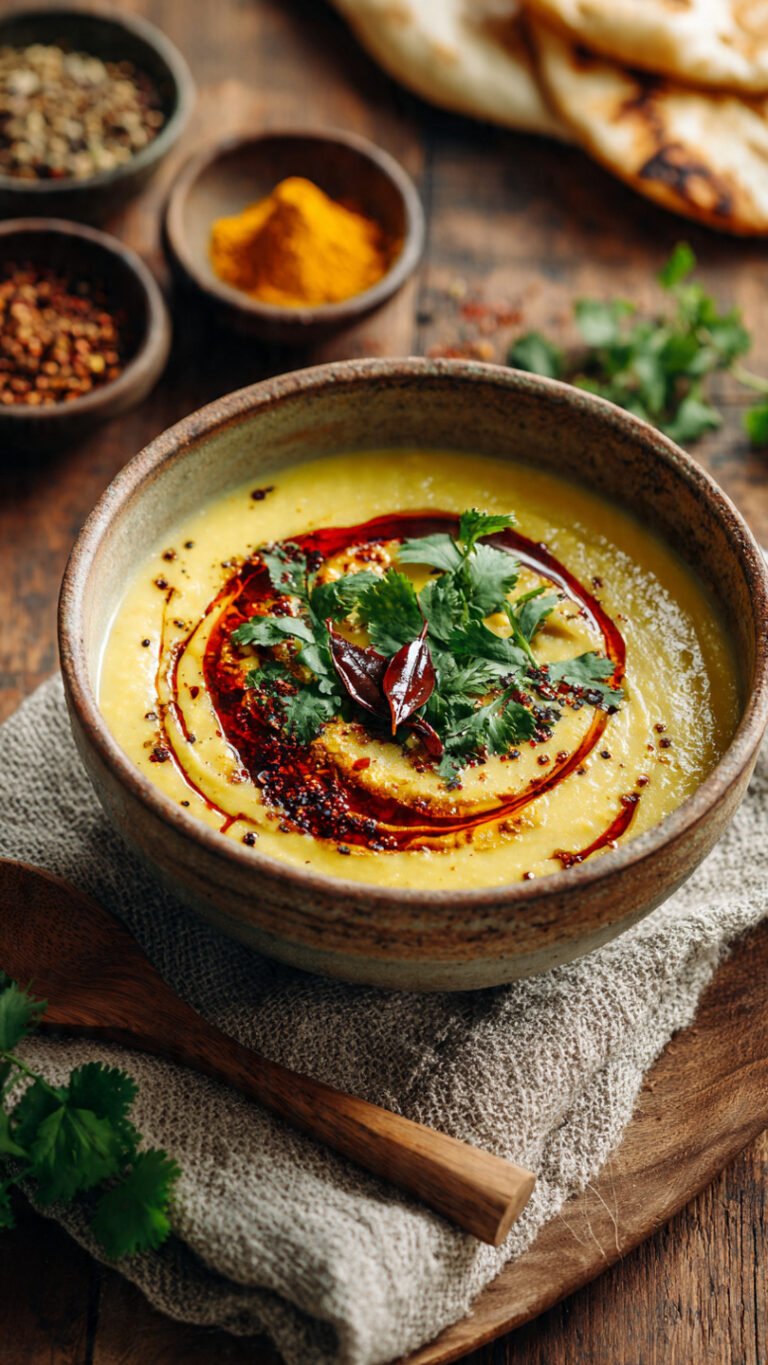
- Spice it Up: Add the mashed dal to the veggie pot. Stir in a generous amount of Sambhar Powder. Add the tiny piece of jaggery. Add water to get your desired consistency (it should be pourable, not a thick curry). Simmer for 10 minutes.
- The Tadka (Tempering): Heat ghee in a small pan. Add mustard seeds (wait for the pop-pop-pop). Add curry leaves, dried red chilies, and a pinch of Hing (Asafoetida). Pour this sizzling, aromatic oil over the Sambhar. Cover immediately to trap the aroma.
Phase 3: The Dosa (Showtime)
- Prep the Pan: Use a cast-iron skillet or a flat non-stick tawa. Heat it up on medium-high. Splash some water on it—if it sizzles and evaporates instantly, we are good to go. Wipe it dry with a cloth or a cut onion (old school trick to prevent sticking).
- Consistency Check: Your fermented batter might be too thick. Add a splash of water until it’s a pouring consistency—thinner than pancake batter, thicker than milk.
- The Swirl: This is the moment of truth.
- Pour a ladle full of batter into the center of the pan.
- Immediately place the bottom of the ladle lightly on the batter and start swirling in a spiral motion, moving outward.
- Don’t press too hard! Gentle, confident circles. Spread it thin.
- The Crisp: Drizzle a teaspoon of oil or ghee around the edges and a bit in the center.
- The Wait: Let it cook. Do not touch it. Watch as the bottom turns golden brown. You will see the edges start to lift off the pan on their own. This is the dosa telling you, “I’m ready.”
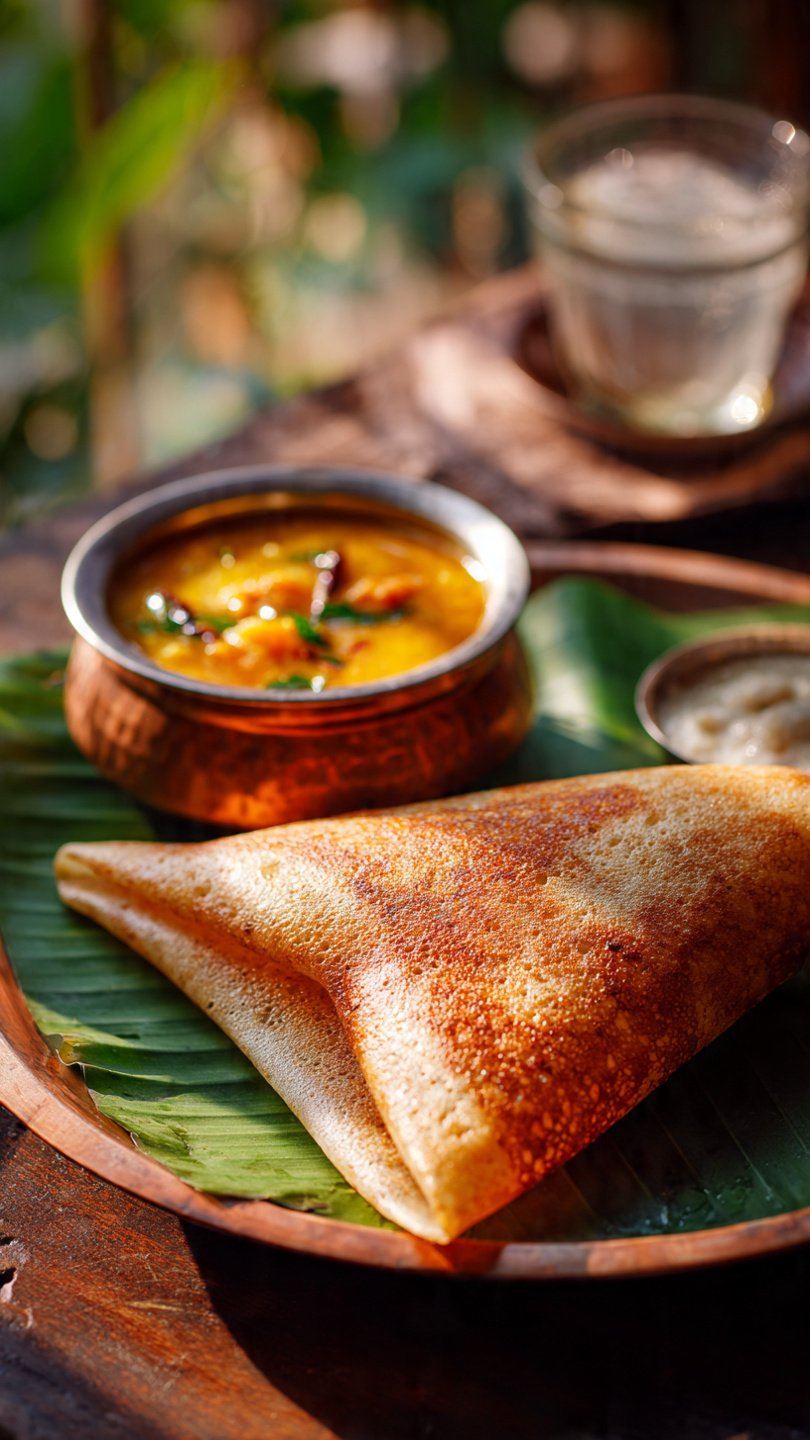
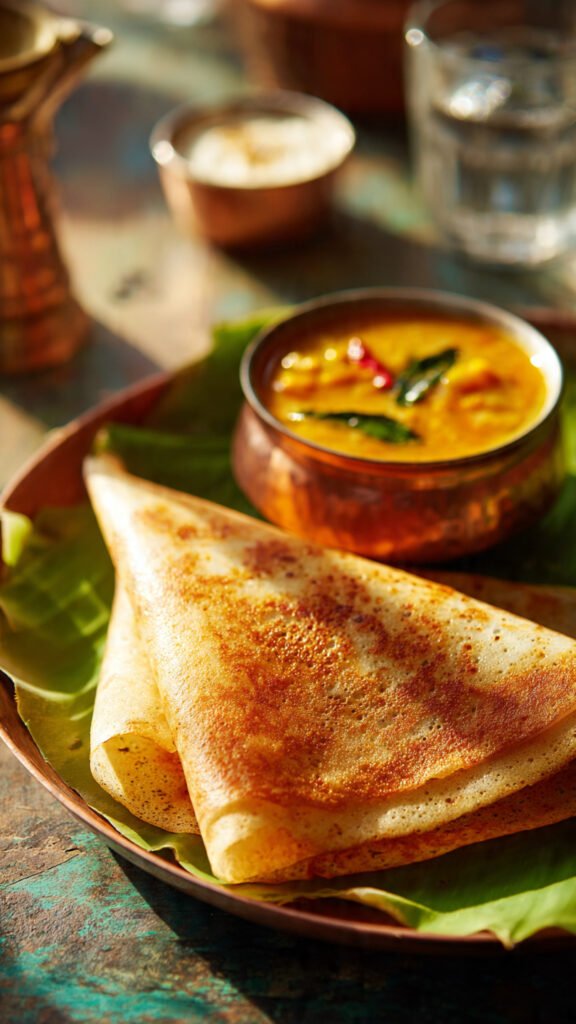
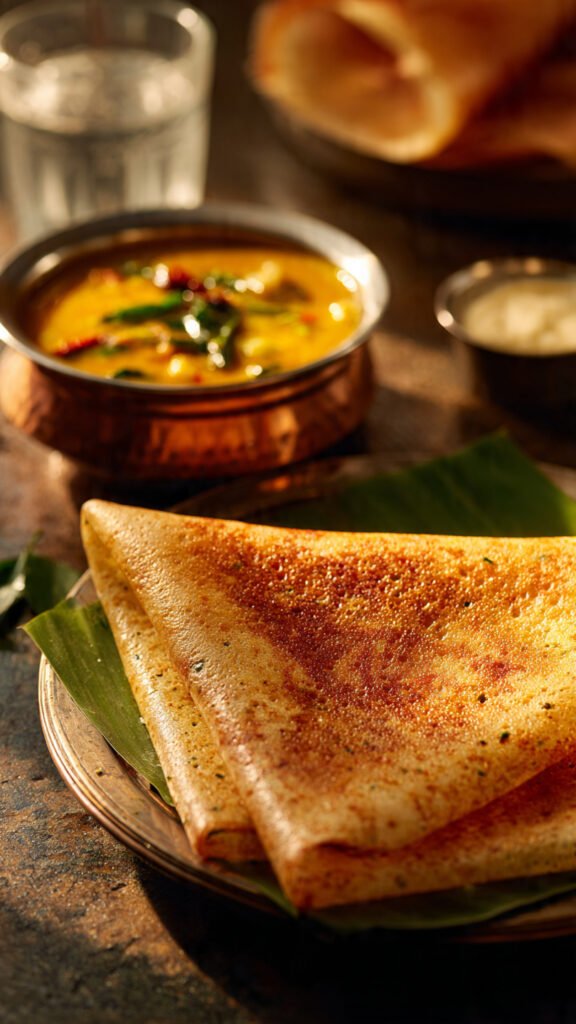
- Serve: Fold it in half or roll it into a tube. Serve immediately with a bowl of hot Sambhar.
Common Mistakes to Avoid
Even the pros mess up. Here is how to avoid the “Walk of Shame” to the trash can.
- The “Cold Pan” Tragedy: If your pan isn’t hot enough, the batter will just sit there and turn into a rubbery, white blob. It needs heat to crisp up. But…
- The “Too Hot” Pan: If the pan is smoking hot, the batter will cook the second it touches the metal, and you won’t be able to spread it. Fix: Between dosas, sprinkle water on the pan to bring the temp down, wipe it, then pour the next one.
- The “Smooth Rice” Error: If you grind the rice too smooth, your dosa will be sticky, not crispy. Keep that slight grit!
- Fermentation Fails: If you live in a cold climate (looking at you, Midwest winters), your batter won’t rise. Hack: Turn your oven on for 2 minutes, turn it off, and put the batter inside with the oven light on. It creates a cozy incubator.
- The “Soggy Sambhar” Veggies: Don’t boil the veggies with the dal in the pressure cooker unless you want vegetable soup puree. Cook them separately to keep their texture.
Alternatives & Substitutions
- No Fermentation Time? Look, I get it. Sometimes you need dosa now. You can make Rava Dosa (semolina dosa) which requires zero fermentation. It’s a different texture (lacy and holey), but delicious.
- Store-Bought Batter: Listen, no judgment here. ID or generic store-bought batter works fine. Just add a little water and maybe a pinch of salt/sugar to wake it up.
- Vegan? The recipe is naturally vegan! Just use oil instead of ghee for the tempering and frying.
- Vegetable Swaps: Hate drumsticks? Use french beans. Hate okra? Use eggplant. Sambhar is democratic; it accepts all vegetables equally.
- Grain Alternatives: You can swap the white rice for brown rice, quinoa, or even millet for a healthier, earthier dosa. It won’t be as crispy, but your cardiologist will high-five you.
FAQ (Frequently Asked Questions)
Q: My dosa is sticking to the pan and tearing. Why do you hate me? A: I don’t hate you, but your pan might. If you are using cast iron, it needs to be well-seasoned. If non-stick, the coating might be gone. Also, make sure the pan isn’t too hot when you pour.
Q: Can I freeze the batter? A: Yes! Fermented batter freezes surprisingly well. Thaw it on the counter for a few hours before using. It might get a little sourer, but that’s just extra flavor.
Q: Why is my dosa white and pale instead of golden red? A: Did you skip the Chana Dal or Fenugreek seeds? They aid in browning. Also, you might be cooking it on too low heat. Crank it up (a little).
Q: Can I use canned lentils for the Sambhar? A: Deep sigh. Technically? Yes. But dried Toor Dal has a specific flavor that canned lentils just don’t replicate well. If you must, use canned yellow lentils, but don’t tell my grandmother.
Q: What do I do with leftover Sambhar? A: Leftover Sambhar is actually better the next day. The spices have time to mingle. Eat it with rice, dip bread in it, or drink it like soup (I won’t tell).
Final Thoughts
You did it! Or, at least, you read through how to do it, which is the first step to greatness.
Making a Dosa Sambhar recipe at home is a ritual. It’s about the smell of the fermenting batter, the sound of the mustard seeds popping, and the satisfaction of that first crispy bite. It’s messy, it’s fun, and it is infinitely better than the soggy takeout that arrives 45 minutes late.
So go ahead, soak those lentils. Impress your family, your date, or just treat yourself. You’ve earned that golden, crispy masterpiece. Now, if you’ll excuse me, I have a date with a bowl of Sambhar.