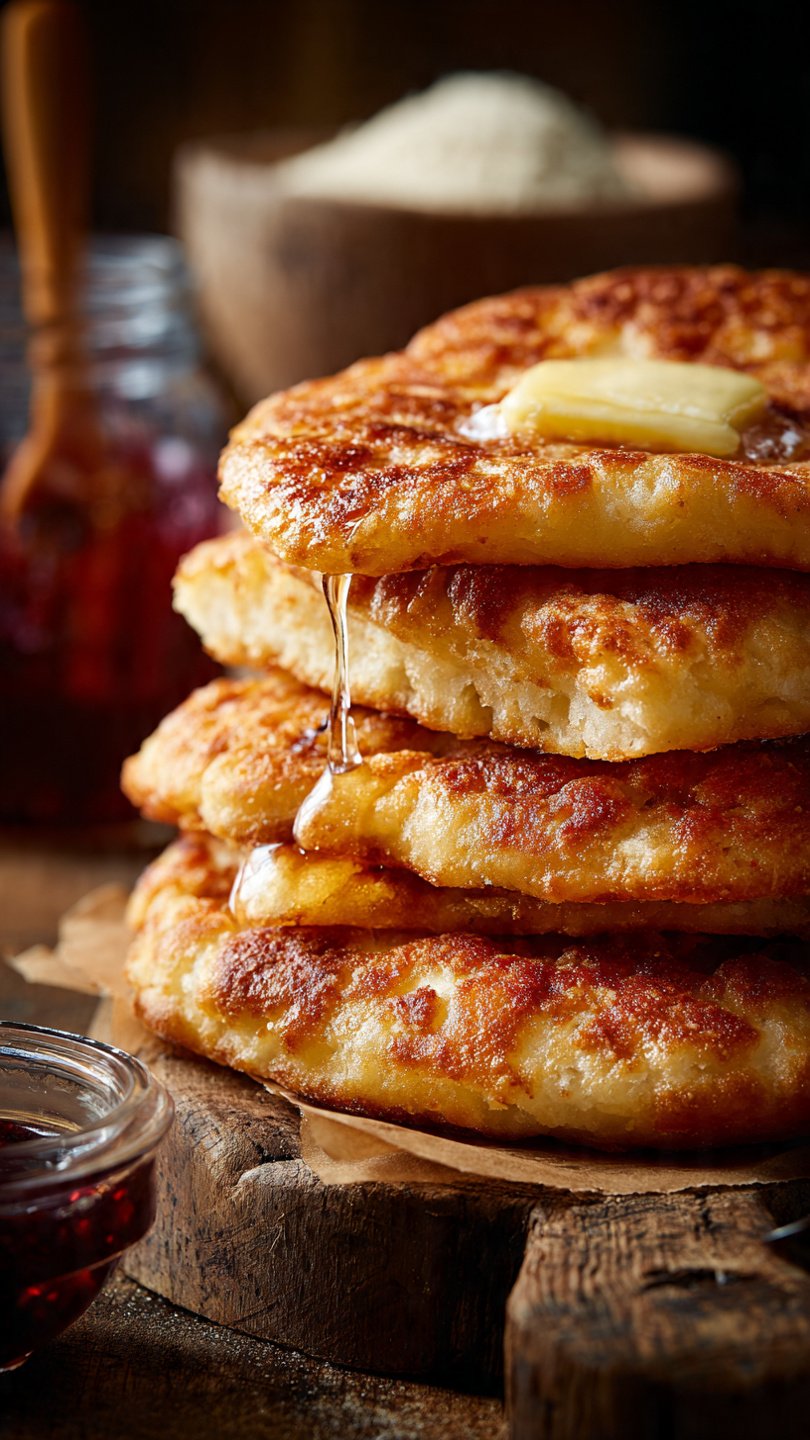
🍞 Best Fried Bannock Recipe: Crispy, Fluffy & Easy
So, let me guess the scenario. You’re sitting there, staring into the pantry abyss, craving something that is specifically carby, warm, and comforting, but you absolutely do not have the patience to wait three hours for yeast to rise. I feel you. I am you.
We’ve all been there—wanting fresh bread but possessing the attention span of a goldfish.
Enter the fried bannock recipe. It is the unsung hero of the quick bread world. It’s golden, it’s crispy, it’s pillowy soft on the inside, and best of all, it requires zero yeast and almost zero skill. If you can hold a spoon and turn on a stove, you are about 20 minutes away from tearing into a hot piece of fried dough slathered in butter. Let’s get into it.
Why This Recipe is Awesome
Okay, aside from the fact that frying dough is universally acknowledged as a love language, there are some very specific reasons why this fried bannock recipe is going to become your new obsession.
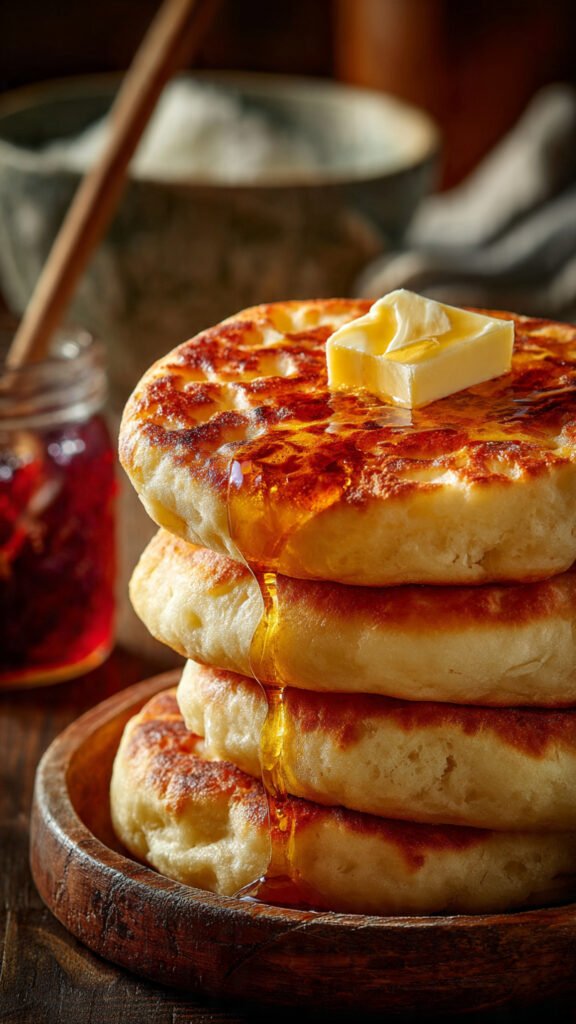
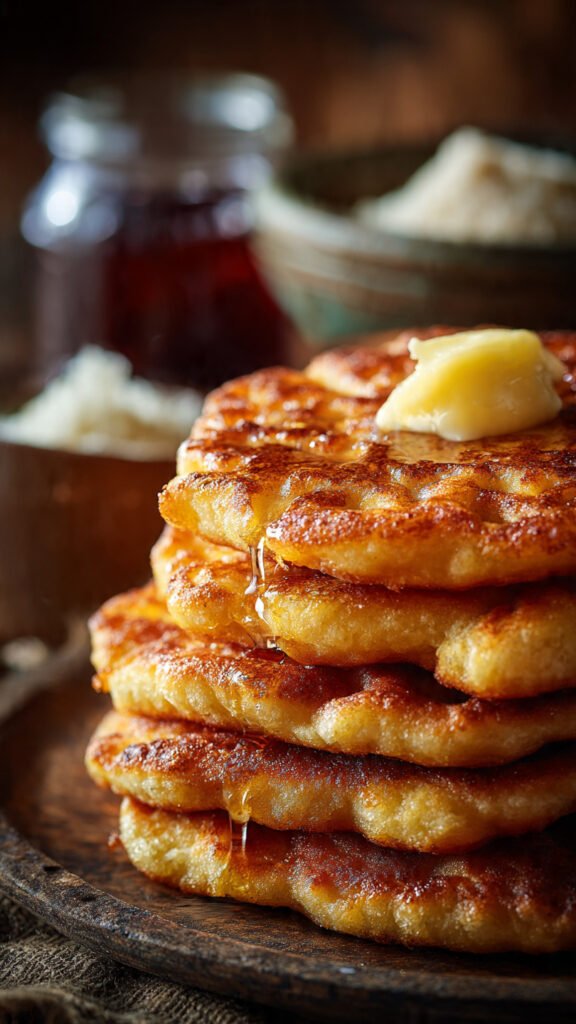
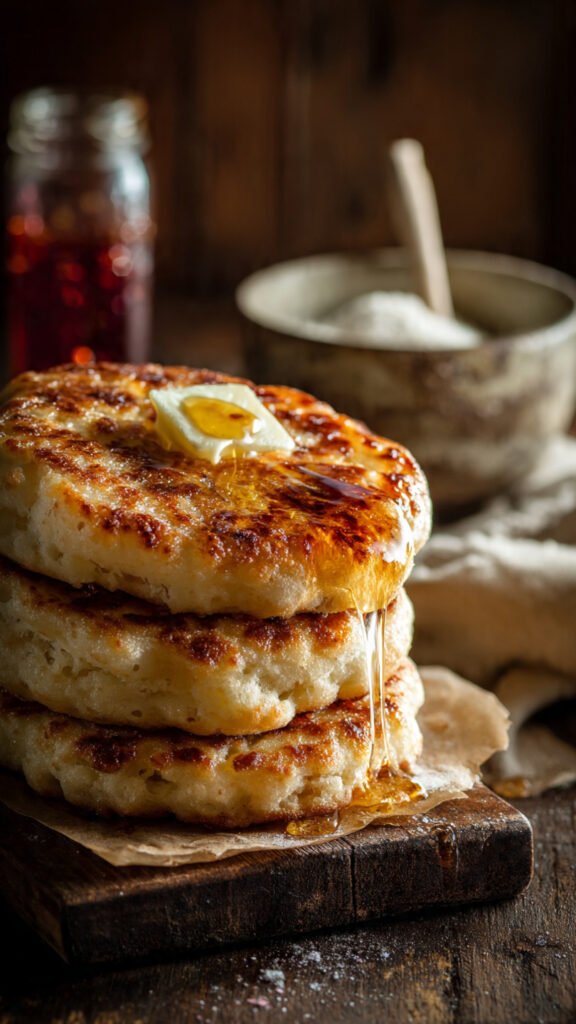
1. The Texture is Absolute Magic We need to talk about the texture because it is a sensory masterpiece. When you drop the dough into that hot oil, a chemical miracle happens. The outside instantly sears into a craggy, golden-brown crust that has an audible crunch when you bite into it. It’s sturdy enough to hold toppings but delicate enough to shatter pleasantly.
Then, you hit the interior. Because we are using baking powder (a chemical leavener) instead of yeast, the inside creates these tender, steamy pockets of air. It’s dense enough to be satisfying—like a biscuit—but fluffy enough to feel like a doughnut’s savory cousin. The contrast between the jagged, crispy exterior and the cloud-like interior is, quite frankly, what dreams are made of.
2. It’s “I Forgot to Go Grocery Shopping” Friendly This recipe thrives on neglect. You don’t need buttermilk, you don’t need artisan bread flour ground by monks in the Alps, and you definitely don’t need yeast. You likely have every single ingredient in your kitchen right now. It is the ultimate “pantry raid” recipe.
3. The Science is forgiving Here is a little nerd moment for you: Bannock is chemically very similar to a scone or a biscuit, but the cooking method changes everything. Baking dries things out; frying locks moisture in. Because the oil transfers heat so efficiently, the baking powder activates explosively fast (that’s the science term, I swear), giving you that puffiness before the gluten has a chance to get tough. This means even if you mess up the measurements slightly, you’re still probably going to end up with something edible and delicious.
4. It’s Versatile (Like, abnormally versatile) You want savory? Add cheese and green onions. You want sweet? Dust that bad boy in cinnamon sugar while it’s hot. You want a taco? Fold it in half and fill it with chili (Indigenous Taco style). This dough is a blank canvas waiting for your artistic genius.
Ingredients You’ll Need
Don’t panic. This list is short. Here is exactly what you need to grab:
- All-Purpose Flour: The backbone of the operation. Nothing fancy needed here.
- Baking Powder: Do not skip or skimp on this. This is the engine of the recipe. If your baking powder has been sitting in the back of the cupboard since 2012, throw it out and buy fresh stuff, or your bannock will be a hockey puck.
- Salt: Flavor town. Without it, you’re just eating fried paste.
- Sugar (Optional): Just a pinch. It helps with browning (thanks to the Maillard reaction) and balances the saltiness.
- Fat (Butter, Lard, or Shortening): You need a solid fat to cut into the flour. This creates flaky layers.
- Liquid (Water or Milk): Milk makes it richer and softer; water makes it crispier. Choose your fighter.
- Oil for Frying: Canola, vegetable, or grapeseed oil. You need something with a high smoke point. Do not use olive oil unless you want your kitchen to fill with smoke and sadness.
Step-by-Step Instructions
Alright, apron on (or not, I’m not your mom). Let’s make some magic.
1. Dry Mixing Grab a large mixing bowl. Toss in your 3 cups of flour, 1 tablespoon of baking powder, 1 teaspoon of salt, and that optional tablespoon of sugar. Whisk it together. Why whisk? It aerates the flour and ensures you don’t get a pocket of pure salty baking powder in one bite. That is a nasty surprise nobody wants.
2. Cut the Fat Take about ¼ cup of cold butter or lard. Cut it into small cubes and drop them into the flour. Using your fingers (nature’s best kitchen tool) or a pastry cutter, rub the fat into the flour until it looks like coarse crumbs.
- Science Tip: You want small chunks of fat remaining. When these melt during cooking, they release steam, creating flaky layers. If you melt the butter beforehand, you lose the layers. Keep it cold!
3. The Liquid Gold Make a well in the center of your flour mixture (like a little volcano). Pour in 1 cup of water or milk. Start mixing with a fork or wooden spoon.
- Crucial Step: Mix just until the dough comes together. It should look shaggy and messy. Do not overmix. Overmixing develops gluten, and while gluten is great for chewy pizza crust, it is the enemy of tender bannock. If you knead it to death, it will be tough.
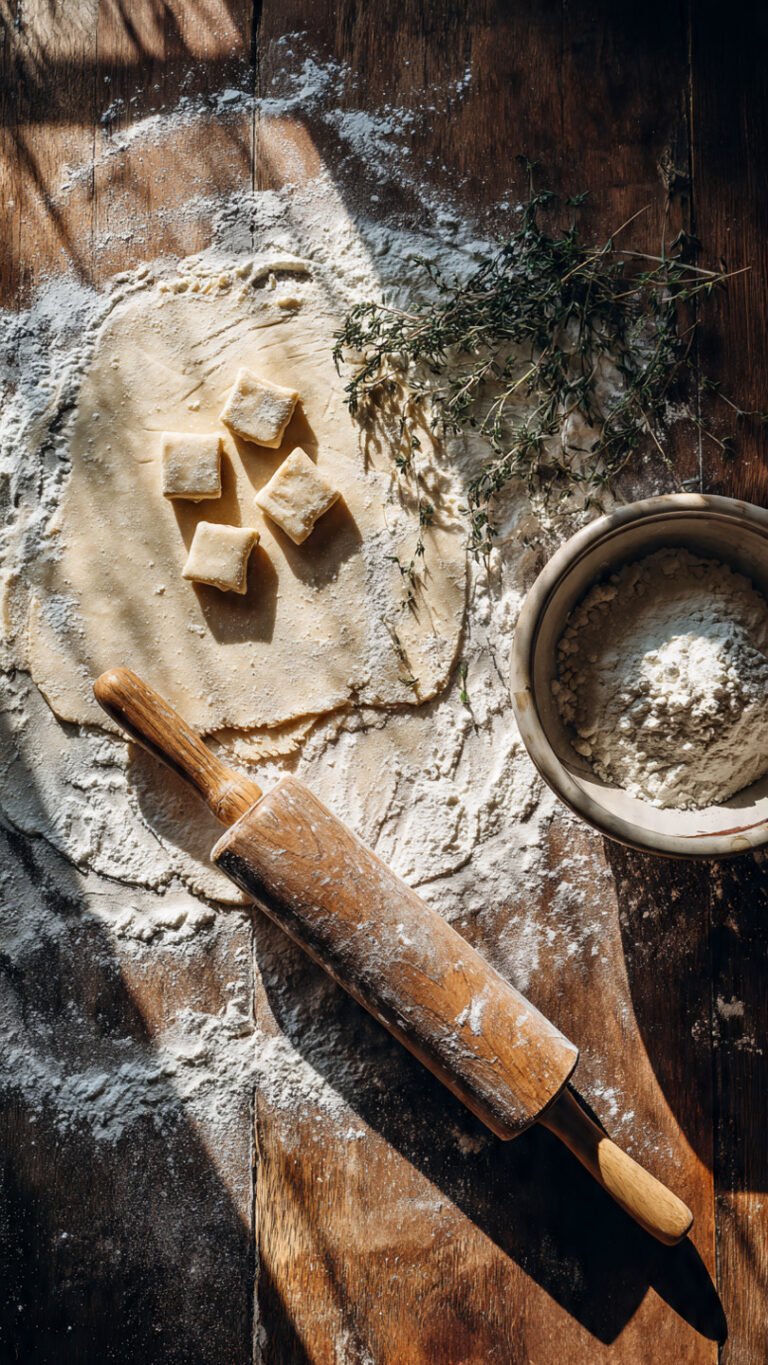
4. The Gentle Knead Turn the dough out onto a lightly floured surface. Dust your hands with flour. Gently fold the dough over itself 3 or 4 times—maximum. You just want it to stop being sticky. Pat it down into a disk about ½ inch to ¾ inch thick.
- Note: Don’t use a rolling pin. Rolling pins compress the air bubbles we are trying to protect. Use your hands to pat it down.
5. The Heat Check Get a skillet (cast iron is the MVP here, but any heavy-bottomed pan works). Pour in about ½ inch of oil. Heat it over medium-high heat.
- How to tell if it’s ready: Stick the handle of a wooden spoon into the oil. If little bubbles immediately fizz around the wood, you are good to go. If it smokes, it’s too hot (take it off the heat!). If nothing happens, wait longer.
6. The Fry You can fry the disk whole (and score it), or cut it into smaller pieces (easier to flip). Carefully lay the dough into the hot oil. Lay it away from you so you don’t splash hot oil on your favorite shirt. Fry for about 3–4 minutes per side. You are looking for a deep, golden brown color.
- Sensory check: Watch the dough puff up. It should essentially double in height as the heat hits it.
7. The Draining Remove the bannock from the pan and place it on a wire rack or a plate lined with paper towels.
- Tip: A wire rack is better. Paper towels trap steam underneath the bread, which can make the bottom soggy. We want to preserve that crunch!
Common Mistakes to Avoid
Even though this is “idiot-proof,” things can go wrong. Here is how to avoid a culinary disaster:
- The “Grease Sponge” Incident: If your oil is too cold, the dough will just sit there and soak up the oil like a sponge. You’ll end up with heavy, greasy lead balls. Make sure the oil is hot (350°F / 175°C if you have a thermometer) before dropping the dough.
- The “Burnt on the Outside, Raw on the Middle”: This happens when your oil is blazing hot (like, surface of the sun hot). The outside turns black in seconds, but the inside is still gooey dough. Medium-high heat is the sweet spot. If it’s browning too fast, turn the heat down.
- The “Gluten Overload”: I mentioned this before, but it bears repeating. Stop kneading it so much. This isn’t sourdough. Treat the dough like a delicate flower, not a stress ball.
Alternatives & Substitutions
Bored of the basics? Here is how to switch it up.
1. The “Campfire” Twist If you are camping, wrap the dough strip around a clean stick and roast it over the fire. It’s basically the best marshmallow alternative ever.
2. The Gluten-Free Route Can you make this gluten-free? Yes! Use a 1:1 gluten-free flour blend (one that includes xanthan gum). It might not rise quite as high, but it still tastes amazing fried in oil. IMO, everything tastes good fried in oil.
3. Veganize It This recipe is naturally egg-free. Just use oil or vegetable shortening for the fat, and water or oat milk for the liquid. Boom. Vegan comfort food.
4. Sweet Tooth Add a splash of vanilla extract to the wet ingredients and toss a handful of raisins or dried cranberries into the dough. Serve with jam. You’re welcome.
FAQ (Frequently Asked Questions)
Q: Can I bake this instead of frying it? A: Technically, yes. Bake at 400°F (200°C) for about 20 minutes. But listen to me: it will be a biscuit. It won’t be bannock in the traditional, soul-warming sense. Frying gives it that distinct flavor and texture. Live a little—fry the dough.
Q: Why is my bannock hard as a rock? A: You either overmixed the dough (shame!) or your baking powder is expired. Or maybe you fried it for way too long. It’s usually the overmixing, though.
Q: Can I make the dough ahead of time? A: Not really. Since we are using baking powder, it starts reacting as soon as it hits the liquid. If you let it sit in the fridge for hours, it loses its “oomph” and won’t rise as well. This is a “make it and eat it” situation.
Q: Is this healthy? A: Let’s be real. It is refined flour fried in oil. Is it a salad? No. Is it good for your mental health after a long, terrible week? Absolutely. Calories don’t count when it’s comfort food (don’t quote me on that).
Q: What’s the best oil to use? A: Vegetable oil or canola oil are the standard go-tos because they are cheap and handle heat well. However, if you have access to lard, that is the traditional (and frankly, tastiest) way to do it.
Final Thoughts
There you have it. The fried bannock recipe that is going to save your breakfast, lunch, or late-night snack cravings. It’s humble, it’s fast, and it’s ridiculously tasty.
Whether you are slathering it in strawberry jam, dipping it in a stew, or just eating it plain while standing over the stove (no judgment here, I do it too), this bread is a winner. Now go impress someone—or yourself—with your new culinary skills. You’ve earned it!
Happy frying!