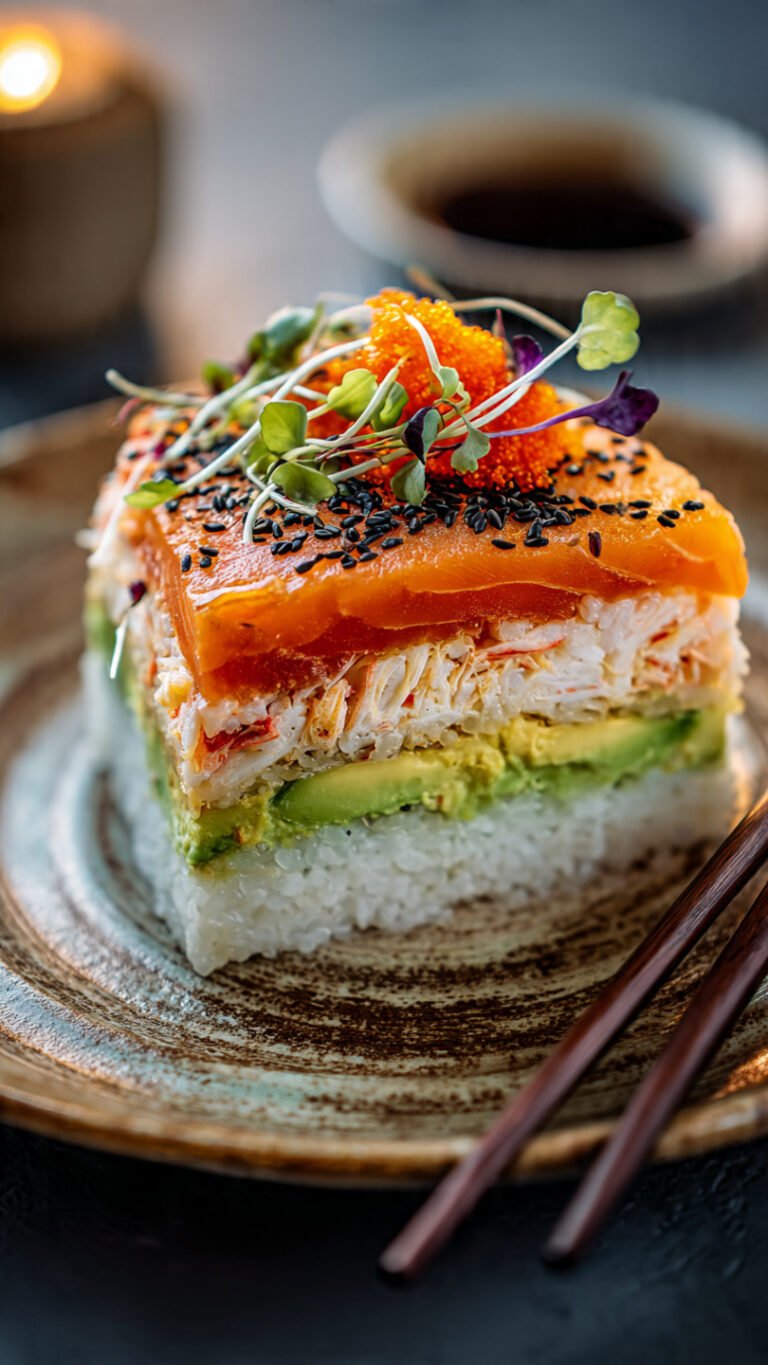
🍱 Easy Japanese Bowls Recipe: Better Than Takeout!
So, you’re craving something savory, slightly sweet, and incredibly comforting, but you are absolutely too lazy to put on real pants and go to a restaurant? Same. Look, we’ve all been there. You want that delicious umami punch of a Japanese rice bowl, but the idea of spending three hours chopping vegetables sounds like a punishment.
Well, good news. This Japanese bowls recipe is your new best friend. It’s the culinary equivalent of a warm hug that also happens to be salty and delicious. We aren’t doing anything fancy or Michelin-star complicated here. We are talking about big flavors, minimal effort, and a bowl of food so good you’ll want to face-plant into it. Let’s get cooking.
Why This Recipe is Awesome
Okay, let’s be real for a second. Why should you make this specific Japanese bowls recipe instead of just ordering delivery?
First off, it’s customizable AF. This isn’t a strict set of rules; it’s a blueprint. We are essentially making a “Donburi” (that’s the fancy Japanese term for “stuff on rice”). Whether you have chicken thighs, a lonely block of tofu, or some ground beef that needs to be used before it turns questionable, this recipe works.
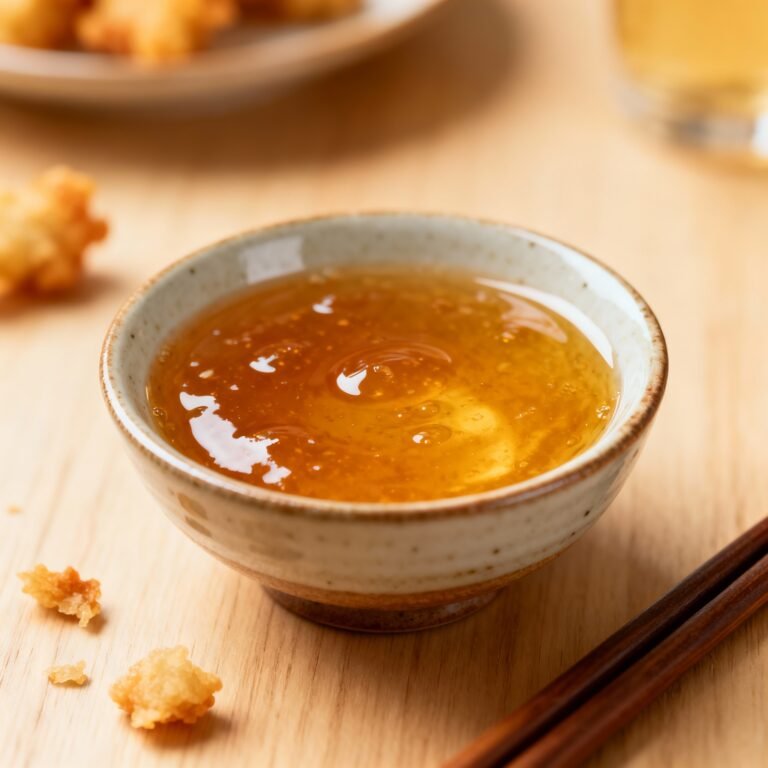
Secondly, the sauce is magic. I’m not exaggerating. It’s that sticky, savory-sweet glaze (often called Teriyaki or Donburi sauce) that coats everything in a glossy sheen of perfection. Once you learn the ratio I’m about to teach you, you will never buy that bottled stuff again. Seriously, the bottled stuff tastes like preservatives and sadness. This homemade version tastes like victory.
Third, it appeals to the lazy cook. This is a one-pan situation (mostly). Less cleanup means more time scrolling through TikTok on the couch. Plus, it creates leftovers that arguably taste even better the next day after the sauce has had time to really get to know the rice.
Finally, there is some actual cool science happening here. We are going to leverage the Maillard reaction (that’s science-speak for browning meat to make it tasty) and caramelization. We aren’t just boiling meat in sauce; we are building layers of flavor that will make your roommate or partner think you secretly went to culinary school. Spoiler: You didn’t, you just read this blog post.
Ingredients You’ll Need
Here is your shopping list. I’ve kept it simple because I know you hate hunting for obscure ingredients in the back of the pantry.
The Foundation (Rice)
- Short-Grain White Rice (Sushi Rice): Do not—I repeat, do not—use minute rice or long-grain rice like Basmati here. You need the stickiness of short-grain rice to soak up the sauce and clump together perfectly. It’s the textural backbone of the bowl.
The Protein (Pick One)
- Chicken Thighs: Boneless and skinless is easiest. Thighs are forgiving; breasts dry out faster than my houseplants.
- Thinly Sliced Beef: Think cheesesteak thin. Ribeye or sirloin works best.
- Firm Tofu: Press the water out first unless you like soggy sponges (you don’t).
The Holy Trinity of Sauce
- Soy Sauce: Use regular Kikkoman or a Japanese brand. Don’t use “dark soy sauce” unless you want it intensely salty and black.
- Mirin: This is Japanese sweet rice wine. It gives that distinctive tang and sheen. If you can’t find it, mix a little sugar with water, but honestly, just buy the Mirin. It lasts forever.
- Sake (optional but recommended): Cooking sake adds depth. If you don’t have it, just use water, but your soul might weep a little.
- Sugar: White or brown sugar helps thicken the glaze and balances the salt.
The Aromatics
- Onion: Yellow or white, sliced into strips. It absorbs the sauce and becomes sweet and tender.
- Fresh Ginger: Grated. Pro Tip: Don’t use the powdered stuff here; it just doesn’t hit the same.
- Garlic: Because garlic is life.
The Finishers (Garnish)
- Scallions (Green Onions): Essential for color and a fresh bite.
- Sesame Seeds: Toasted.
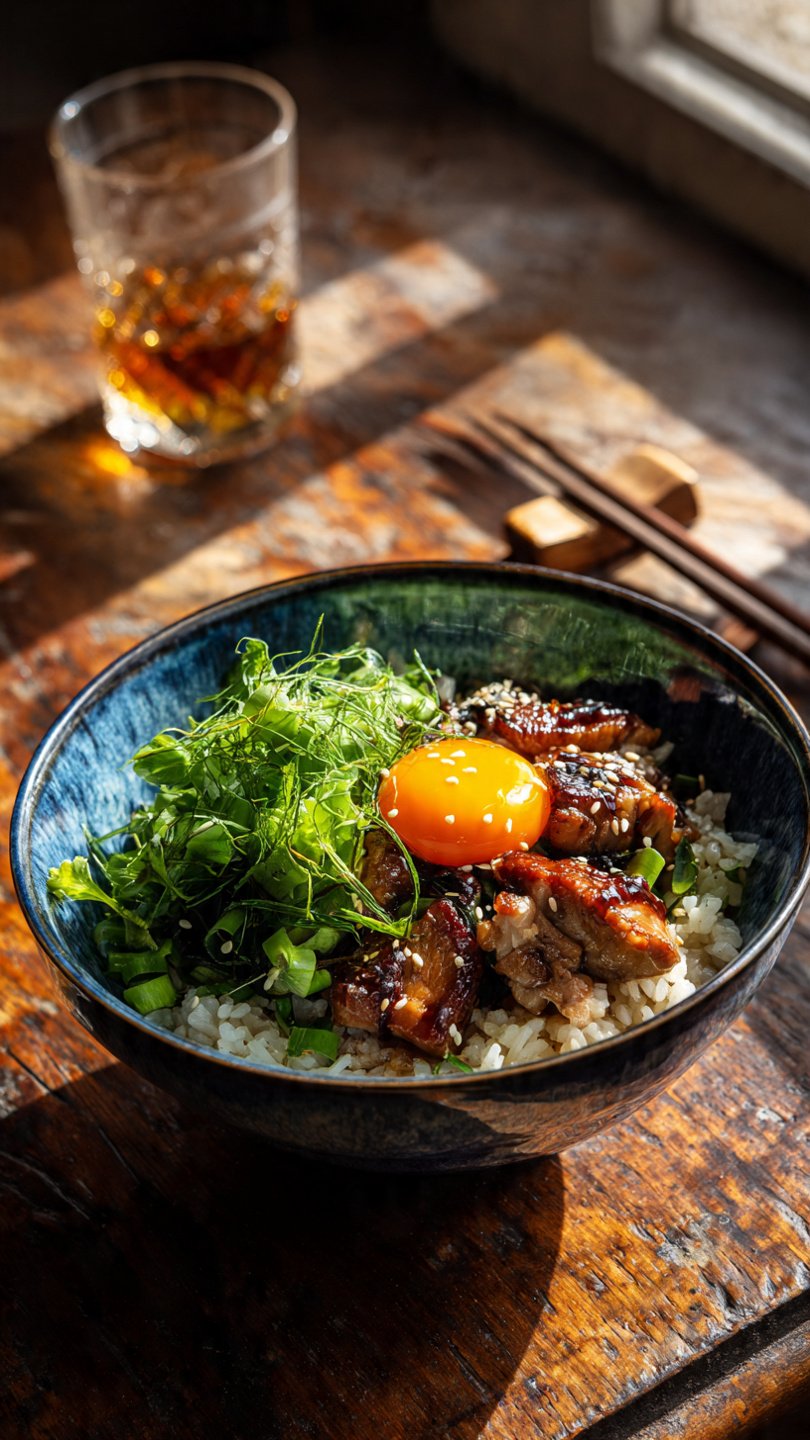
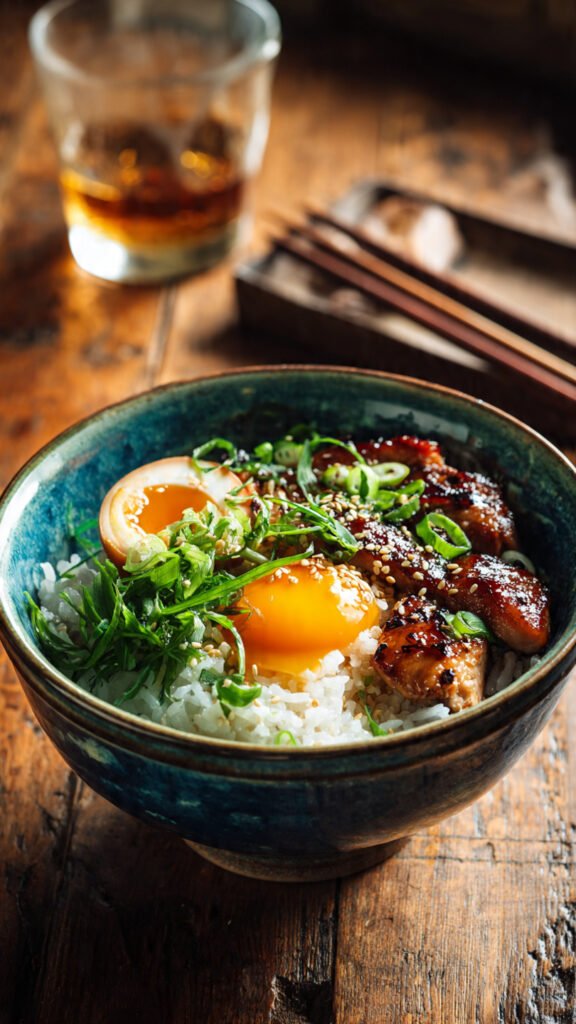
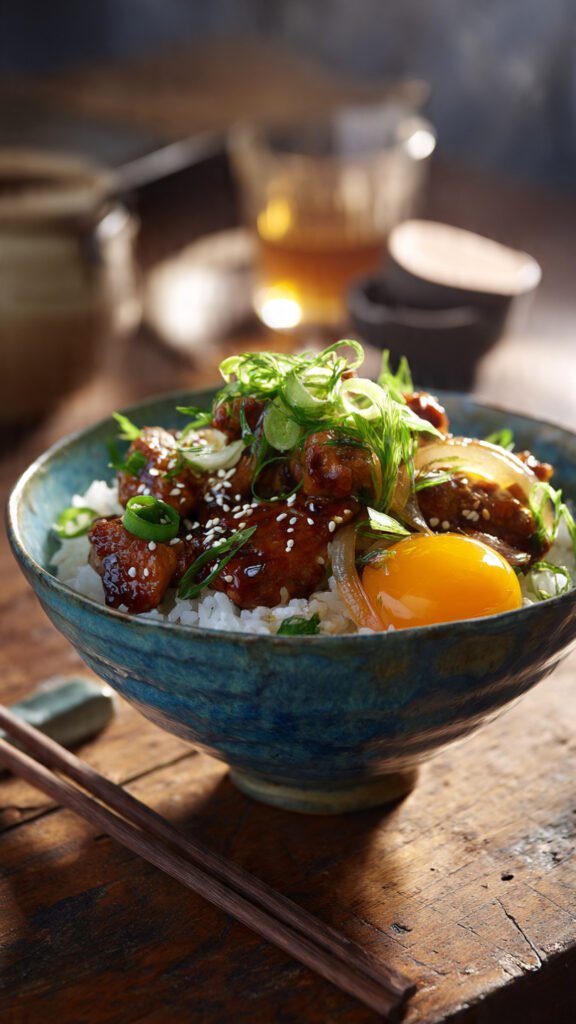
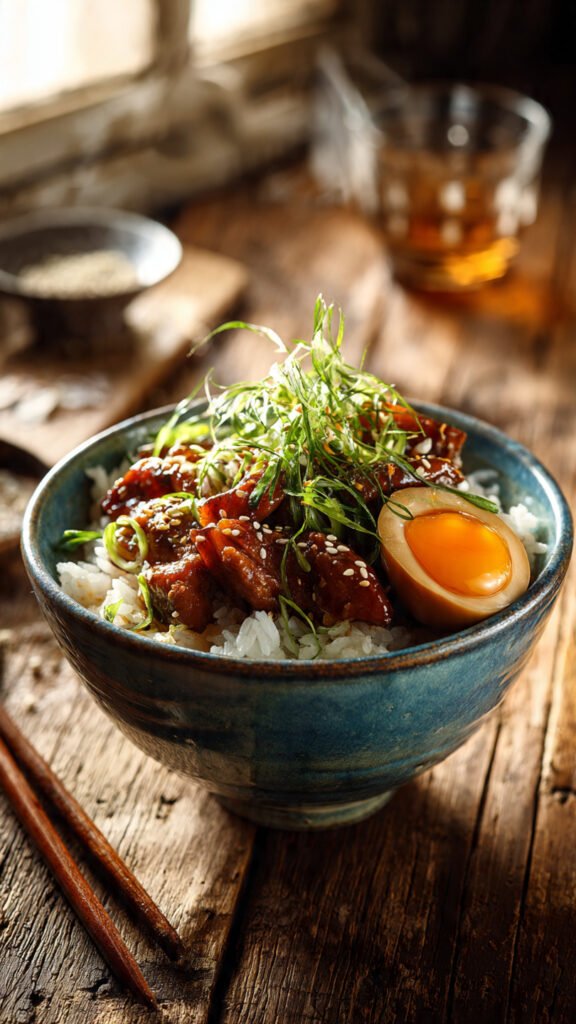
- Egg (Optional): A soft-boiled egg or a raw yolk (if you’re brave/have pasteurized eggs) takes this to god-tier levels.
Step-by-Step Instructions
Ready to make the best Japanese bowls recipe of your life? Let’s do this.
1. Respect the Rice First things first, get that rice going. Wash your short-grain rice until the water runs clear. This removes excess starch so it’s fluffy, not gummy. Cook it in your rice cooker or on the stove. While that’s happening, we tackle the fun part.
2. Mix the Magic Potion (The Sauce) In a small bowl, combine your soy sauce, Mirin, Sake (if using), sugar, and grated ginger.
- Ratio Guide: I usually do 2 parts Soy Sauce, 2 parts Mirin, 1 part Sake, 1 part Sugar. Taste it. Too salty? Add sugar. Too sweet? Add soy. You’re the boss here. Stir until the sugar dissolves.
3. Prep Your Protein Slice your meat (or tofu) into bite-sized pieces. If you are using chicken, cut it into 1-inch chunks. If using beef, slice it paper-thin against the grain. Season lightly with salt and pepper. Don’t skip the pepper.
4. The Sizzle Heat a splash of neutral oil (canola or vegetable) in a frying pan over medium-high heat. Once the oil is shimmering (not smoking), toss in your sliced onions. Sauté them for about 3–4 minutes until they start to look translucent and smell sweet.
- Why this works: We are softening the onions first so they don’t crunch when we eat them later. We want them to melt in the mouth.
5. The Sear Push the onions to the side of the pan (or take them out if your pan is tiny). Add your protein. Important: Spread the meat out in a single layer and don’t touch it for a minute. Let it get golden brown. That brown crust is flavor town. Once browned, flip and cook the other side.
6. The Simmer & Glaze Pour that sauce mixture over the meat and onions. Lower the heat to a simmer. Let it bubble away for about 3–5 minutes. Watch the magic happen: the sauce will reduce, bubble vigorously, and turn into a glossy, thick glaze that coats every piece of meat.
- Sensory check: It should smell sweet, savory, and incredibly appetizing. If the sauce is too thin, keep simmering. If it gets too thick (like molasses), splash in a tablespoon of water.
7. Assemble the Throne Scoop a generous mound of fluffy hot rice into a deep bowl. Pour the meat, onions, and that glorious extra sauce right over the top. The sauce should seep down into the rice—that is arguably the best part of the dish.
8. Garnish Like a Pro Top with sliced scallions, a sprinkle of sesame seeds, and your egg if you made one. Take a photo for the ‘Gram (optional, but did it really happen if you didn’t post it?), and dig in.
Common Mistakes to Avoid
Even though this is easy, things can go wrong. Avoid these rookie errors to ensure your Japanese bowls recipe reigns supreme.
- Crowding the Pan: If you dump a mountain of meat into the pan at once, it won’t sear—it will steam. You’ll end up with gray, sad meat. If you’re cooking for a village, do it in batches.
- Burning the Garlic: If you add garlic too early with the high heat, it will burn and taste bitter. Add garlic right before the sauce, or just mix it into the sauce.
- Using the Wrong Rice: I mentioned this earlier, but I’m saying it again. Long-grain rice falls apart here. You need the “stick” of sushi rice to hold the sauce and making eating with chopsticks (if you’re fancy) actually possible.
- Skipping the Garnish: “It’s just onions,” you say. No. The scallions provide a sharp, fresh contrast to the rich, sweet sauce. It cuts the heaviness. Don’t skip the green stuff.
- Overcooking the Sauce: Sugar burns fast. Once the sauce is bubbling and thickened, turn the heat off. If you leave it on high heat while you go check your email, you will end up with hard candy chicken.
Alternatives & Substitutions
Missing something? No sweat. Here is how to hack this recipe.
- “I don’t eat meat.” Cool! Use Firm Tofu (pan-fry it until crispy first) or Eggplant. Eggplant soaks up this sauce like a sponge and becomes incredibly creamy. It’s actually one of my favorite versions. Mushrooms are also a solid win here.
- “I’m Gluten-Free.” Easy fix. Swap the Soy Sauce for Tamari or Coconut Aminos. The flavor profile is nearly identical, and your stomach won’t hate you later.
- “I hate onions.” First of all, who hurt you? Second, you can skip them. Try using cabbage or sliced carrots instead for some veggie volume.
- “I want it Spicy.” I like the way you think. Add a teaspoon of Gochujang (Korean chili paste) or some red pepper flakes to the sauce mixture. It adds a nice kick that balances the sugar.
- “Can I use brown rice?” Technically, yes. It’s healthier, I guess? But the texture won’t be as comforting. It’s a bit nuttier and chewier. If you’re into that, go for it.
FAQ (Frequently Asked Questions)
1. Can I meal prep this Japanese bowls recipe? Absolutely. In fact, you should. The meat and onions keep well in the fridge for 3–4 days. Just store the rice separately if possible so it doesn’t get mushy, or store them together if you don’t mind the rice absorbing all the sauce (which, honestly, is delicious).
2. Is this authentic Japanese food? It’s “home-style” authentic. Think of it like a hamburger in America. Every family makes it differently. This is a style of Donburi (rice bowl), similar to Gyudon (beef bowl) or Oyakodon (chicken and egg bowl). It’s authentic to the spirit of Japanese comfort food, even if we are playing fast and loose with the rules.
3. What sides go well with this? Since the bowl is rich and savory, you want something acid or fresh. A simple cucumber salad with vinegar, some kimchi, or Miso soup is perfect. Keep it light.
4. Can I use honey instead of sugar? Yes! Honey works great and adds a floral note. Just be careful—honey burns faster than sugar, so watch that pan like a hawk when reducing the sauce.
5. My sauce isn’t thickening! What did I do? You probably just need to be patient. Let it bubble. If 5 minutes have passed and it’s still water, you might have added too much sake/water. Make a tiny “slurry” (1/2 tsp cornstarch + 1 tsp water) and whisk it in. It’ll thicken instantly.
6. Why does my rice taste boring? Did you salt it? No? Okay, well, traditionally Japanese rice isn’t salted because the toppings are salty. But if you find it bland, try cooking the rice with a piece of Kombu (dried kelp) or just a tiny pinch of salt.
7. Is Mirin alcoholic? Yes, slightly. But the alcohol cooks off during the simmering process. If you cannot have alcohol at all, use a “Mirin-fu” (Mirin-style condiment) or just sugar and water.
Final Thoughts
There you have it. A Japanese bowls recipe that is faster than delivery, cheaper than a restaurant, and genuinely fun to make. There is something deeply satisfying about watching a thin brown liquid transform into a sticky, glossy glaze that smells like heaven.
This is the kind of meal that makes you feel like you have your life together, even if your laundry pile says otherwise. It’s warm, filling, and hits every single taste bud—salty, sweet, savory, and umami.
So, stop reading and go check your pantry. You probably have the ingredients right now. Now go impress someone—or yourself—with your new culinary skills. You’ve earned it!