🍪 The Ultimate Chewy Lotus Cookie Recipe (Better Than Takeout!)
So, you’re craving something tasty but you’re too lazy to spend forever in the kitchen, huh? Same.
We have all been there. You want a cookie, but not just any cookie. You want something that tastes like caramelized heaven, hugs your soul, and makes your house smell like a European bakery at Christmas time. Enter the Lotus Cookie Recipe.
If you have been living under a rock (no judgment, rocks are cozy), Lotus Biscoff is that addictive “speculoos” cookie butter that basically tastes like crushed-up ginger cookies mixed with magic and unicorn dreams. Today, we aren’t just spreading it on toast like savages. We are putting it inside a cookie, then putting a cookie on top of that cookie. It’s cookie-ception. And it is glorious.
Buckle up, buttercup. We are about to bake the best thing you’ll eat all year.

Why This Recipe is Awesome
Okay, I know every food blogger says their recipe is “life-changing,” but seriously, this one might actually pay your taxes and water your crops. Here is why you need this in your life immediately:
1. It’s Basically Idiot-Proof
Look, baking can be scary. Science is involved. Things explode (rarely, but still). But this recipe? It is incredibly forgiving. Even if you accidentally overmix it a tiny bit or your oven is temperamental, the high fat content in the Biscoff spread keeps these cookies moist and chewy. It’s highly unlikely you will mess this up unless you fall asleep while they are in the oven.
2. The Texture is Illegal
You know how some cookies are too crunchy, and you feel like you’re biting into a roof shingle? Or they are too soft and just feel like raw dough? These strike the perfect, holy balance. The edges are crispy and caramelized—thanks to the brown sugar—while the center stays gooey, soft, and dense. It’s that “fudgy” texture usually reserved for brownies, but in a cookie form.
3. The Flavor Profile (Science of Yum)
Let’s talk about why these taste so good. It’s not just sugar; it’s Speculoos spice. We are talking cinnamon, nutmeg, ginger, cloves, and cardamom notes. When you bake these, the spices warm up and release oils that trigger the “comfort” centers of your brain. Plus, we use white chocolate chips. The creamy, milky sweetness of white chocolate cuts through the deep, spicy caramel notes of the Biscoff. It’s a flavor contrast that works harder than my caffeine addiction.
4. Minimal Chill Time
Most “gourmet” cookie recipes ask you to chill the dough for 24 to 72 hours. Who plans a cookie craving 3 days in advance? Sociopaths, that’s who. While chilling helps, you can get away with a quick 30-minute freeze here. You can be eating these in under an hour. Winner.
Ingredients You’ll Need
Here is your shopping list. Don’t try to be a hero and substitute things randomly (we’ll get to that later).
- Unsalted Butter: You need this room temperature. Not melted, not rock hard. If you press it, it should leave a dent but not stick to your finger.
- Lotus Biscoff Spread: The star of the show. You want the “Smooth” version for the dough. The crunchy one is great for toast, but it messes with the dough consistency here.
- Brown Sugar: Light or dark works, but dark adds more molasses flavor (and moisture). This is non-negotiable for chewiness.
- Granulated White Sugar: This helps the edges get that nice crispiness.
- Egg + One Yolk: Why the extra yolk? Because fat equals flavor and tenderness. The extra yolk creates that rich, velvety texture we are chasing.
- Vanilla Extract: Measure this with your heart, not a spoon.
- All-Purpose Flour: Just standard plain flour. Nothing fancy.
- Cornstarch: Secret Weapon Alert! This keeps the cookies soft and prevents them from spreading into flat pancakes.
- Baking Soda: To help them rise and spread just the right amount.
- Salt: To balance the sweetness. Ideally, sea salt.
- White Chocolate Chips: Get the good quality ones. Cheap ones taste like wax candles.
- Lotus Biscoff Biscuits: For topping. We break them in half and shove them on top for aesthetic points and extra crunch.
Step-by-Step Instructions
Ready? Let’s do this. Preheat your oven to 350°F (175°C). Line two baking sheets with parchment paper. Do not use foil unless you like burnt bottoms.
Step 1: The Creaming Phase (Arm Day)
In a large bowl (or a stand mixer if you’re fancy), combine your softened butter, Biscoff spread, brown sugar, and white sugar.
- Action: Beat this on medium-high speed for about 3–4 minutes.
- Why? You aren’t just mixing ingredients; you are aerating the fat. You want the mixture to look pale and fluffy. If it still looks gritty and dark, keep going.
Step 2: The Liquid Gold
Add the egg, the extra yolk, and the vanilla extract.
- Action: Mix on medium speed just until combined.
- Visual Check: It should look glossy and smooth. Do not overbeat at this stage, or you’ll incorporate too much air, and your cookies will collapse later.
Step 3: The Dry Stuff
In a separate bowl, whisk together the flour, cornstarch, baking soda, and salt.
- Action: Pour the dry ingredients into the wet ingredients.
- Technique: Mix on low speed. Stop when you still see a few streaks of flour. We finish by hand to avoid overworking the gluten (which leads to tough cookies).
Step 4: The Goodies
Pour in the white chocolate chips.
- Action: Fold them in with a rubber spatula. Make sure they are evenly distributed so no cookie gets left behind.
Step 5: The Chill (Don’t Skip This!)
Scoop the dough into balls (about 2 tablespoons each). Place them on a tray or plate.
- Action: Pop them in the freezer for 20–30 minutes or the fridge for an hour.
- Science Tip: Chilling creates solid fat. When the cold fat hits the hot oven, it melts slower, meaning the cookie spreads less and stays thicker. If you skip this, you will have flat, sad puddles.
Step 6: The Bake
Arrange the chilled dough balls on your baking sheet. Leave about 2 inches of space between them because they will grow.
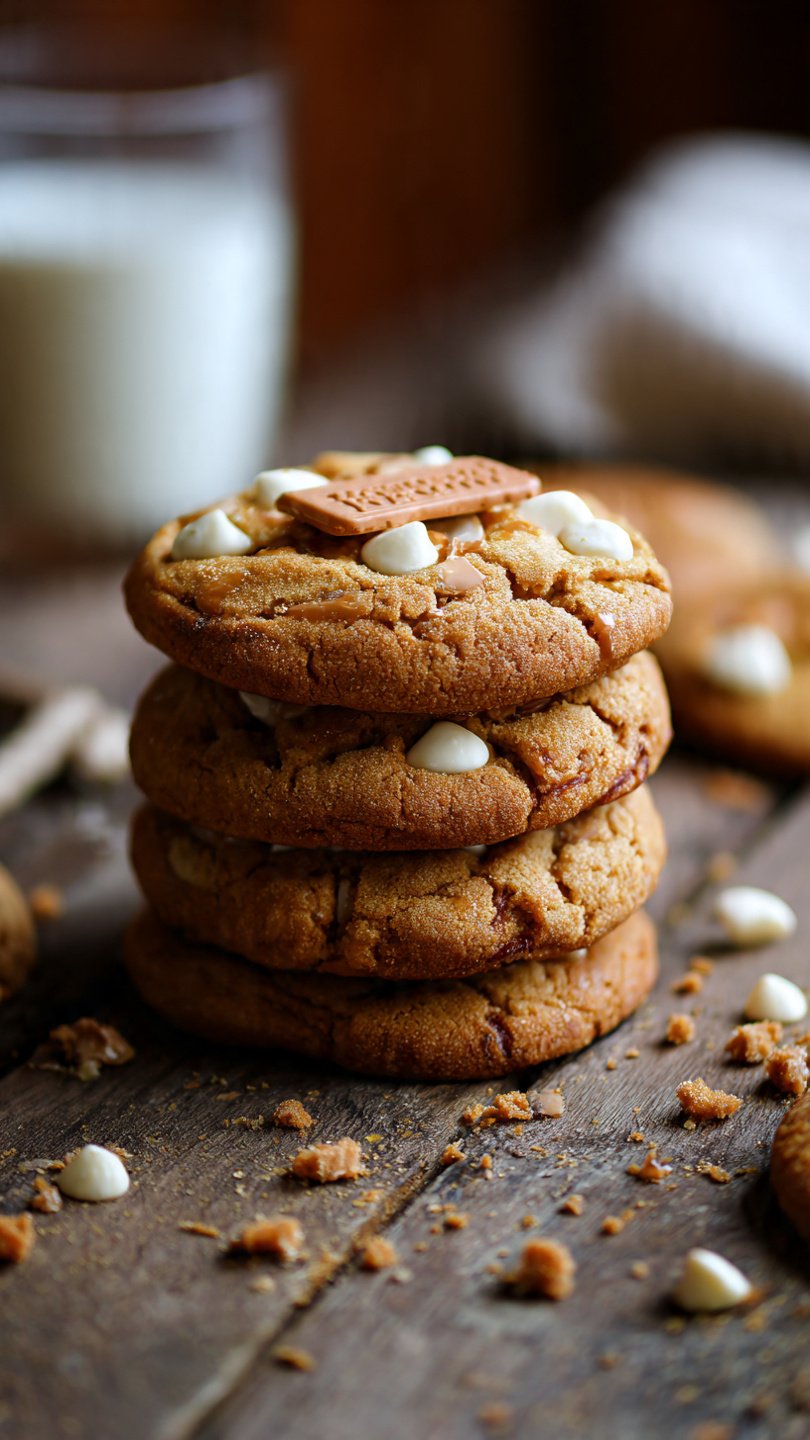
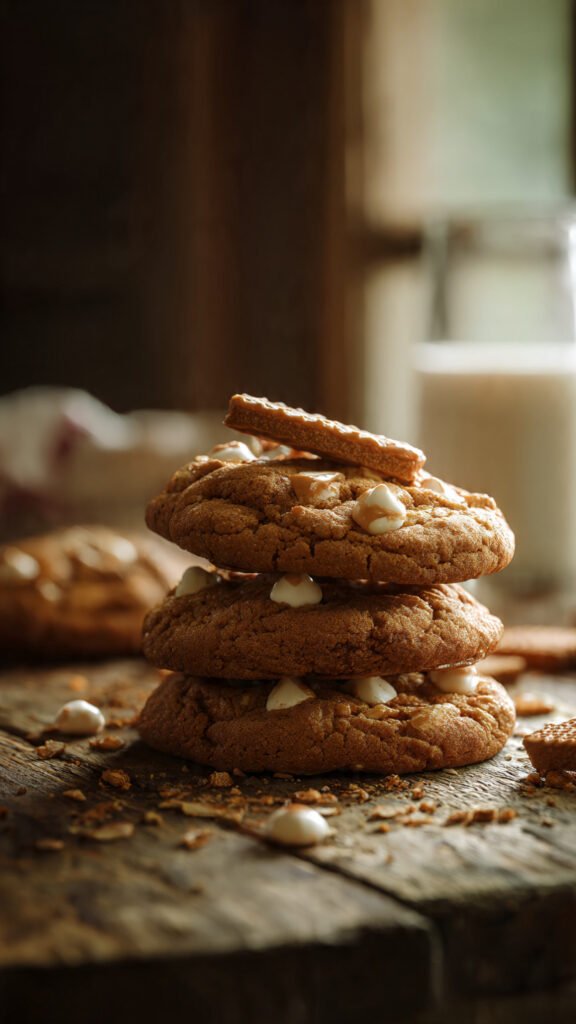
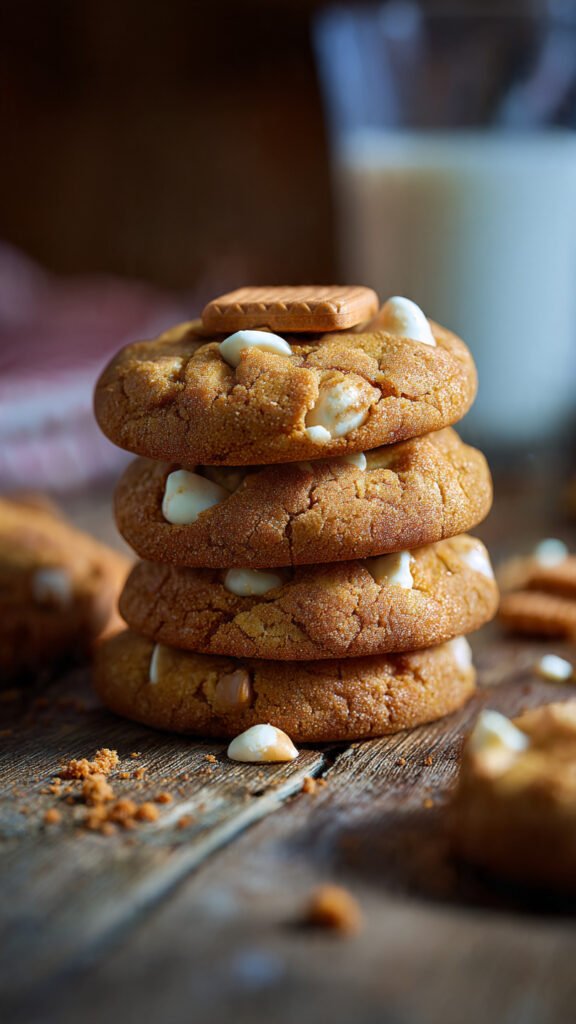
- The Artistic Touch: Break a Lotus biscuit in half and gently press a piece into the top of each dough ball.
- Time: Bake for 10–12 minutes.
- Crucial Check: They are done when the edges are slightly golden brown, but the center still looks woefully undercooked. Take them out. They will finish cooking on the hot baking tray. If they look done in the oven, they are already overbaked.
Step 7: The Scoot (Optional but Pro)
As soon as they come out, if they aren’t perfectly round, place a large round cookie cutter or a glass over the cookie and gently swirl it in a circular motion to reshape the edges.
Common Mistakes to Avoid
I have failed so you don’t have to. Here is how to avoid disaster:
- Using Melted Butter: If you nuke your butter until it’s liquid, your cookies will spread into a giant greasy sheet. Patience, grasshopper. Let it soften naturally.
- Overmeasuring Flour: Do not dip your measuring cup into the bag of flour. You pack it down, and suddenly you have 20% more flour than you need. Use a spoon to fluff the flour, spoon it into the cup, and level it off with a knife.
- Ignoring the Cooling Rack: Let the cookies sit on the hot baking sheet for 5–10 minutes to set, then move them to a wire rack. If you move them too soon, they will break, and you will cry.
- Preheating Failure: Thinking you don’t need to preheat the oven—rookie mistake. If the oven isn’t hot enough instantly, the butter melts before the edges set. Result? Greasy puddles.
Alternatives & Substitutions
Want to switch things up? Here is what you can get away with:
- Vegetarian/Vegan? Swap the butter for a high-quality plant-based block butter (not tub margarine!) and use a flax egg. Lotus Biscoff spread and biscuits are accidentally vegan (IMO, the best accidental vegan snack ever).
- Chocolate Swap: Not a fan of white chocolate? You are wrong, but okay. You can use milk chocolate chips or even dark chocolate chunks. Dark chocolate makes it less sweet and more sophisticated.
- Nut Allergies: Good news! Biscoff is nut-free. Just make sure your chocolate chips are processed in a safe facility.
- Gluten-Free: You can sub the flour for a 1:1 Gluten-Free All-Purpose Baking Flour (like Bob’s Red Mill). It works surprisingly well, though the texture might be slightly grainier.
FAQ (Frequently Asked Questions)
1. Can I use smooth peanut butter instead of Biscoff spread? Technically, yes. But then it’s a peanut butter cookie, not a Lotus cookie. If you do this, don’t come crying to me when it tastes like a Reese’s cup instead of a European delight.
2. Why are my cookies flat? You probably didn’t chill the dough long enough, or your butter was too warm. Or maybe your baking soda is from 2012. Check your dates, people!
3. Can I freeze the dough? Absolutely! This is actually a power move. Roll the dough into balls, freeze them solid, then put them in a Ziploc bag. You can bake them straight from frozen; just add an extra minute or two to the baking time. Fresh cookies on demand? Yes, please.
4. How long do these last? In an airtight container, they stay fresh for about 4–5 days. But let’s be real, they aren’t going to last 4 days. If they do, I question your commitment to joy.
5. Can I use margarine instead of butter? Well, technically yes, but why hurt your soul like that? Margarine has a higher water content, which affects the texture. Butter adds flavor. Stick to butter.
6. Can I double the recipe? Yes, and you should.
7. Why add cornstarch? Cornstarch softens the proteins in the flour, ensuring a tender crumb. It’s the secret to that bakery-style texture that feels soft rather than cakey.
Final Thoughts
There you have it! You are now fully equipped to make the Lotus Cookie Recipe of your dreams. These cookies are warm, spicy, gooey, and honestly, a little bit dangerous because you cannot stop at one.
Whether you are baking these for a party, a bake sale, or just to eat alone in your sweatpants while binge-watching a series (my personal favorite), these cookies deliver.
Now go impress someone—or yourself—with your new culinary skills. You’ve earned it! And hey, if you make them, tag me… or don’t, and keep them all for yourself. I respect that energy.
Happy Baking! 🍪