Oreo Delight Recipe: The Easiest Dessert You’ll Ever Make!
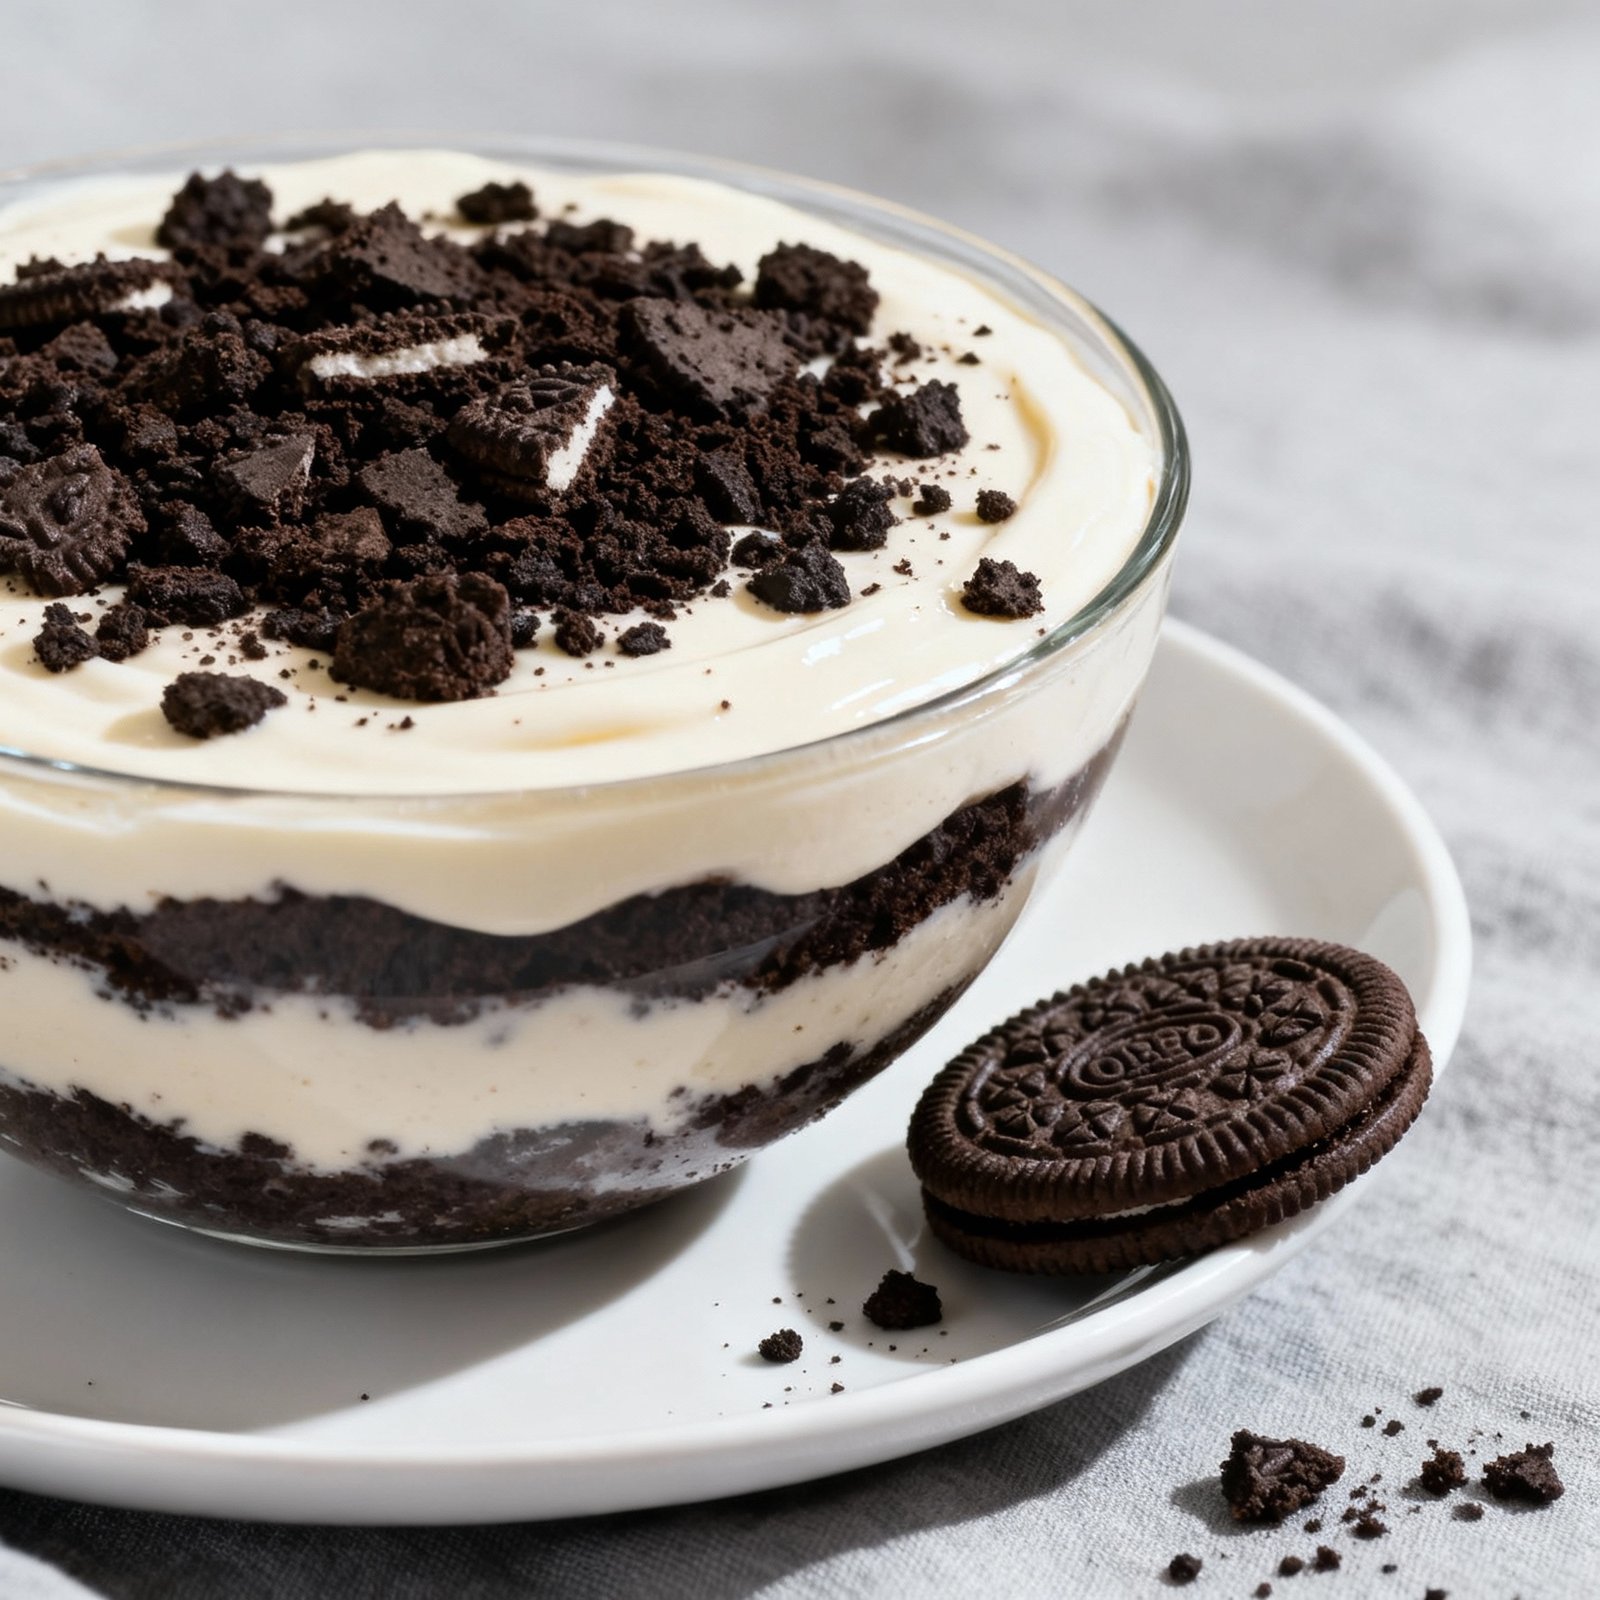
Looking for a dessert that’s incredibly easy to make, requires no baking, and is guaranteed to be a crowd-pleaser? Look no further than Oreo Delight! This layered dessert is a symphony of textures and flavors, combining the iconic crunch of Oreos with the creamy richness of cream cheese and whipped topping. It’s perfect for potlucks, family gatherings, or even just a weeknight treat when you’re craving something sweet. This recipe is so simple that even beginner bakers can master it, and the results are unbelievably delicious. Get ready to impress everyone with this Oreo Delight – they’ll think you spent hours in the kitchen!
Why This Recipe Works
Oreo Delight’s magic lies in its simplicity and the perfect balance of contrasting textures and flavors. Here’s why this recipe is a winner:
- Easy Assembly: No baking is required! The entire dessert is assembled in layers, making it incredibly quick and easy to put together.
- Classic Flavors: Oreos, cream cheese, and whipped topping are a match made in dessert heaven. The chocolatey crunch of the Oreos complements the tangy creaminess of the cream cheese and the light sweetness of the whipped topping.
- Customizable: This recipe is highly adaptable. You can easily substitute ingredients to suit your preferences or dietary needs. For example, use gluten-free Oreos or a sugar-free whipped topping.
- Make-Ahead Friendly: Oreo Delight is best made a few hours in advance, allowing the flavors to meld together and the Oreos to soften slightly. This makes it an ideal dessert for entertaining.
- Crowd-Pleasing: Everyone loves Oreos! This dessert is always a hit with both kids and adults.
Ingredients
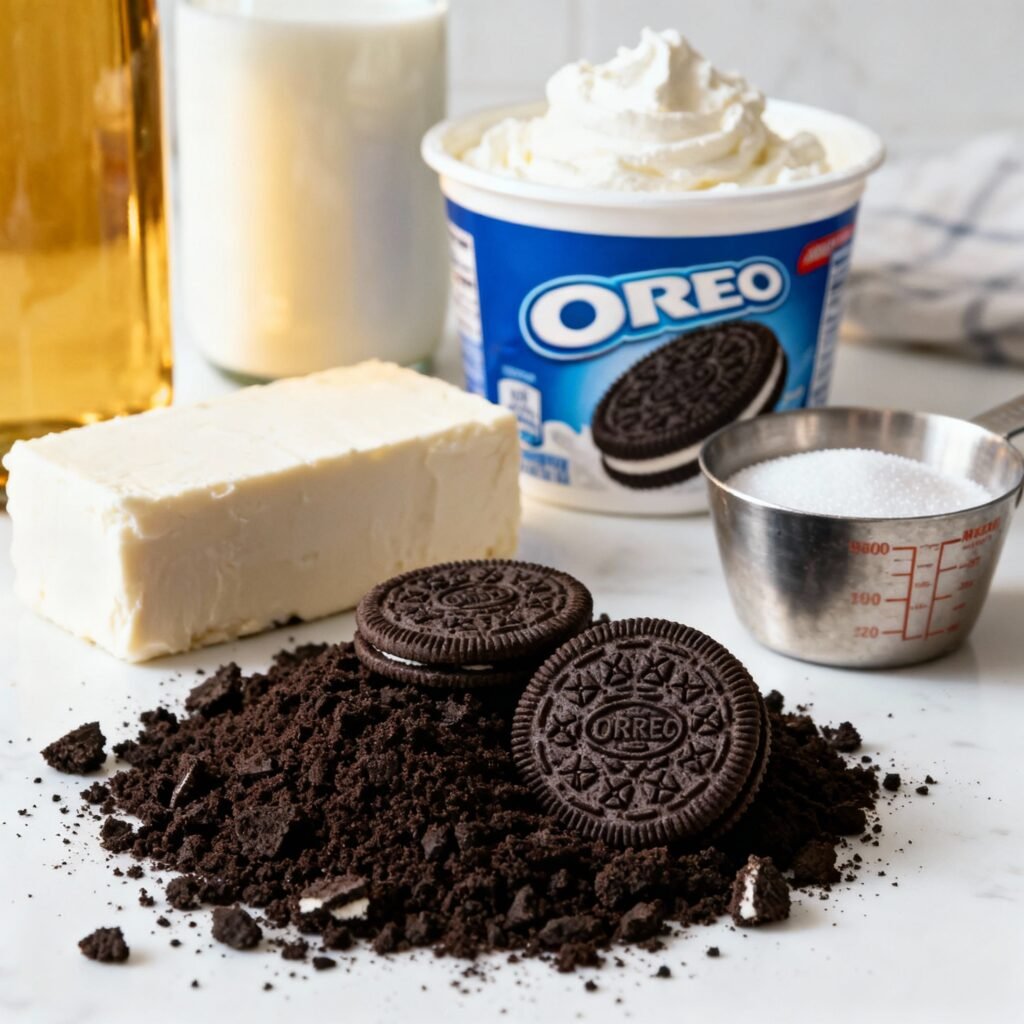
- 1 package (14.3 ounces) Oreo cookies, regular or Double Stuf
- 6 tablespoons butter, melted
- 8 ounces cream cheese, softened
- 1 cup powdered sugar
- 3 tablespoons milk
- 1 teaspoon vanilla extract
- 1 container (8 ounces) frozen whipped topping, thawed
- Optional: Additional crushed Oreos for garnish
Instructions
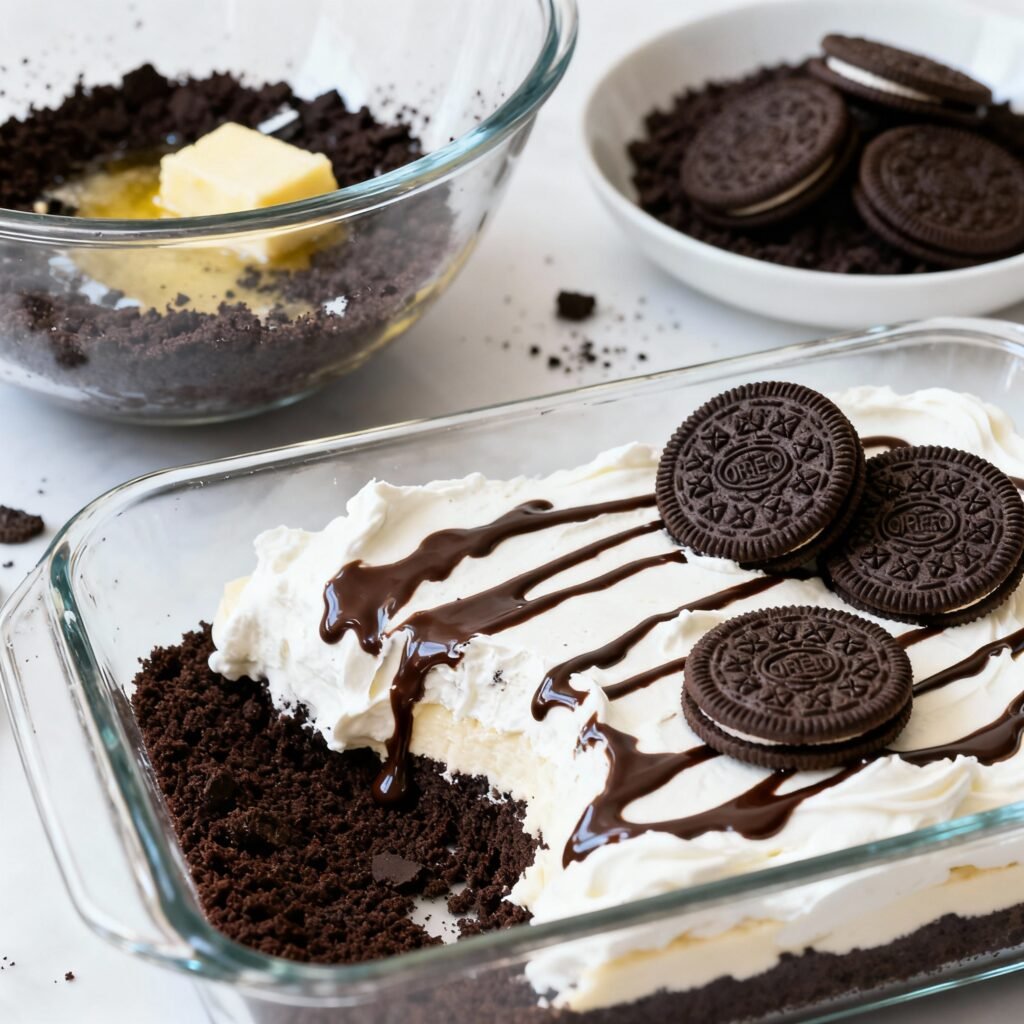
- Prepare the Oreo Crust: In a food processor, pulse the Oreo cookies until they are finely crushed. If you don’t have a food processor, you can place the cookies in a resealable bag and crush them with a rolling pin.
- Combine Crust Ingredients: In a medium bowl, combine the crushed Oreo cookies and melted butter. Mix well until the crumbs are evenly moistened.
- Press into Pan: Press the Oreo crumb mixture into the bottom of a 9×13 inch baking dish. Use the bottom of a measuring cup or your hands to firmly pack the crust.
- Prepare the Cream Cheese Layer: In a large bowl, beat the softened cream cheese with an electric mixer until smooth and creamy.
- Add Sweeteners and Flavorings: Gradually add the powdered sugar to the cream cheese, mixing until well combined.
- Incorporate Liquid: Add the milk and vanilla extract to the cream cheese mixture and beat until smooth and creamy.
- Spread Cream Cheese Layer: Spread the cream cheese mixture evenly over the Oreo crust.
- Add Whipped Topping: Gently spread the thawed whipped topping evenly over the cream cheese layer.
- Garnish (Optional): Sprinkle additional crushed Oreos over the whipped topping for garnish.
- Chill: Cover the baking dish with plastic wrap and refrigerate for at least 2 hours, or preferably overnight, to allow the flavors to meld.
- Serve: Cut into squares and serve chilled. Enjoy!
Tips for Success
Here are some tips to ensure your Oreo Delight turns out perfectly:
- Soften the Cream Cheese: Make sure your cream cheese is fully softened before mixing. This will prevent lumps and ensure a smooth and creamy texture. Take it out of the refrigerator at least 30 minutes before you plan to use it.
- Don’t Overmix: Avoid overmixing the cream cheese layer, as this can make it thin. Mix until just combined.
- Chill Thoroughly: Chilling the dessert for at least 2 hours is crucial. This allows the flavors to meld and the Oreos to soften slightly.
- Use a Good Quality Whipped Topping: Using a good quality whipped topping will result in a lighter and more flavorful dessert.
- Experiment with Flavors: Feel free to experiment with different Oreo flavors, such as mint, peanut butter, or golden Oreos. You can also add a layer of chocolate pudding or caramel sauce for extra indulgence.
- Presentation Matters: For a more elegant presentation, you can assemble the Oreo Delight in individual parfait glasses.
Storage Instructions
Oreo Delight should be stored in the refrigerator. Cover the baking dish tightly with plastic wrap or transfer the dessert to an airtight container. It will keep for up to 3-4 days in the refrigerator. Keep in mind that the Oreo crust may soften slightly over time.
FAQ
Here are some frequently asked questions about Oreo Delight:
- Can I use a different size baking dish? Yes, you can use an 8×8 inch baking dish for a thicker dessert. You may need to adjust the baking time slightly.
- Can I use a homemade whipped cream instead of store-bought whipped topping? Yes, you can use homemade whipped cream. However, it may not hold its shape as well as store-bought whipped topping.
- Can I freeze Oreo Delight? While technically you can freeze it, the texture of the whipped topping and cream cheese may change slightly. It’s best enjoyed fresh or within a few days of making it.
- Can I make this recipe gluten-free? Yes, you can use gluten-free Oreo cookies.
- Can I reduce the amount of sugar? You can reduce the amount of powdered sugar in the cream cheese layer to your liking. However, keep in mind that the sugar helps to stabilize the cream cheese.
Conclusion
Oreo Delight is a truly delightful dessert that’s perfect for any occasion. Its simplicity, delicious flavor, and customizable nature make it a guaranteed crowd-pleaser. Whether you’re a seasoned baker or a beginner in the kitchen, you can easily whip up this irresistible treat. So, gather your ingredients, follow these easy steps, and get ready to indulge in the ultimate Oreo experience! You’ll be amazed at how quickly this dessert disappears!