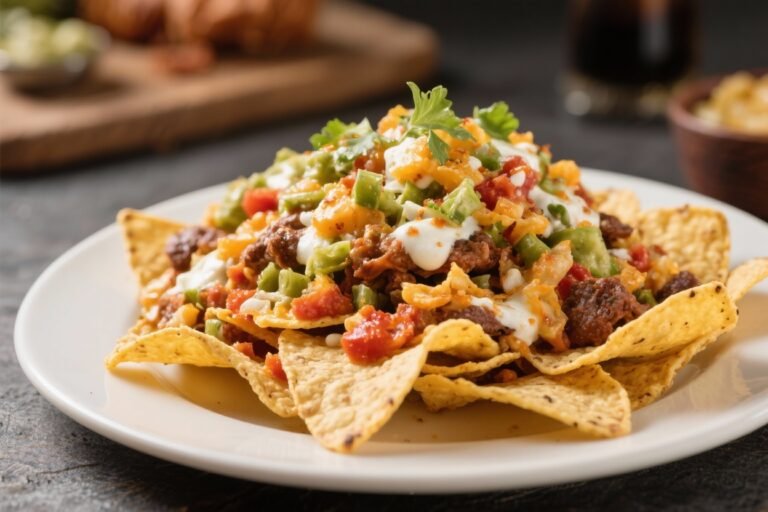
🤤 Ultimate Loaded Pork Nachos Recipe: The Best Game Day Snack!
Look, let’s just put it all out on the table. Sometimes—usually at 8:00 PM on a Tuesday when you’ve “had a day”—a sad little side salad or a sensible chicken breast just isn’t going to cut it. Your soul craves something crunchy, salty, cheesy, meaty, and perhaps a little bit irresponsible.
You need nachos.
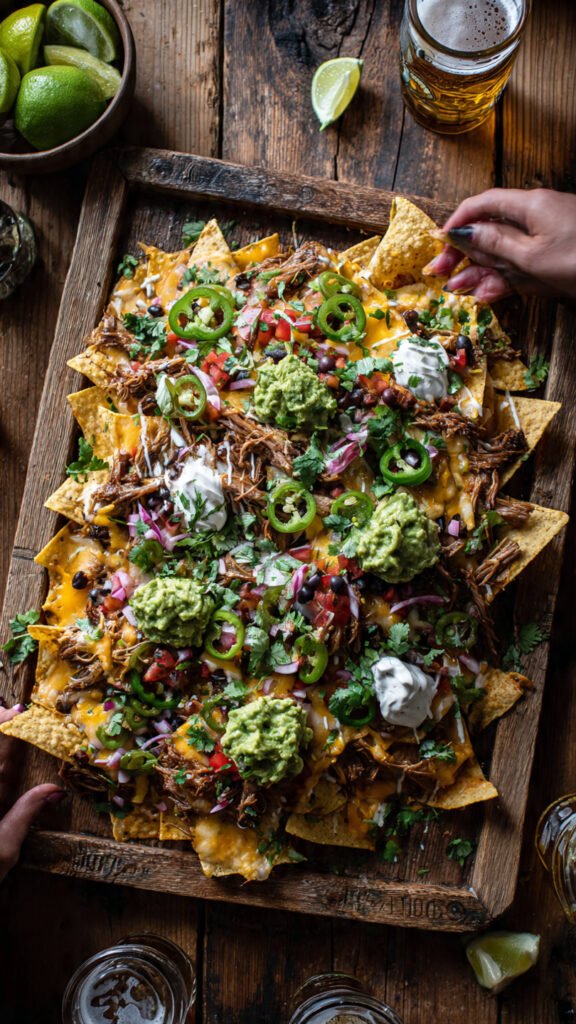
But we aren’t talking about those sad, soggy ballpark nachos with the neon orange “cheese” sauce that tastes suspiciously like melted plastic. No, my friend. We are talking about the undisputed king of the snack world: towering, glorious, fully loaded pork nachos.
This isn’t just a snack; it’s an event. It’s a meal that you eat with your hands, which automatically makes it 10x better than regular food. So grab a baking sheet and prepare to build a monument to flavor.

Why This Recipe is Awesome
Okay, besides the obvious fact that it involves melted cheese and tortilla chips, why is this specific pork nachos recipe the one you need in your life right now?
First off, it’s the ultimate redemption arc for leftovers. Did you make pulled pork sandwiches yesterday? Did you slow-cook a pork shoulder that’s currently sitting in the fridge judging you? This recipe is the single best way to use up leftover pork. The savory, slightly fatty richness of pork (especially pulled pork or carnitas) holds up infinitely better against strong cheese flavors than bland chicken ever could.
Secondly, we need to talk about structural integrity. A major issue with amateur nacho-making is the dreaded “Soggy Bottom Syndrome.” You know what I mean—you lift a chip, and the five chips underneath it turn into a limp, wet mess. It’s tragic.
This recipe uses a strategic two-stage layering technique and—crucially—a homemade cheese sauce instead of just piling shredded cheddar on top. Why? Because just melting shredded cheese on chips results in a greasy oil slick as the cheese separates in the heat. A proper cheese sauce (we’ll get to the science in a minute) stays creamy, gooey, and coats the chips without turning them into mush.
Finally, it’s aggressively customizable. Think of this recipe as a delicious blank canvas. Don’t like jalapeños? Yeet them into the sun. Want extra beans? Go for it. It’s hard to mess this up unless you actively try. It’s basically idiot-proof, and honestly, even I haven’t managed to ruin a batch yet.
Ingredients You’ll Need
We are building a mountain here, people. You need solid foundations. Don’t skimp on the good stuff.
The Foundation
- Restaurant-Style Tortilla Chips: Do not, I repeat, DO NOT use those thin, flimsy chips that shatter if you look at them wrong. You need thick, sturdy, “restaurant-style” corn chips that can handle the weight of the toppings without crumbling under pressure.
The Star of the Show
- Cooked Pork: About 3–4 cups. This is the main event. Leftover pulled pork butt, carnitas, or even diced leftover pork chops work amazingly well. If your pork is a bit dry from the fridge, toss it in a pan with a splash of BBQ sauce or broth to wake it up before assembling. The pork needs to be warm before it hits the chips.
The Liquid Gold (The Cheese Sauce)
- Butter & Flour: The dynamic duo that creates a roux. This is the science part that stops your cheese sauce from breaking into a grainy, oily mess.
- Whole Milk: Don’t use skim milk here; we want creaminess.
- Sharp Cheddar Cheese (Block Form!): This is critical. Pre-shredded cheese is coated in starches (like cellulose) to keep it from clumping in the bag. Guess what those starches do when melted? They prevent smooth melting and make your sauce gritty. Grate your own cheese. It takes two minutes. Trust me on this one.
- Pepper Jack Cheese (Block Form!): For that perfect creamy melt and a little kick of heat.
- Spices: A little cumin, garlic powder, and smoked paprika to make the cheese sauce taste like something other than just warm milk.
The Essential Accessories (Toppings)
- Black Beans or Pinto Beans: Rinsed and drained well. Nobody wants bean water on their nachos.
- Fresh Jalapeños: Thinly sliced fresh ones provide a bright crunch and heat that pickled ones just can’t match.
- Red Onion: Finely diced for a sharp bite that cuts through the rich cheese.
- Cilantro: Chop it up fresh. If you have that genetic thing where cilantro tastes like soap, I’m very sorry for your loss. Just skip it.
- Sour Cream & Guacamole/Avocado: The cool, creamy elements that balance the salty heat. These go on after baking.
Step-by-Step Instructions
Okay, chef. Let’s build this masterpiece.
Phase 1: Prep Work
1. Preheat your oven. Crank that bad boy to 400°F (200°C). We want a hot oven to melt things fast without cooking the chips for too long.
2. Shred the cheese. Grab your box grater and shred the cheddar and Pepper Jack. It’s an arm workout, so you can skip the gym today. You’re welcome.
3. Warm the pork. If your pork is cold from the fridge, give it a quick zap in a skillet with a tiny bit of moisture (BBQ sauce, broth, or even water) just until it’s steamy. Cold pork on nachos is a crime against humanity.
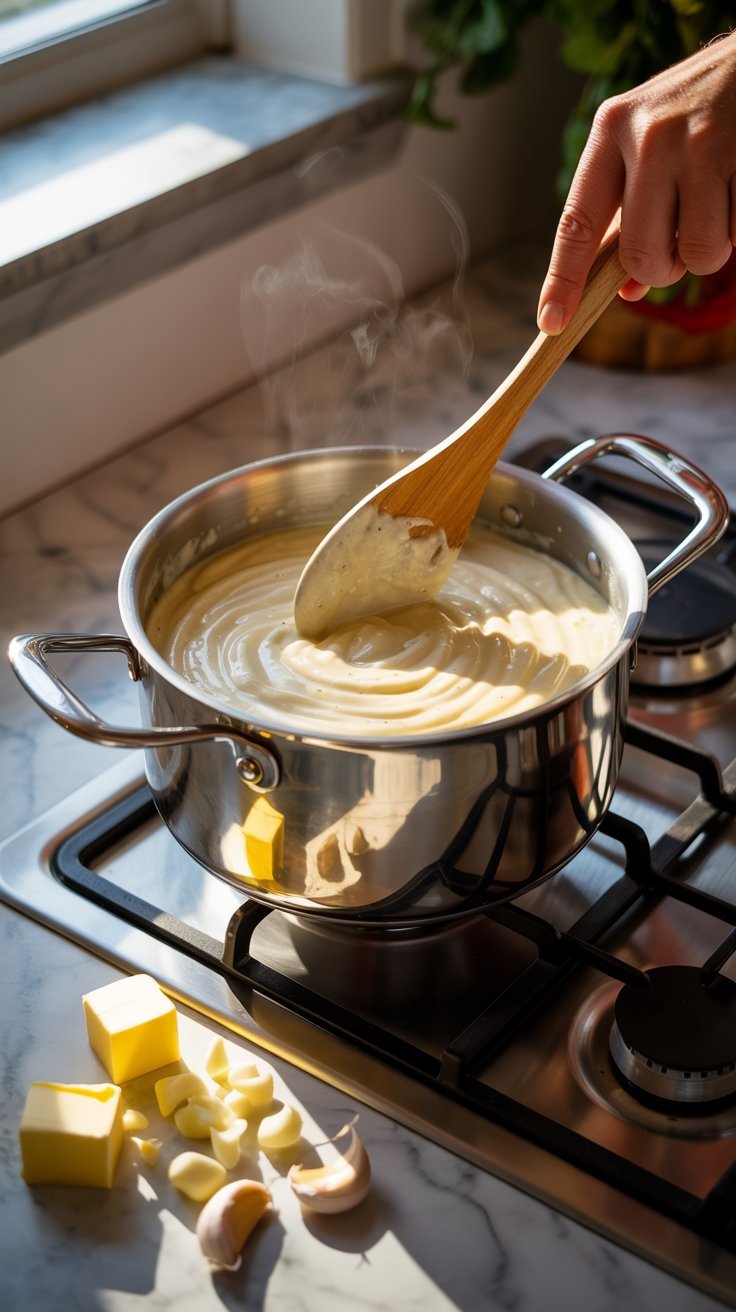
Phase 2: The Liquid Gold
4. Start the roux. In a medium saucepan over medium heat, melt the butter. Once it’s bubbling, whisk in the flour. Cook this mixture for about one minute. It will smell a bit nutty. This cooks out the raw flour taste.
5. Add the milk slowly. While whisking constantly (seriously, don’t stop whisking), slowly pour in the milk. It will thick up instantly at first, then smooth out. Keep whisking until it’s simmering and thickened enough to coat the back of a spoon—usually about 3–5 minutes.
6. The meltdown. Remove the saucepan from the heat. This is important! If it’s too hot, the cheese will seize up. Stir in your spices. Then, add your hand-shredded cheese a handful at a time, stirring until completely smooth before adding the next handful. Behold: glorious, glossy cheese sauce. Try not to eat it all with a spoon right now.
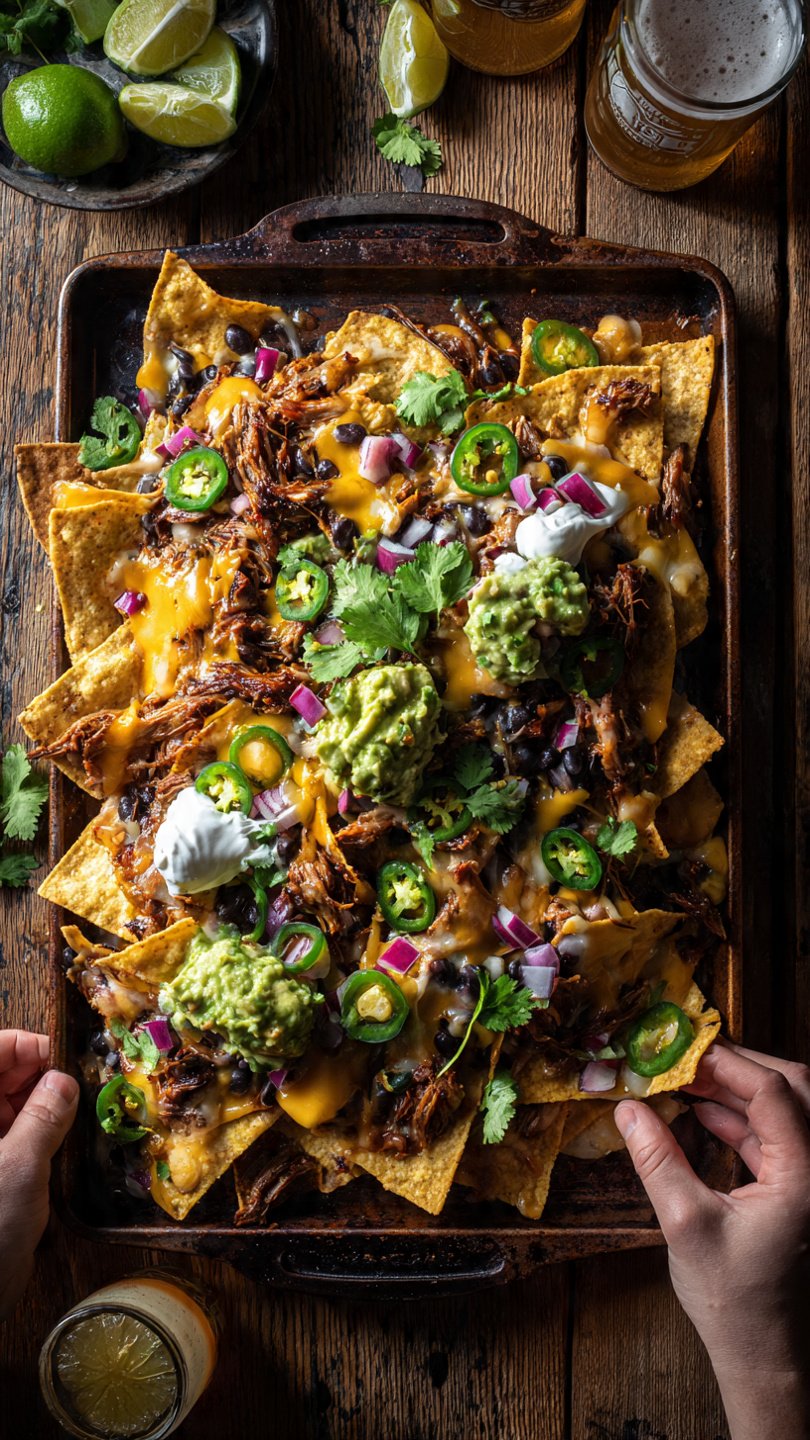
Phase 3: The Assembly & Bake
7. The first layer. On a large, rimmed baking sheet (line it with foil or parchment paper for easy cleanup—future you will thank you), spread out an even layer of those sturdy tortilla chips. Don’t overlap them too much yet.
8. Saucing the base. Drizzle about half of your cheese sauce over this bottom layer of chips. You want every chip to get a little love.
9. The second story. Add another layer of chips right on top of the sauced ones. We are building vertically now.
10. The payload. Top this second layer with the rest of the cheese sauce. Now, evenly distribute your warm pork over the top, followed by the black beans, diced red onion, and fresh jalapeño slices.
11. The bake. Pop the baking sheet into the oven for about 8–12 minutes. Since the pork and sauce are already warm, we’re really just looking for everything to get acquainted, the edges of the chips to get slightly toasty, and the smells to become intoxicating.
12. The finale. Pull it out of the oven. Immediately hit it with fresh cilantro, dollops of sour cream, and scoops of guacamole. Serve immediately straight from the baking sheet. Forks are optional; enthusiasm is mandatory.
Common Mistakes to Avoid
Listen, I want you to succeed. Avoid these rookie errors to ensure nacho nirvana.
- The Pre-Shredded Cheese Trap: I already mentioned this, but it bears repeating because it’s the #1 nacho killer. Pre-shredded cheese contains anti-caking agents that ruin the melt. Just grate the block cheese. It’s worth the extra 90 seconds of effort, I promise.
- Naked Chips: The tragedy of lifting a fully loaded chip only to discover a desert of dry, plain chips underneath. This is why we layer. Sauce layer one, sauce layer two. No chip left behind!
- Overloading the Center: It’s tempting to pile everything in the middle, but then the chips in the center get soggy while the outer chips remain naked. Spread the love (and the toppings) to the very edges of the baking sheet.
- Putting Cold Toppings in the Oven: Things like sour cream, guacamole, and fresh pico de gallo should never see the inside of an oven. They are “finishing” toppings. Hot guacamole is… unsettling.
Alternatives & Substitutions
This recipe is chill. It wants you to be happy. Feel free to swap things around.
- The Protein Switch-Up: Don’t do pork? No problem. Shredded rotisserie chicken tossed in taco seasoning is fantastic. Ground beef browned with cumin and chili powder works too. Heck, even chopped-up leftover brisket is incredible here.
- Vegetarian Vibes: Ditch the meat entirely. Double up on the black beans, maybe add some pinto beans or roasted corn for extra texture. It’s still hearty and delicious.
- Cheese Choices: Not a fan of Pepper Jack? Use Monterey Jack for the meltiness without the spice. Want it smokier? Sub half the cheddar for a smoked gouda. Just remember the golden rule: buy it in a block and shred it yourself.
- The Heat Level: If fresh jalapeños scare you, use pickled ones (pat them dry first!) for a milder, tangy heat. Or, if you’re a heat-seeker, toss on some serranos or drizzle the whole thing with your favorite hot sauce at the end.
FAQ (Frequently Asked Questions)
Can I use microwave nachos for this? Rubs temples. Look, technically, yes. You can. But you can also wear socks with sandals. Just because you can doesn’t mean you should. The microwave heats unevenly, making some chips rubbery and others blazing hot, and it doesn’t give you that essential toasted edge. Use the oven. It’s worth it.
Why did my cheese sauce get grainy? It usually means the heat was too high when you added the cheese, causing the fats to separate from the solids. Always pull the saucepan off the burner before stirring in the cheese, and add it slowly.
Can I make these ahead of time? Absolutely not. Nachos wait for no one. The second that cheese sauce hits the chip, a ticking clock begins. You have about 20 minutes before peak deliciousness turns into soggy sadness. Assemble and bake right before you intend to inhale them.
What’s the best way to reheat leftovers? Honestly? Leftover nachos are rarely good. But if you must, do not microwave them. Your best bet is an air fryer at 350°F for 3-5 minutes, or back in the oven until crisp. They won’t be as good as fresh, but they’ll be edible.
Is this recipe healthy? It has beans (fiber!) and avocado (good fats!). There’s also protein! So, you know… it’s practically a salad. FYI, I am not a doctor or a nutritionist. I’m just a person who loves cheese.
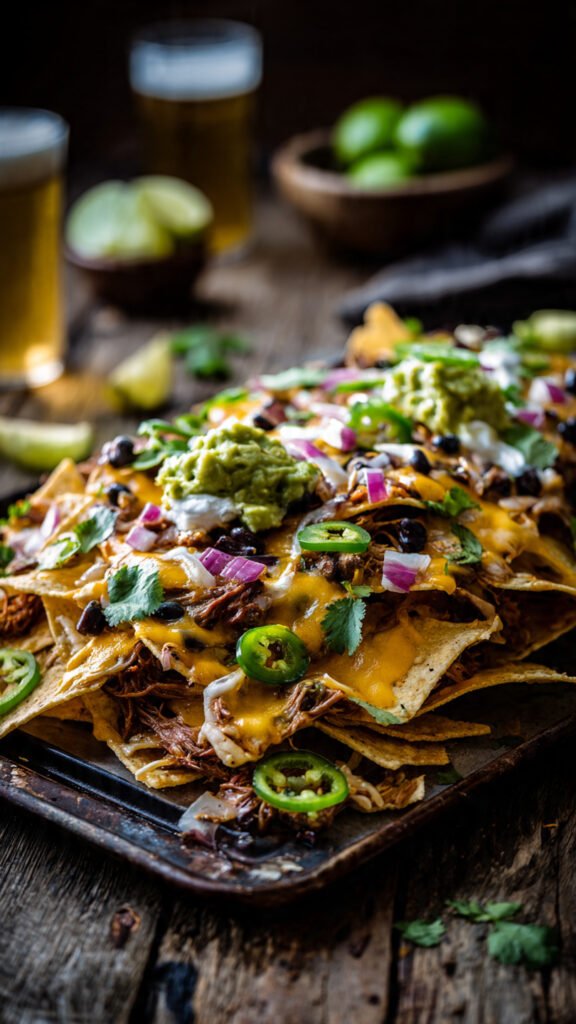
Final Thoughts
There you have it. The blueprint for the ultimate pork nachos experience. It’s cheesy, it’s meaty, it’s crunchy, and quite frankly, it’s beautiful.
Whether you’re making these for a game day party, a movie marathon, or just because it’s Tuesday and you deserve a win, this recipe delivers. Don’t be afraid to get messy—nachos are a contact sport. Now go forth, impress your friends (or just yourself), and conquer that snack mountain. You’ve earned it!