🍗 Best Southern Smothered Chicken Recipe
So, you’re craving something incredibly tasty but you’re currently functioning at about 15% energy and are too lazy to spend forever in the kitchen, right? Same.
We have all been there. You want the kind of meal that tastes like your grandmother made it (assuming your grandmother was a Southern culinary wizard), but you also want to remain in your sweatpants and not use every pot in the house. Enter the smothered chicken recipe.
If you aren’t familiar with the term “smothered,” let me educate you. In the culinary world—specifically the glorious world of Southern comfort food—to “smother” something is an act of love. It means taking a perfectly seared piece of meat and gently tucking it into a bed of savory, rich gravy, usually involving onions, and letting it braise until it surrenders. It is, quite literally, a warm hug in a skillet.
Today, we are going to make a version that is foolproof, packed with flavor, and guarantees you’ll be wiping the plate clean with a piece of bread. Let’s get cooking.
Why This Recipe is Awesome
Look, I don’t use the word “life-changing” lightly, mostly because I save that for finding twenty bucks in an old coat pocket. But this smothered chicken recipe is pretty close.
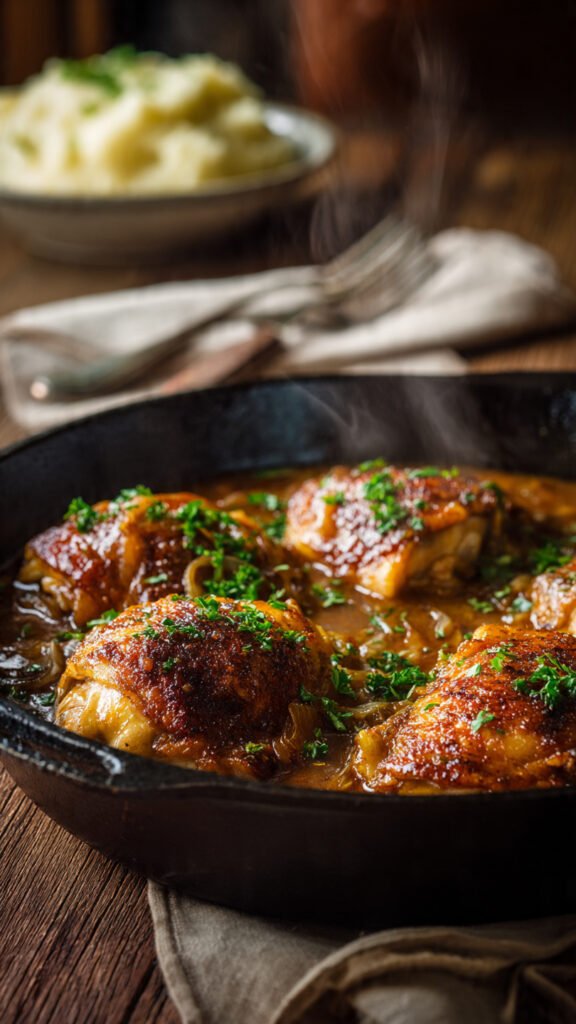
1. It’s a One-Pan Wonder I hate doing dishes. I assume you also hate doing dishes. If you enjoy doing dishes, please close this tab and go seek professional help. This entire recipe happens in one large skillet (preferably cast iron, but we aren’t snobs here). You sear the chicken, sauté the veggies, make the gravy, and finish the cooking all in the same vessel. This means all those delicious “brown bits” stuck to the bottom of the pan—fancy chefs call this fond—end up in your mouth, not down the drain.
2. The “Forgiveness” Factor Unlike baking a soufflé or searing a scallop, this recipe is incredibly forgiving. Because we are braising the chicken in liquid, it’s actually difficult to dry it out. If you leave it on the stove for an extra five minutes because you got distracted scrolling through TikTok, it’s fine. In fact, it might even be better.
3. The Gravy Science This isn’t just thickened water. We are building a velouté (that’s French for “velvety,” look at us being fancy). By combining the rendered chicken fat with flour and savory broth, we create a suspension that coats your tongue. The science here is simple but powerful: starch gelatinization. When the flour hits the hot fat and liquid, it swells up and creates a texture that is glossy, smooth, and sticks to the meat. It turns a simple Tuesday night dinner into a restaurant-quality experience.
4. It’s Cheap but Tastes Expensive We are using chicken thighs here. They are cheaper than breasts and infinitely tastier. Combined with onions, garlic, and broth, you are creating a flavor profile that tastes like you spent $50 on ingredients, when you really just raided the pantry.
Ingredients You’ll Need
Here is the lineup. Don’t panic, it’s mostly stuff you probably have. If you don’t, a quick run to the store is worth it.
- Chicken Thighs (Bone-in, Skin-on): This is non-negotiable for me. The bone keeps the meat juicy, and the skin renders out that liquid gold (fat) we need for the gravy. You need about 4–6 thighs.
- Salt & Black Pepper: To season the chicken like you mean it.
- Garlic Powder & Onion Powder: We are layering flavors here, folks.
- Paprika: Smoked paprika if you’re feeling fancy, sweet paprika if you’re a traditionalist. It adds color and a subtle kick.
- Butter (Unsalted): We need a little extra fat to make the roux. Plus, butter makes everything better.
- Onion (Yellow or White): Get a big one. Slice it into thin strips. We want them to melt into the sauce.
- Garlic: Fresh cloves, minced. None of that jarred stuff that tastes like citric acid and sadness. Use 3–4 cloves (or measure with your heart).
- All-Purpose Flour: The glue that holds our gravy masterpiece together.
- Chicken Broth/Stock: Low sodium is best so you can control the saltiness levels later.
- Heavy Cream (Optional): Just a splash at the end adds a richness that might make you weep with joy.
- Fresh Parsley: For garnish. Because we eat with our eyes first, and green things make it look “healthy.”
Step-by-Step Instructions
Alright, apron on. Let’s make magic happen.
1. Prep the Chicken (The Dry-Off) First, take your chicken thighs out of the package and pat them dry with paper towels. Do not skip this. If the chicken is wet, it will steam instead of sear. We want the skin to be bone-dry so it gets crispy and golden. Season the chicken generously on all sides with a mix of salt, pepper, garlic powder, onion powder, and paprika. Rub it in.
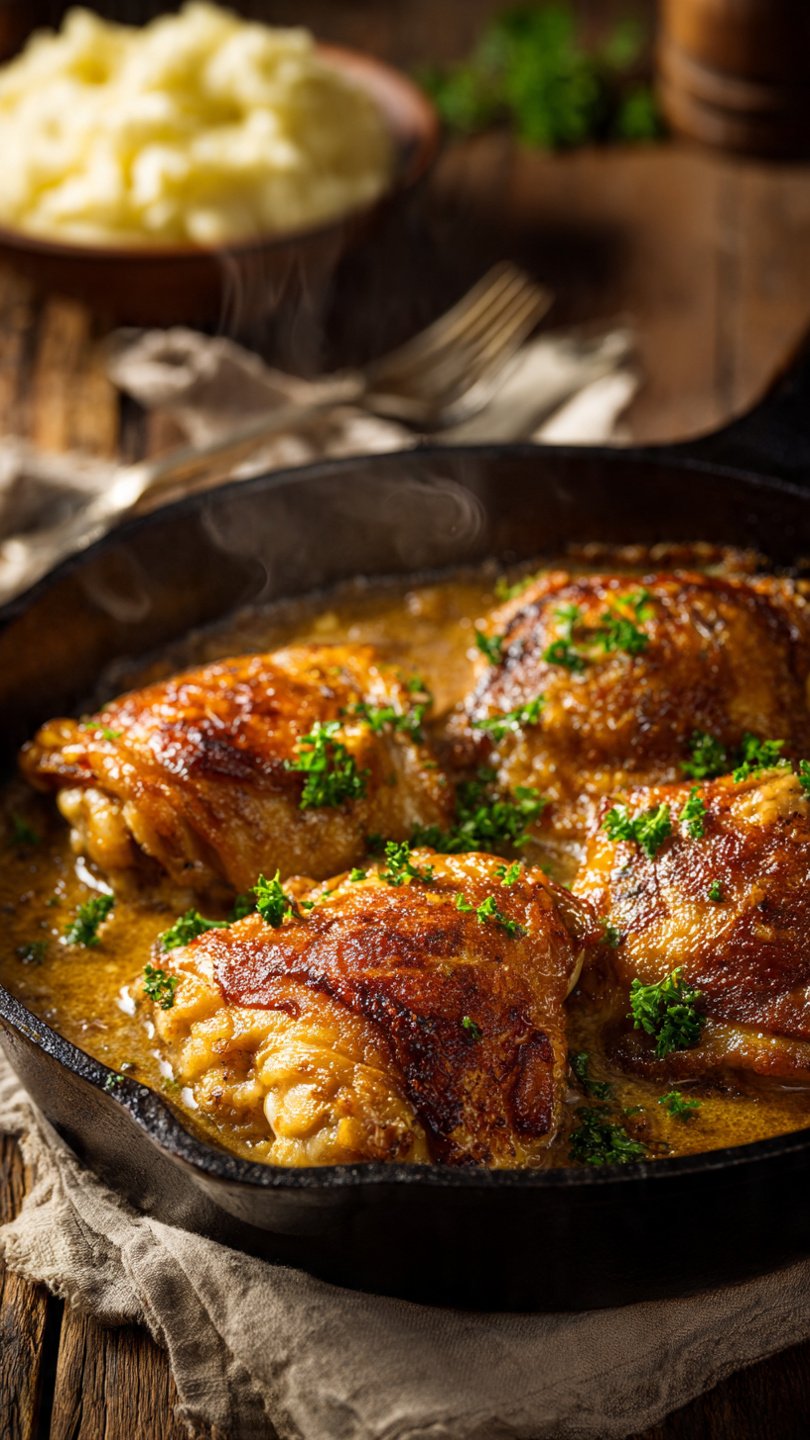
2. The Sear (Maillard Reaction Time) Heat your large skillet over medium-high heat with a splash of oil. Once the oil is shimmering (but not smoking), place the chicken thighs in, skin-side down.
- Listen: You should hear a loud sizzle. If it’s a quiet whisper, the pan isn’t hot enough. Take it out and wait.
- The Wait: Let it cook undisturbed for about 5–6 minutes. I know you want to peek. Don’t. We are looking for the Maillard reaction—a chemical reaction between amino acids and reducing sugars that gives browned food its distinctive flavor.
- Flip: Flip the chicken. The skin should be deep golden brown. Cook the other side for 4 minutes. Remove the chicken and set it on a plate. It won’t be fully cooked yet; that’s okay.
3. The Aromatics Look at the pan. There should be some rendered chicken fat in there. If it looks dry, add that knob of butter now. Toss in your sliced onions.
- Sauté the onions for about 5–8 minutes until they are soft and starting to brown. Scrape the bottom of the pan with your wooden spoon while you do this to lift up those crispy chicken bits (the fond).
- Add the minced garlic and cook for just 1 minute until fragrant. If you burn the garlic, it gets bitter, and we will have to start over. Don’t do that to yourself.
4. The Roux (Thickening Power) Sprinkle the flour directly over the onions and garlic. Stir it constantly for about 2 minutes. We need to “cook out” the raw flour taste. The mixture will look pasty and messy. This is good. It should smell slightly nutty, like a pie crust baking.
5. The Liquid Gold Slowly pour in the chicken broth while stirring constantly. Key Tip: Pour slowly to avoid lumps. As the liquid hits the hot flour paste, it will bubble and thicken. Keep stirring until it creates a smooth, consistent gravy. Bring it to a gentle simmer.
- Optional: If you want it creamy, stir in that splash of heavy cream now. Taste the gravy. Does it need more salt? Pepper? A dash of cayenne for heat? You’re the boss.
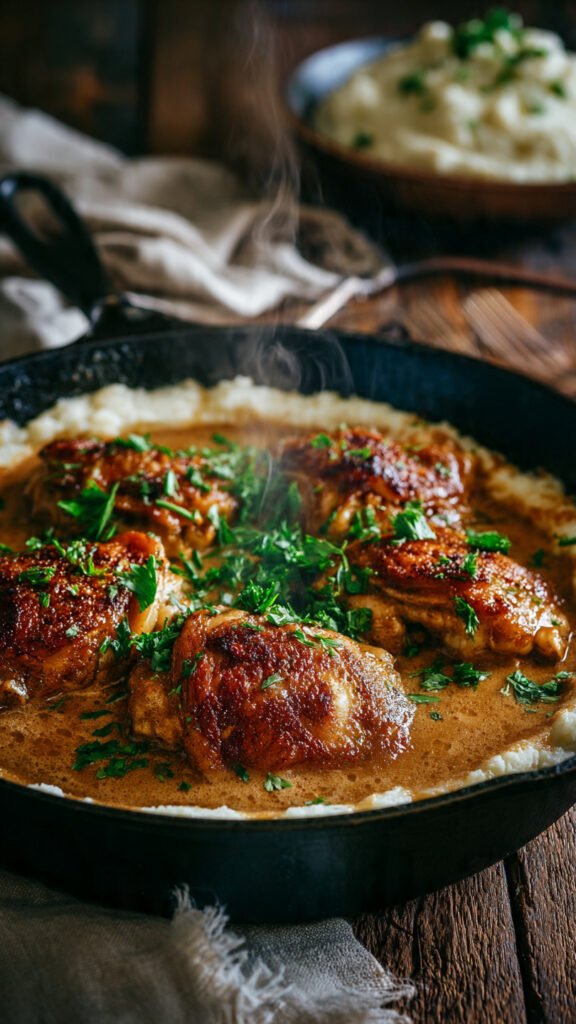
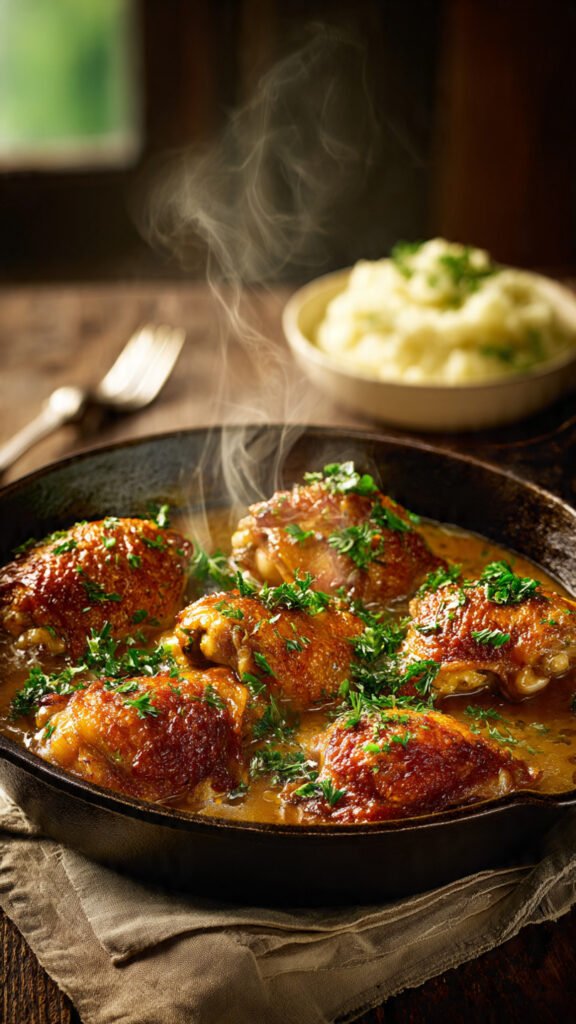
6. The Reunion Nestle the chicken thighs back into the pan, skin-side up. Make sure they are nice and cozy in the gravy, but try to keep the crispy skin above the liquid line so it stays somewhat crisp.
- Turn the heat down to low. Cover the pan (or use foil) and let it simmer for about 20–25 minutes. The chicken is done when it hits an internal temp of 165°F (75°C), but for thighs, I like to take them to 175°F—they get even more tender.
7. The Finish Remove the lid. If the gravy looks too thin, let it bubble uncovered for a few minutes to reduce. If it’s too thick (like pudding), add a splash of water or broth. Sprinkle with fresh parsley. Serve immediately.
Common Mistakes to Avoid
Even though this is an “easy” recipe, there are a few ways to derail the train.
- Crowding the Pan: When searing the chicken, give the thighs personal space. If they are touching, they trap moisture and steam. Steamed chicken skin is flabby and sad. We want crispy and proud.
- Using Cold Broth: FYI, adding ice-cold broth to a hot roux can sometimes cause the flour to seize up into clumps. Try to use room temperature broth if you remember. If not, just whisk like your life depends on it.
- Thinking “Boneless Skinless” is Better: Listen to me. In this specific recipe, boneless skinless breasts will dry out. They lack the fat content to stand up to the searing and braising. If you must use them, reduce the cooking time significantly. But really… just buy the thighs.
- Not Tasting as You Go: You need to taste the gravy before you put the chicken back in. Once the raw chicken is back in, you can’t taste it until it’s fully cooked. Adjust your salt levels while it’s just sauce!
Alternatives & Substitutions
Cooking is jazz, baby. Improvisation is welcome.
- ** Mushroom Lovers:** If you are a fan of fungi, slice up some Cremini or baby bella mushrooms and sauté them right along with the onions. They add a deep, earthy umami flavor that works perfectly with the gravy.
- The Bacon Upgrade: Want to make this sinful? Fry 3–4 strips of bacon in the pan before the chicken. Remove the bacon, crumble it, and use the bacon grease to sear the chicken. Sprinkle the crumbled bacon on top at the end. I mean… come on.
- Dairy-Free Friend: Skip the butter and use olive oil or more chicken fat. Skip the cream. The gravy will still be thick and delicious because of the flour and collagen from the chicken.
- Gluten-Free: Swap the all-purpose flour for a high-quality 1:1 Gluten-Free flour blend. Cornstarch also works as a thickener, but mix it with cold water first (making a slurry) and add it to the boiling liquid—don’t add dry cornstarch to hot oil!
FAQ (Frequently Asked Questions)
1. Can I make this ahead of time? You sure can. In fact, like a good stew, the flavors often get better the next day. Just reheat it gently on the stove. If the gravy has turned into Jell-O in the fridge (that’s the gelatin at work!), just add a splash of water to loosen it up as it heats.
2. Can I use water instead of chicken broth? Technically, yes. But why would you? Water has zero flavor. Broth brings the savory goodness. If you use water, you’ll need to overcompensate heavily with bouillon cubes or spices. Just stick to the broth.
3. What do I serve this with? This is a gravy-heavy dish, so you need a “vehicle” for the sauce. Mashed potatoes are the undisputed champion here. White rice is a close second. Egg noodles work great, too. If you are doing low-carb (I’m sorry), mashed cauliflower is a decent substitute.
4. My gravy is lumpy. Did I ruin it? Deep breaths. No. If you have lumps, you can usually whisk them out with vigorous stirring. If they are stubborn, strain the gravy through a sieve before adding the chicken back in. No one has to know.
5. Is this spicy? Only if you want it to be. The base recipe is savory, not spicy. If you want heat, add cayenne pepper or some crushed red pepper flakes during the onion sauté step.
6. Can I do this in the oven? Absolutely. After you add the broth and return the chicken to the pan (Step 6), you can transfer the whole oven-safe skillet into a 375°F oven for 25-30 minutes. This actually helps cook the chicken very evenly.
Final Thoughts
There you have it. A smothered chicken recipe that delivers maximum flavor with minimal emotional distress. It’s savory, tender, and the kind of meal that makes your house smell like a professional kitchen.
Don’t overthink it. Cooking should be fun, messy, and delicious. Even if your onions get a little too dark or your gravy is a little too thick, it’s still going to taste amazing because you made it. Now, go impress someone—or just impress yourself—with your new culinary skills. You’ve earned it!