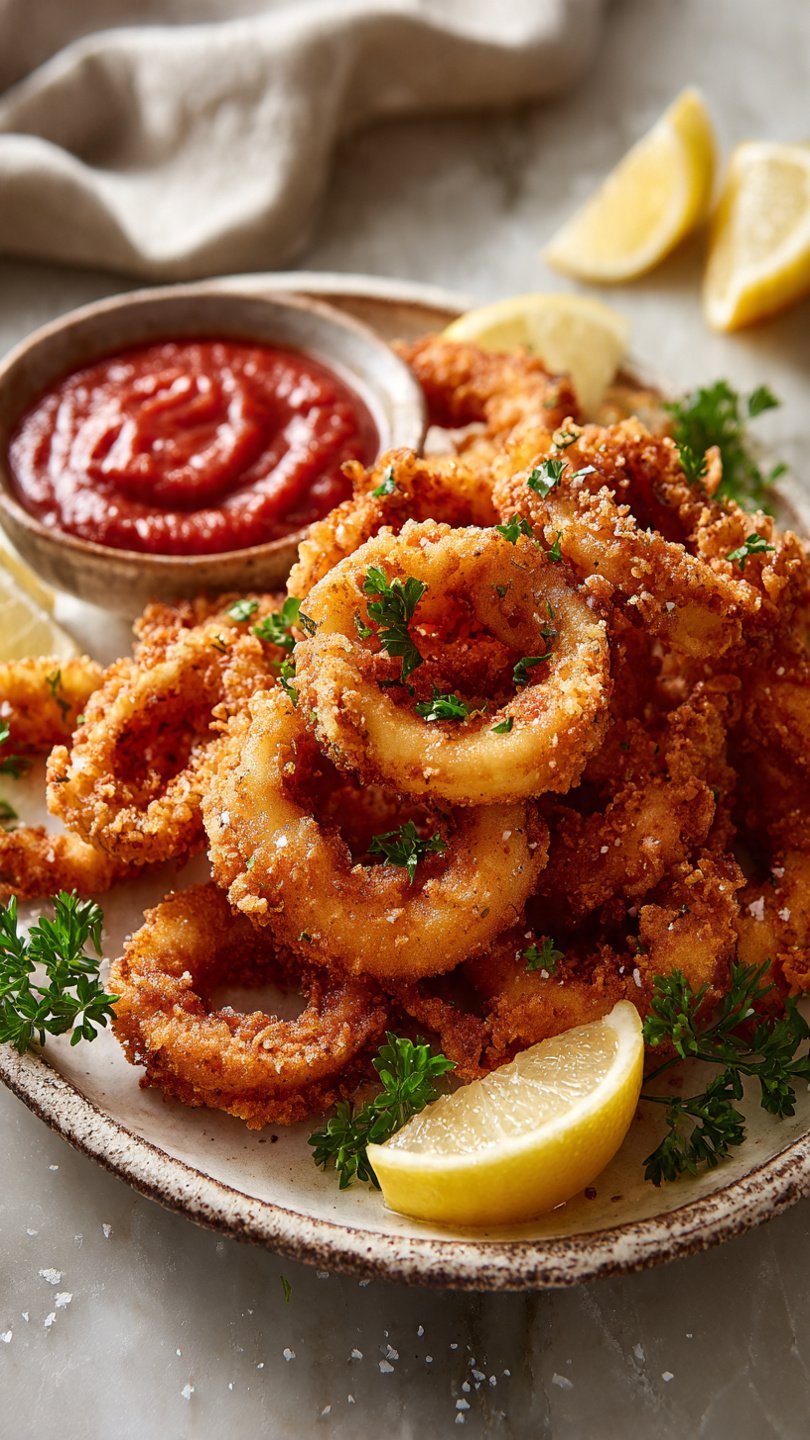
🦑 Crispy Squid Rings Recipe: Better Than Takeout!
So you’re craving something tasty but too lazy to spend forever in the kitchen, huh? Same. We’ve all been there: staring into the fridge, hoping a gourmet meal will magically materialize, only to end up eating cereal for dinner again. But today, we are aiming higher. Today, we are tackling the crispy, golden, addictive glory that is the squid rings recipe.
Wait! Don’t run away just because I said “squid.” I know, cooking seafood can feel intimidating—like trying to assemble IKEA furniture without instructions. You’re worried it’ll turn out rubbery, or the breading will fall off, or you’ll burn the house down. Relax. I’ve got you.
This recipe is basically the culinary equivalent of a cheat code. It looks fancy, tastes expensive, but is actually incredibly simple to pull off. Whether you call it calamari or just “those crunchy hoop things,” we are about to make magic happen. Grab your apron (or don’t, I’m not your boss), and let’s get frying.
Why This Recipe is Awesome
Okay, I could just say “because it tastes good” and move on, but we need to really appreciate the majesty of this dish. There are a million reasons why this squid rings recipe deserves a permanent spot in your rotation, but let’s break down the big ones.
1. It’s Cheaper Than Therapy (and Restaurants) Have you seen the price of calamari appetizers lately? You get like six sad little rings on a bed of wilting lettuce for the price of a small car. Making this at home is a fraction of the cost. You can buy a pound of frozen squid tubes for cheap, and you probably already have the flour and oil. It’s budget-friendly luxury.
2. The “I Can’t Believe I Made This” Factor There is something deeply satisfying about frying food at home. When you pull those golden rings out of the oil, you feel like a professional chef. It’s an instant ego boost. Plus, if you serve this to friends, they will be impressed. You don’t even have to tell them it only took 20 minutes. Let them think you slaved away.
3. The Perfect Texture Ratio This recipe uses a specific blend of flour and cornstarch (more on that science-y stuff later). This creates a coating that is shattering-crisp on the outside but protects the squid so it stays tender and sweet on the inside. We aren’t doing that thick, heavy batter that feels like eating a doughnut; we are doing a light, seasoned dusting that lets the seafood shine.
4. It’s Actually Fast Food Squid cooks fast. Like, blink-and-you-miss-it fast. Once your oil is hot, the actual cooking time is under 3 minutes per batch. This makes it perfect for a quick appetizer, a light dinner, or a midnight snack when you’ve had a few drinks and need something fried immediately.
5. It’s Idiot-Proof (Mostly) I’ve messed up a lot of recipes in my time. I’ve burned water. But this? It’s forgiving. As long as you don’t fall asleep while the squid is in the oil, you’re going to be fine. We use a method that ensures the coating sticks, so you won’t end up with naked squid and floating breadcrumbs.
Ingredients You’ll Need
Here is your shopping list. It’s short, sweet, and mostly pantry staples.
- Squid Tubes (1 lb): You can buy these fresh or frozen. If frozen, thaw them in the fridge overnight. You can buy pre-sliced rings if you’re feeling extra lazy (no judgment), but whole tubes are usually cheaper.
- All-Purpose Flour (1 cup): The base of our crunch.
- Cornstarch (1/2 cup): This is the secret weapon. Cornstarch inhibits gluten formation and absorbs moisture, making the crust extra crispy and light rather than heavy and bready.
- Baking Powder (1/2 tsp): Just a pinch helps the coating puff up slightly, creating tiny air pockets of crunch.
- Salt & Black Pepper: Generous amounts. Bland calamari is a crime.
- Smoked Paprika (1 tsp): For a little smoky depth and a nice golden color.
- Garlic Powder (1 tsp): Because garlic makes everything better.
- Cayenne Pepper (Optional): If you want a little kick to wake up your tastebuds.
- Milk (1 cup): For soaking the squid. It helps tenderize the meat and neutralize any “fishy” odor.
- Lemon Wedges: Mandatory for serving. The acid cuts through the fried richness.
- Oil for Frying: Vegetable, Canola, or Peanut oil. You need something with a high smoke point. Do not use olive oil unless you want your kitchen to smoke like a 1980s bingo hall.
Step-by-Step Instructions
Alright, let’s do this. Follow these steps, and you’ll be snacking in no time.
1. Prep the Squid (The Gross Part) If you bought whole tubes, rinse them under cold water. Check the inside for that clear, plastic-looking quill (it’s the squid’s backbone) and pull it out.
- Pro Tip: Peel off the purple-ish skin on the outside of the tube. It’s edible, but removing it makes the squid much more tender and prevents the rings from shrinking weirdly.
- Slice the tubes into rings about 1/2 inch thick. If they are too thin, they overcook; too thick, and they’re chewy.
2. The Milk Bath Toss your squid rings into a bowl and cover them with the milk. Let them chill there for about 10–15 minutes while you prep the rest. The lactic acid in the milk helps tenderize the fibers. It’s like a spa day for your seafood.
3. Mix the Dry Stuff In a large bowl (or a large Ziploc bag, if you hate doing dishes), combine the flour, cornstarch, baking powder, salt, pepper, paprika, garlic powder, and cayenne. Whisk it well so you don’t get a clump of pure baking powder in one bite. Yuck.
4. Heat the Oil Pour about 2–3 inches of oil into a heavy-bottomed pot or Dutch oven. You want the oil to reach 350°F to 375°F (175°C–190°C).
- No thermometer? No problem. Stick the handle of a wooden spoon into the oil. If little bubbles form around the wood immediately and float up, you’re good to go. If it bubbles violently, it’s too hot. If nothing happens, wait longer.
5. The Shake and Dredge Take a handful of squid rings out of the milk. Do not dry them off completely, but let the excess drip away. Drop them into your flour mixture.
- Toss them around until they are completely coated. Press the flour into them a bit.
- Crucial Step: Shake off the excess flour before frying! You want a coating, not a thick blanket. A wire mesh strainer works great for shaking off the extra powder.
6. Fry Baby, Fry Carefully lower the squid into the hot oil. Do this in batches—maybe 8 to 10 rings at a time.
- Don’t overcrowd the pan! If you throw too many in at once, the oil temperature will plummet, and your squid will absorb the oil and get greasy and soggy. We want fried, not oily sponge.
- Fry for about 2 to 3 minutes. That’s it. They should be golden brown and floating.
- Sensory Check: Listen to the sound. At first, it will be a loud, violent hiss (moisture leaving). When the bubbles slow down and the sound becomes a lower, rhythmic sizzle, they are done.
7. Drain and Season Fish them out with a slotted spoon and place them on a wire rack.
- Avoid paper towels if you can. Putting fried food on paper towels can steam the bottom, making it soggy. A wire rack keeps air circulating for maximum crunch.
- Hit them with a little extra pinch of salt immediately while they are hot and oily.
8. Serve Immediately Squid waits for no one. Squeeze that fresh lemon over the top and dive in.
Common Mistakes to Avoid
Even though this recipe is easy, there are a few traps you can fall into. Let’s avoid these rookie errors.
- Overcooking the Squid: This is the big one. If you cook squid for 2 minutes, it’s tender. If you cook it for 5 minutes, you are eating a tire. If you accidentally overcook it, you have to brave it out and cook it for like 40 minutes to make it tender again (braising). Ain’t nobody got time for that. Keep it quick!
- Oil Too Cold: If your oil isn’t hot enough, the breading will soak up grease before it cooks. You’ll end up with heavy, sad, beige rings. Patience is a virtue—wait for the heat.
- Not Drying the Squid (Pre-Milk): If the squid is soaking wet with water before it hits the milk or flour, the coating might slide right off. You want the surface to be tacky, not slippery.
- Forgetting the Salt: Fried food loves salt. If you taste it and it feels like “something is missing,” it’s salt. It’s always salt.
- Microwaving Leftovers: Just don’t. Microwaved calamari becomes a rubbery, soggy mess that smells weird. Use an air fryer or oven to reheat (see the FAQ below).
Alternatives & Substitutions
Kitchen empty? dietary restriction? I got you.
- Gluten-Free: Swap the All-Purpose flour for a 1:1 Gluten-Free flour blend or use rice flour. Rice flour actually makes things insanely crispy (it’s what is used in tempura), so this is barely even a compromise.
- No Squid? You can use this exact same breading and method for shrimp, onion rings, or even zucchini slices. It’s a universal “make things crunchy” mix.
- Spicy Version: Add red pepper flakes or increase the cayenne in the flour mix. Serve with a spicy chili mayo instead of marinara.
- Air Fryer Method: Okay, I know you’re going to ask. Can you air fry this? Technically, yes. Spray the breaded rings generously with oil spray and air fry at 400°F for 8–10 minutes, flipping halfway.
- My Honest Opinion (IMO): It won’t be as good as deep frying. It just won’t. The color will be uneven and the crunch is a bit drier. But it saves calories, so pick your battles.
FAQ (Frequently Asked Questions)
1. Can I use frozen squid rings? Absolutely. In fact, frozen squid is often “fresher” than the stuff at the seafood counter because it was flash-frozen on the boat. Just make sure you thaw it completely and pat it dry before starting.
2. Why did my breading fall off? Usually, this happens because the squid was too wet, or the oil wasn’t hot enough. The coating needs to “shock” onto the squid the second it hits the oil. Also, don’t touch it for the first 30 seconds of frying! Let the crust set.
3. What sauce goes best with this? Classics are classic for a reason: Marinara sauce or Tartar sauce. But if you want to be fancy, try a garlic aioli or a sweet chili sauce.
4. Can I prep this in advance? You can clean and cut the squid in advance, but don’t bread it until you are ready to fry. If the flour sits on the wet squid for too long, it turns into a gooey paste.
5. Is squid healthy? Squid itself is actually high in protein and low in fat. Once we dredge it in flour and deep fry it… well, it’s not a salad. But it’s good for the soul, and that counts for something, right?
6. My kitchen smells like fried fish. Help? Boil a small pot of water with vinegar and a cinnamon stick while you eat. It neutralizes the odor. Or just open a window and embrace the seaside vibes.
Final Thoughts
And there you have it! You have successfully conquered the squid rings recipe. You are now the master of the deep fryer, the captain of the calamari, the… okay, I’ll stop.
But seriously, making restaurant-quality food at home is a flex. Whether you are making this for a date night, a game day snack, or just because it’s Tuesday and you deserve something crunchy, I hope you enjoy every bite.
Now go impress someone—or yourself—with your new culinary skills. You’ve earned it!